
Welcome to our blog about restoring and updating our 1977 Toyota Chinook Pop Top Camper. The build is far from done, so we’ll be updating this on a regular basis.
Follow on Instagram: @77chinook
CONTENTS
- Overview
- Engine
- Engine Dress up
- Exhaust
- Engine Upgrade
- Carburetor
- Transmission
- Wheels
- Tires
- Suspension/Steering/Brakes
- Exterior
- Cab Interior
- Camper Interior
- Heat
- Propane
- Water
- Manuals
- Misc
Overview
Some of the basic specs about the Chinook when we first bought it. Aside from being over 40+ years old, it was almost 100% original include the orange shag carpets.
1977 Toyota Chinook
20R – SOHC 4 cyl
97 hp / 119 lb⋅ft @ 2,800 rpm
4 speed L43 Transmission
Engine
If the plan was to always keep the 20R I would have pulled this engine and refreshed it a little more than I did but in the end I just did what I felt was the bare minimum to get it back on the road. I have plans to swap in a 22R, or go with something like a 22RE, or…?
– New Carburetor (Weber 32/36) w/ elec choke
-Removed old emissions equipment (vacuum lines, pump, etc)
-New 4-1 Pacesetter Header
-New Spark Plugs Denso W16ERXU
-Newer Spark Plug wires from the 22R I have
-New Fuel Lines (Engine to the Fuel Tank)
-New Fuel Filter – [Local Auto Parts, Rock Auto]
-New Fuel Pump – [Rock Auto]
-New PCV Valve – [Rock Auto]
-New Radiator Hoses – [Rock Auto]
-New Radiator Cap – [Rock Auto]
-New Exhaust Manifold Studs – [LC Performance]
-New Waterpump & Gaskets – [LC Performance] *pre early 77 use Rock Auto
-New Front Main Seal – [Rock Auto]
-New Valve Cover Gasket Set – [LC Performance]
-New Drive Belt – [Local Auto Parts, Rock Auto]
Engine Dress Up
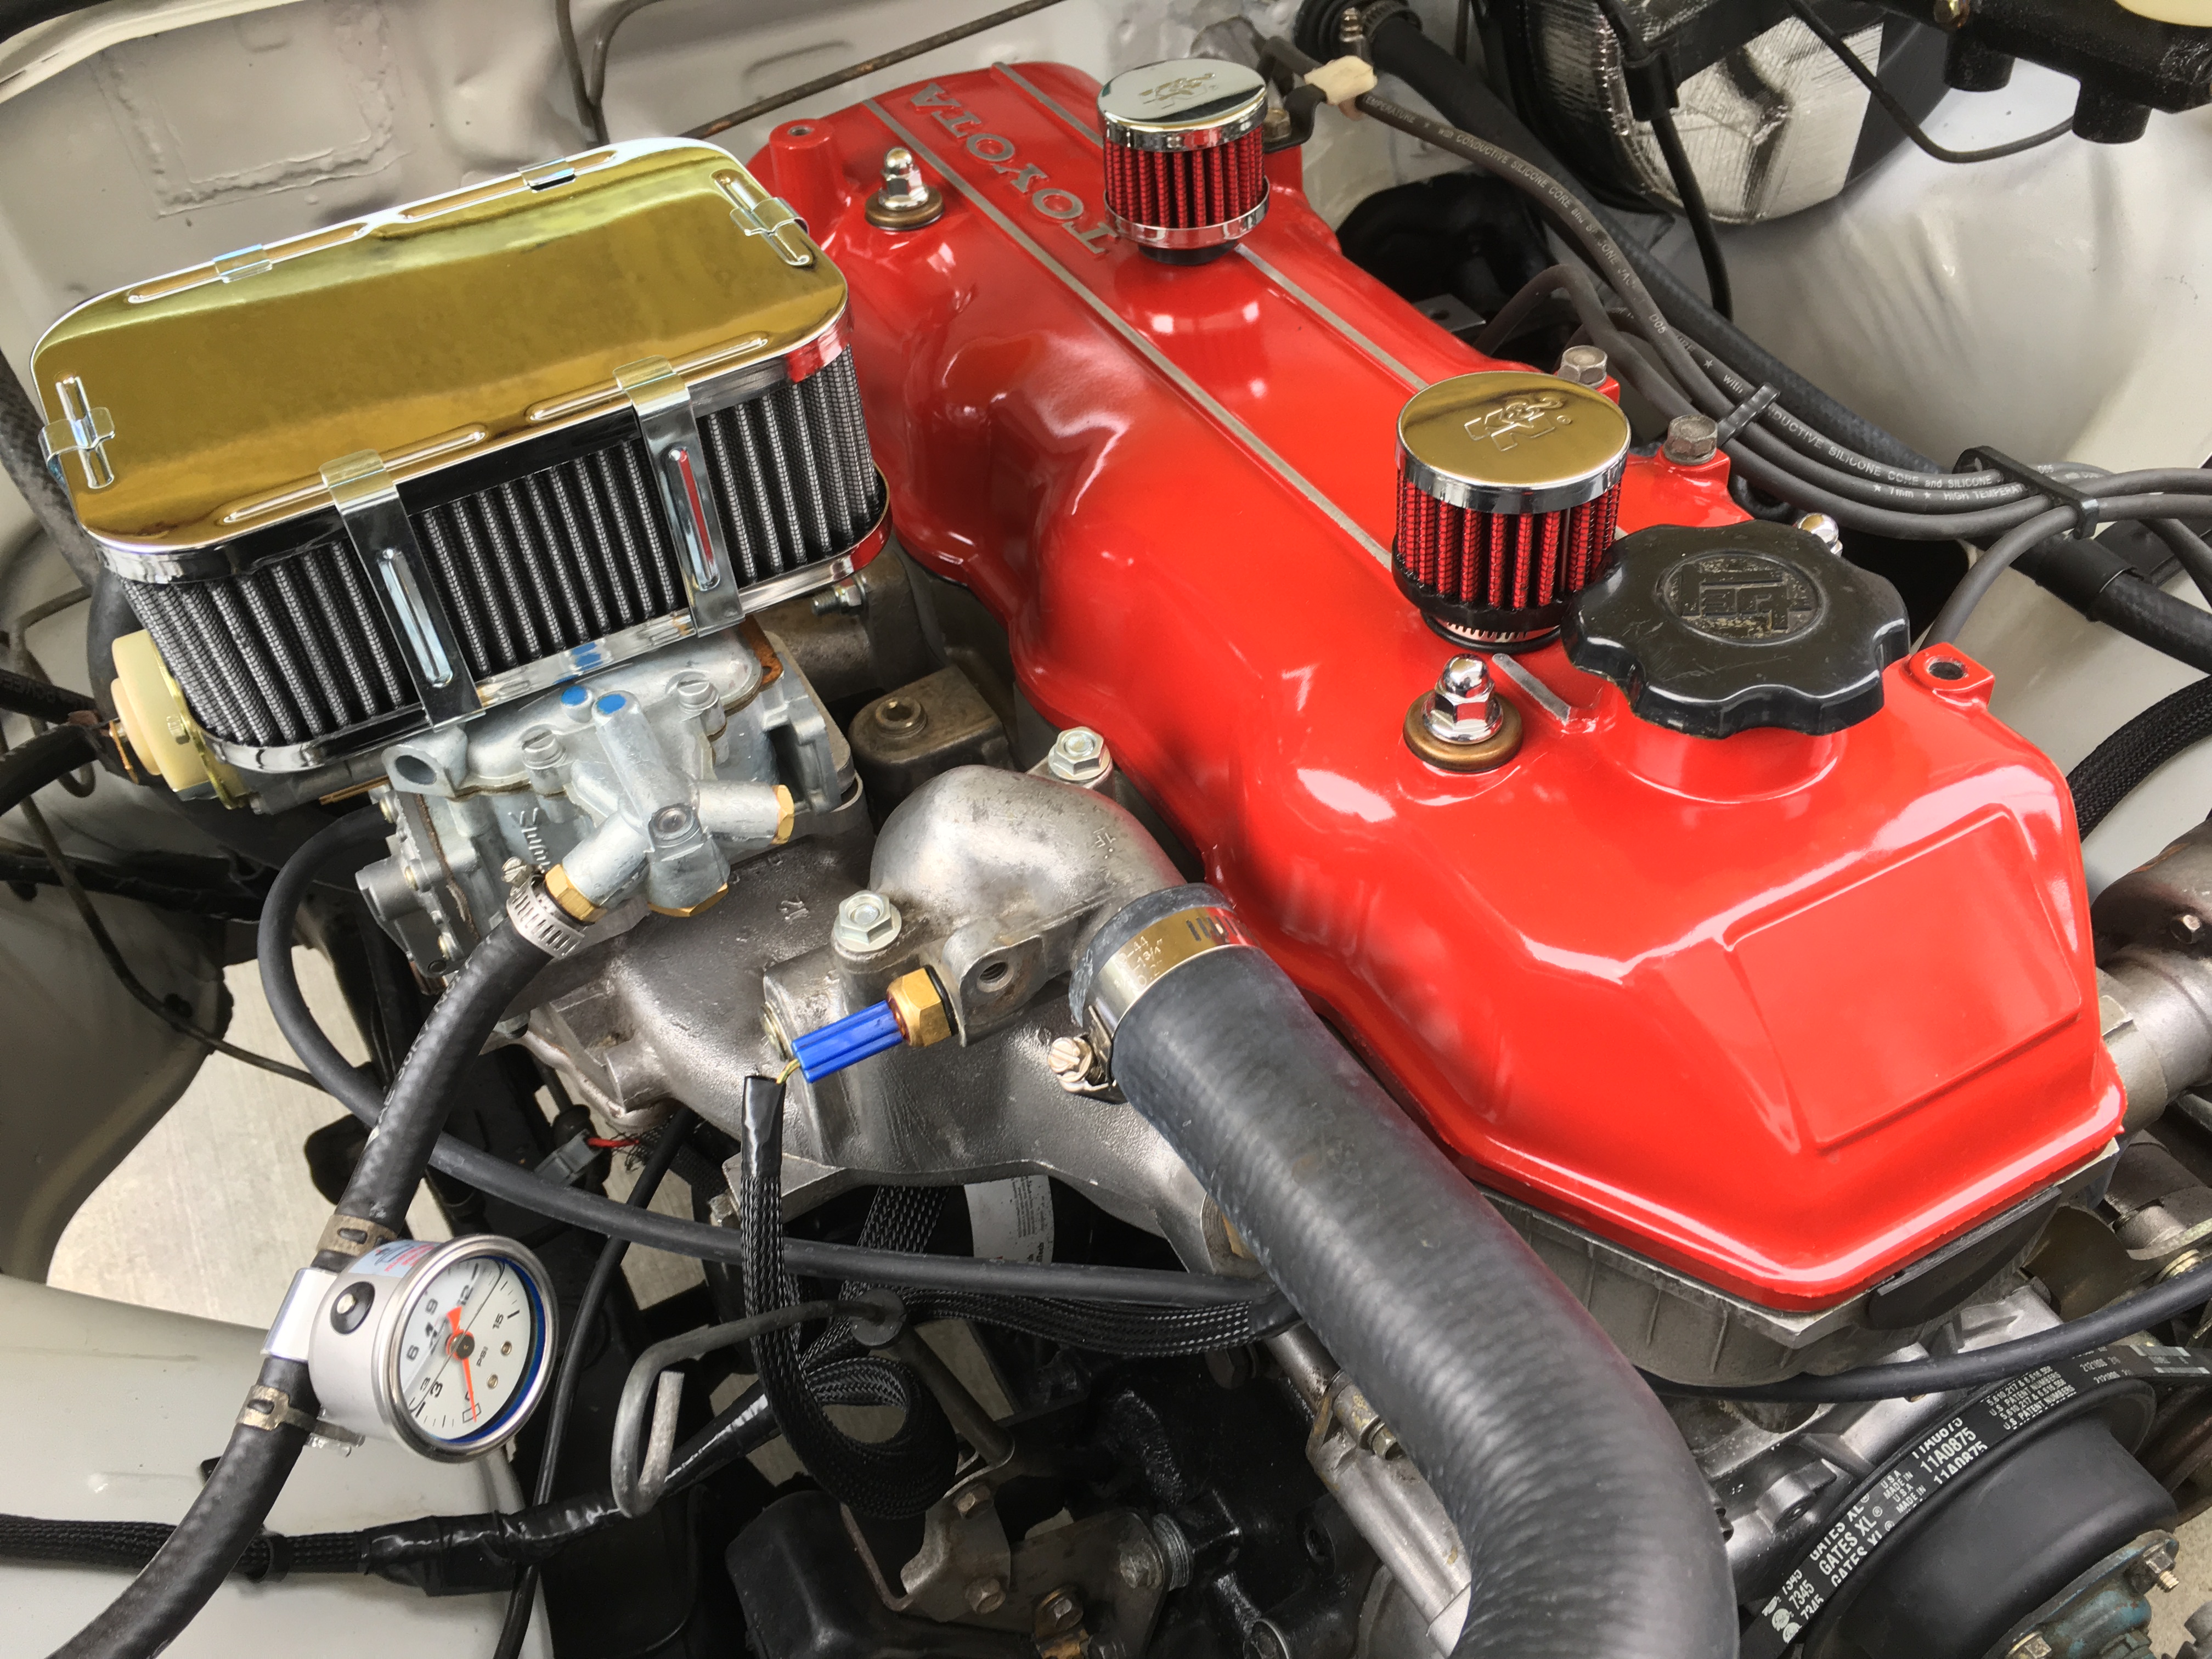
The focal point of this engine bay has to be the valve cover on the 20R. Ours was covered in oil from a leaking valve cover gasket, and having the stock air cleaner sitting above it for 40+ years had caused a fair amount of dirt to build up. On top of all that it was silver and blended in with everything. Let’s see what a few hours of elbow grease and some spray paint can do.
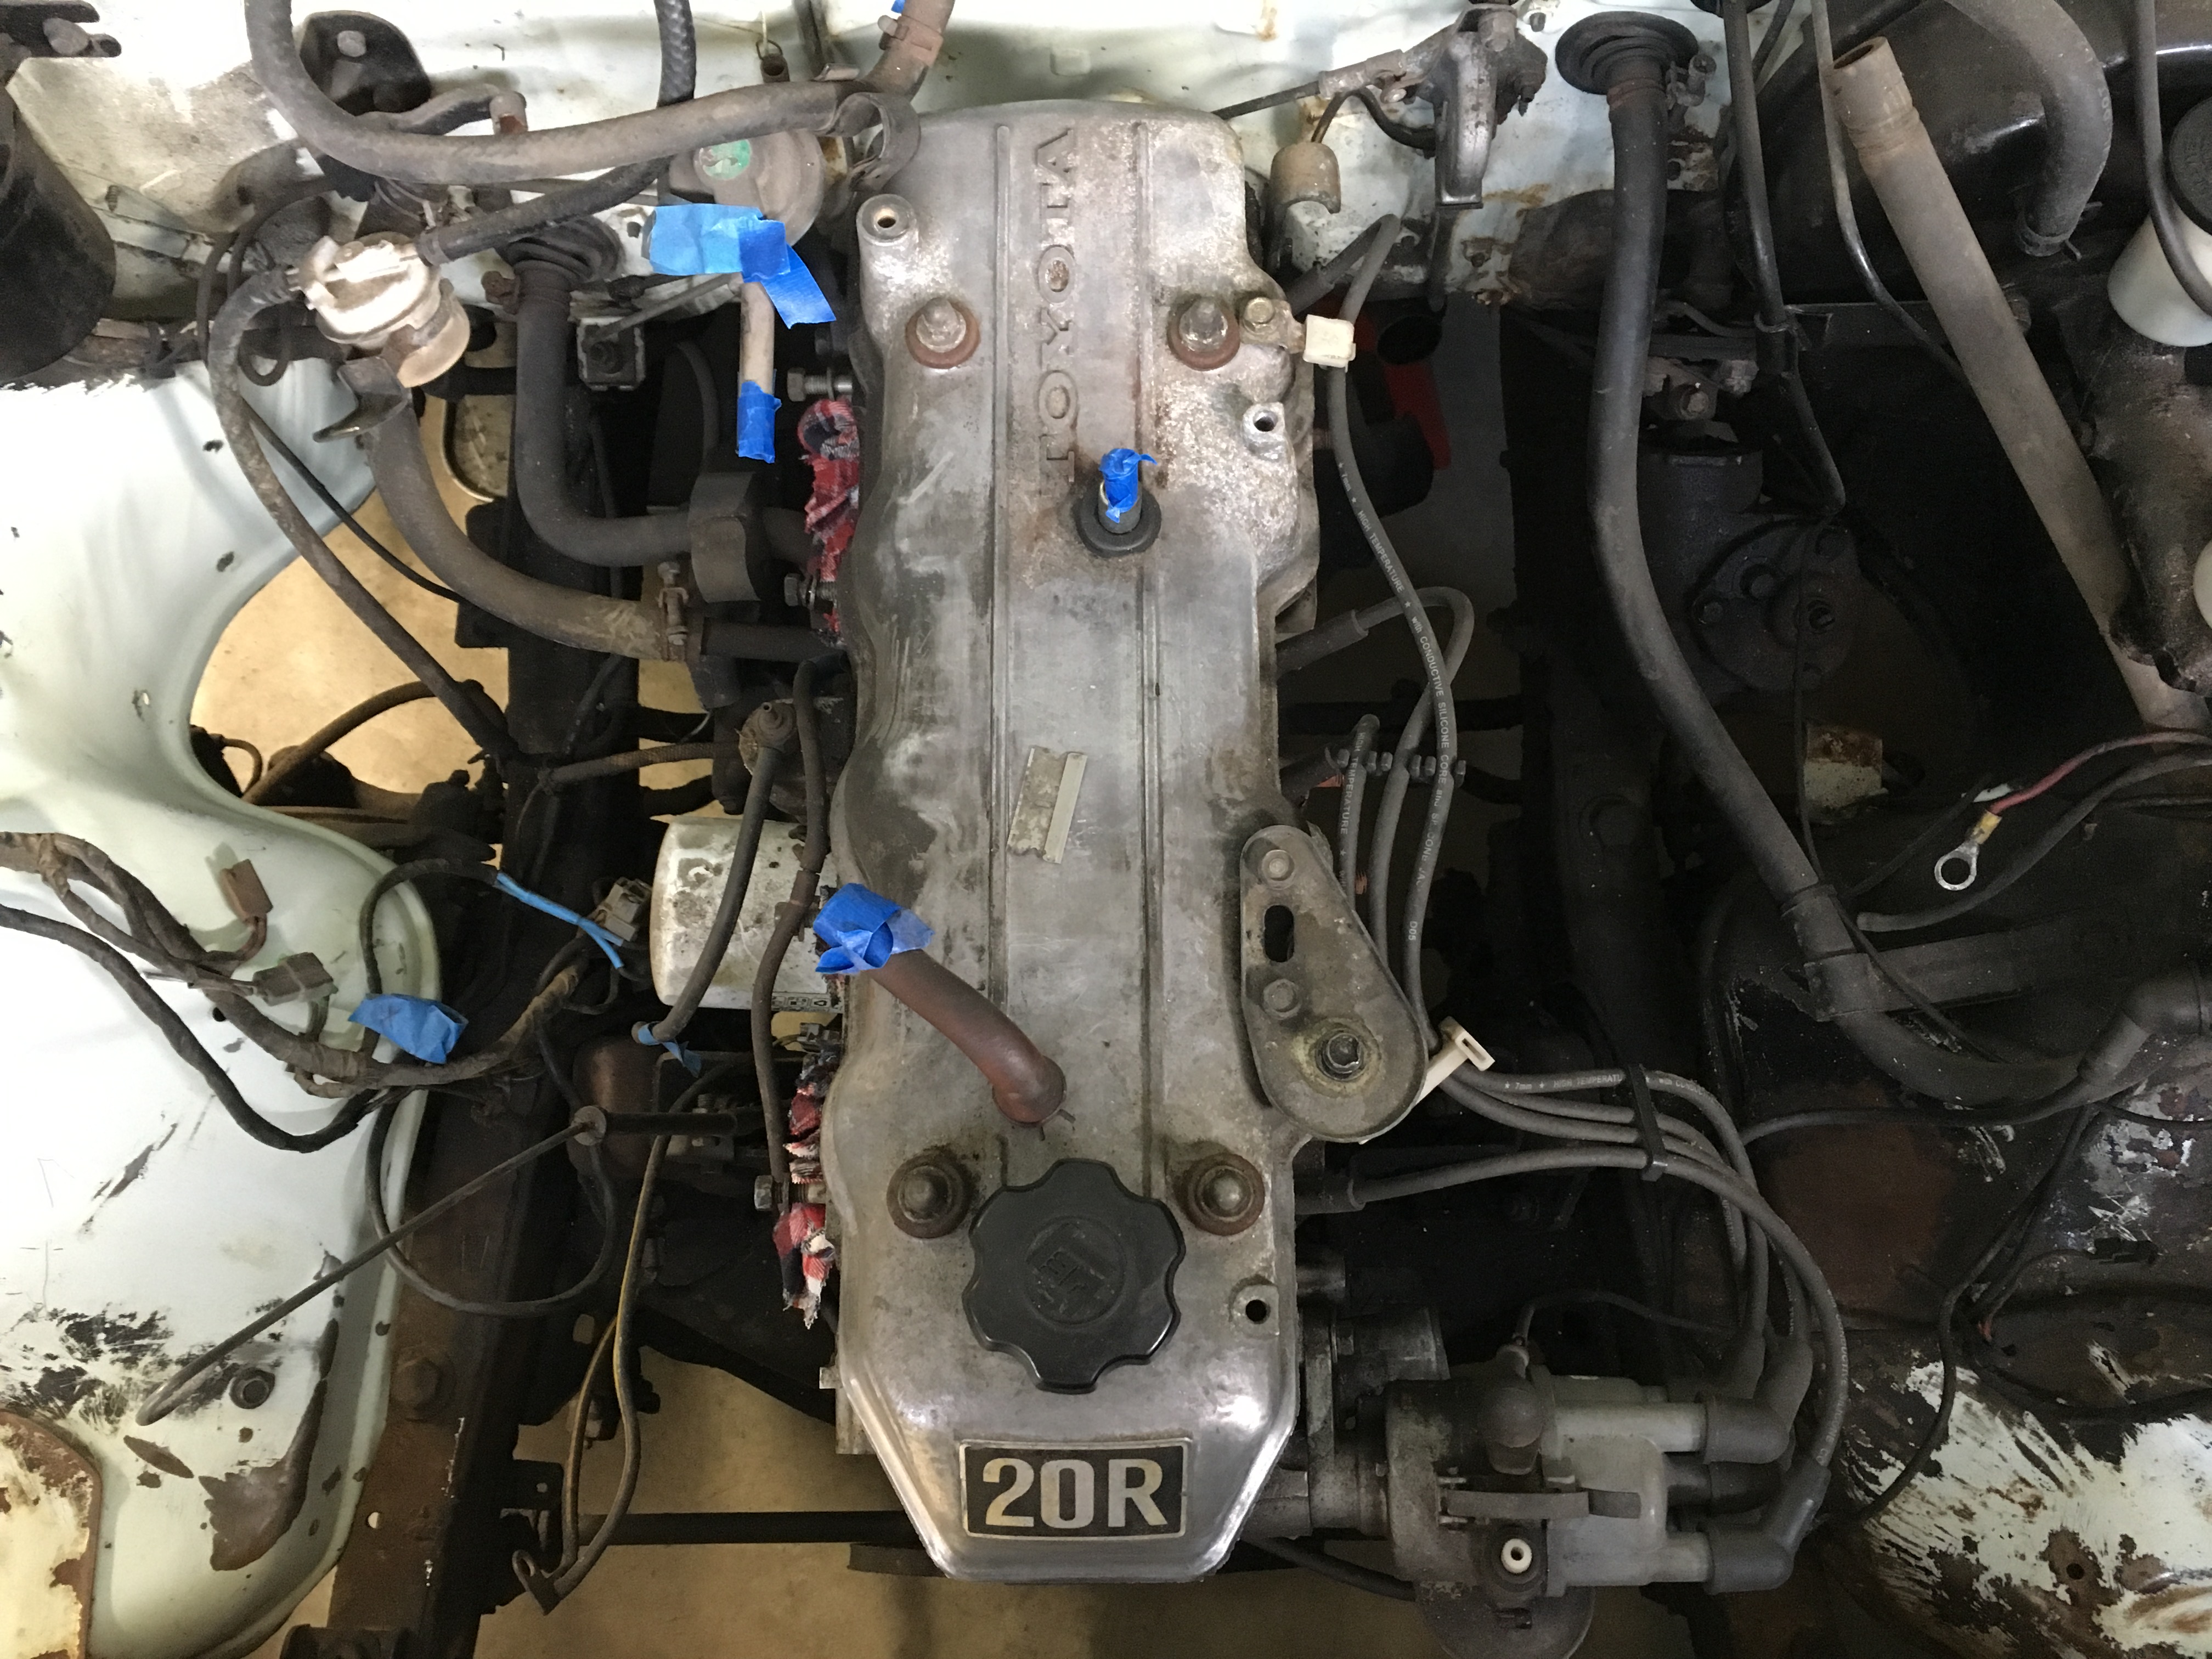

The valve cover had to be removed because the gaskets had failed and needed to be replaced. So now was the perfect time to also clean this up a little. First thing I needed to do after removed all the hardware was to scrape off all the chunks of oil, and clean the surface with something that can decrease everything. Once that was done I had to sand down the surface using various grits of sand paper until I had a clean surface to prime.

I removed the ’20R’ sticker because I was convinced I could just purchase a new one. Come to find out you can only purchase the ’22R’ so I was a bit disappointed. Going back I would have sanded down the edges where the sticker would have gone just t clean up this area bit.
*Be careful to not allow any debris to get into the valve cover. There is a baffle in the oil fill area that could trap debris if it made it in there. I had to remove mine to replace a gasket so I made sure to clean that area out as well.

After sanding and degreased the valve cover, I gave it a healthy coat of primer.

I wanted a really bold color and I read somewhere that red would give me an extra +5hp. I’m not sure if any spray paint would hold up to the underhood temps so I went with a Dupli-Color High Heat Paint
Dupli-Color DE1653 Ceramic Red Engine : https://amzn.to/3gQahKC
It turned out amazing, but it was a bit much for my taste. I wanted a little more contrast on the valve cover to balance out how red it was. I decided to potentially ruin all my hard work and carefully sanded down the raised lettering.
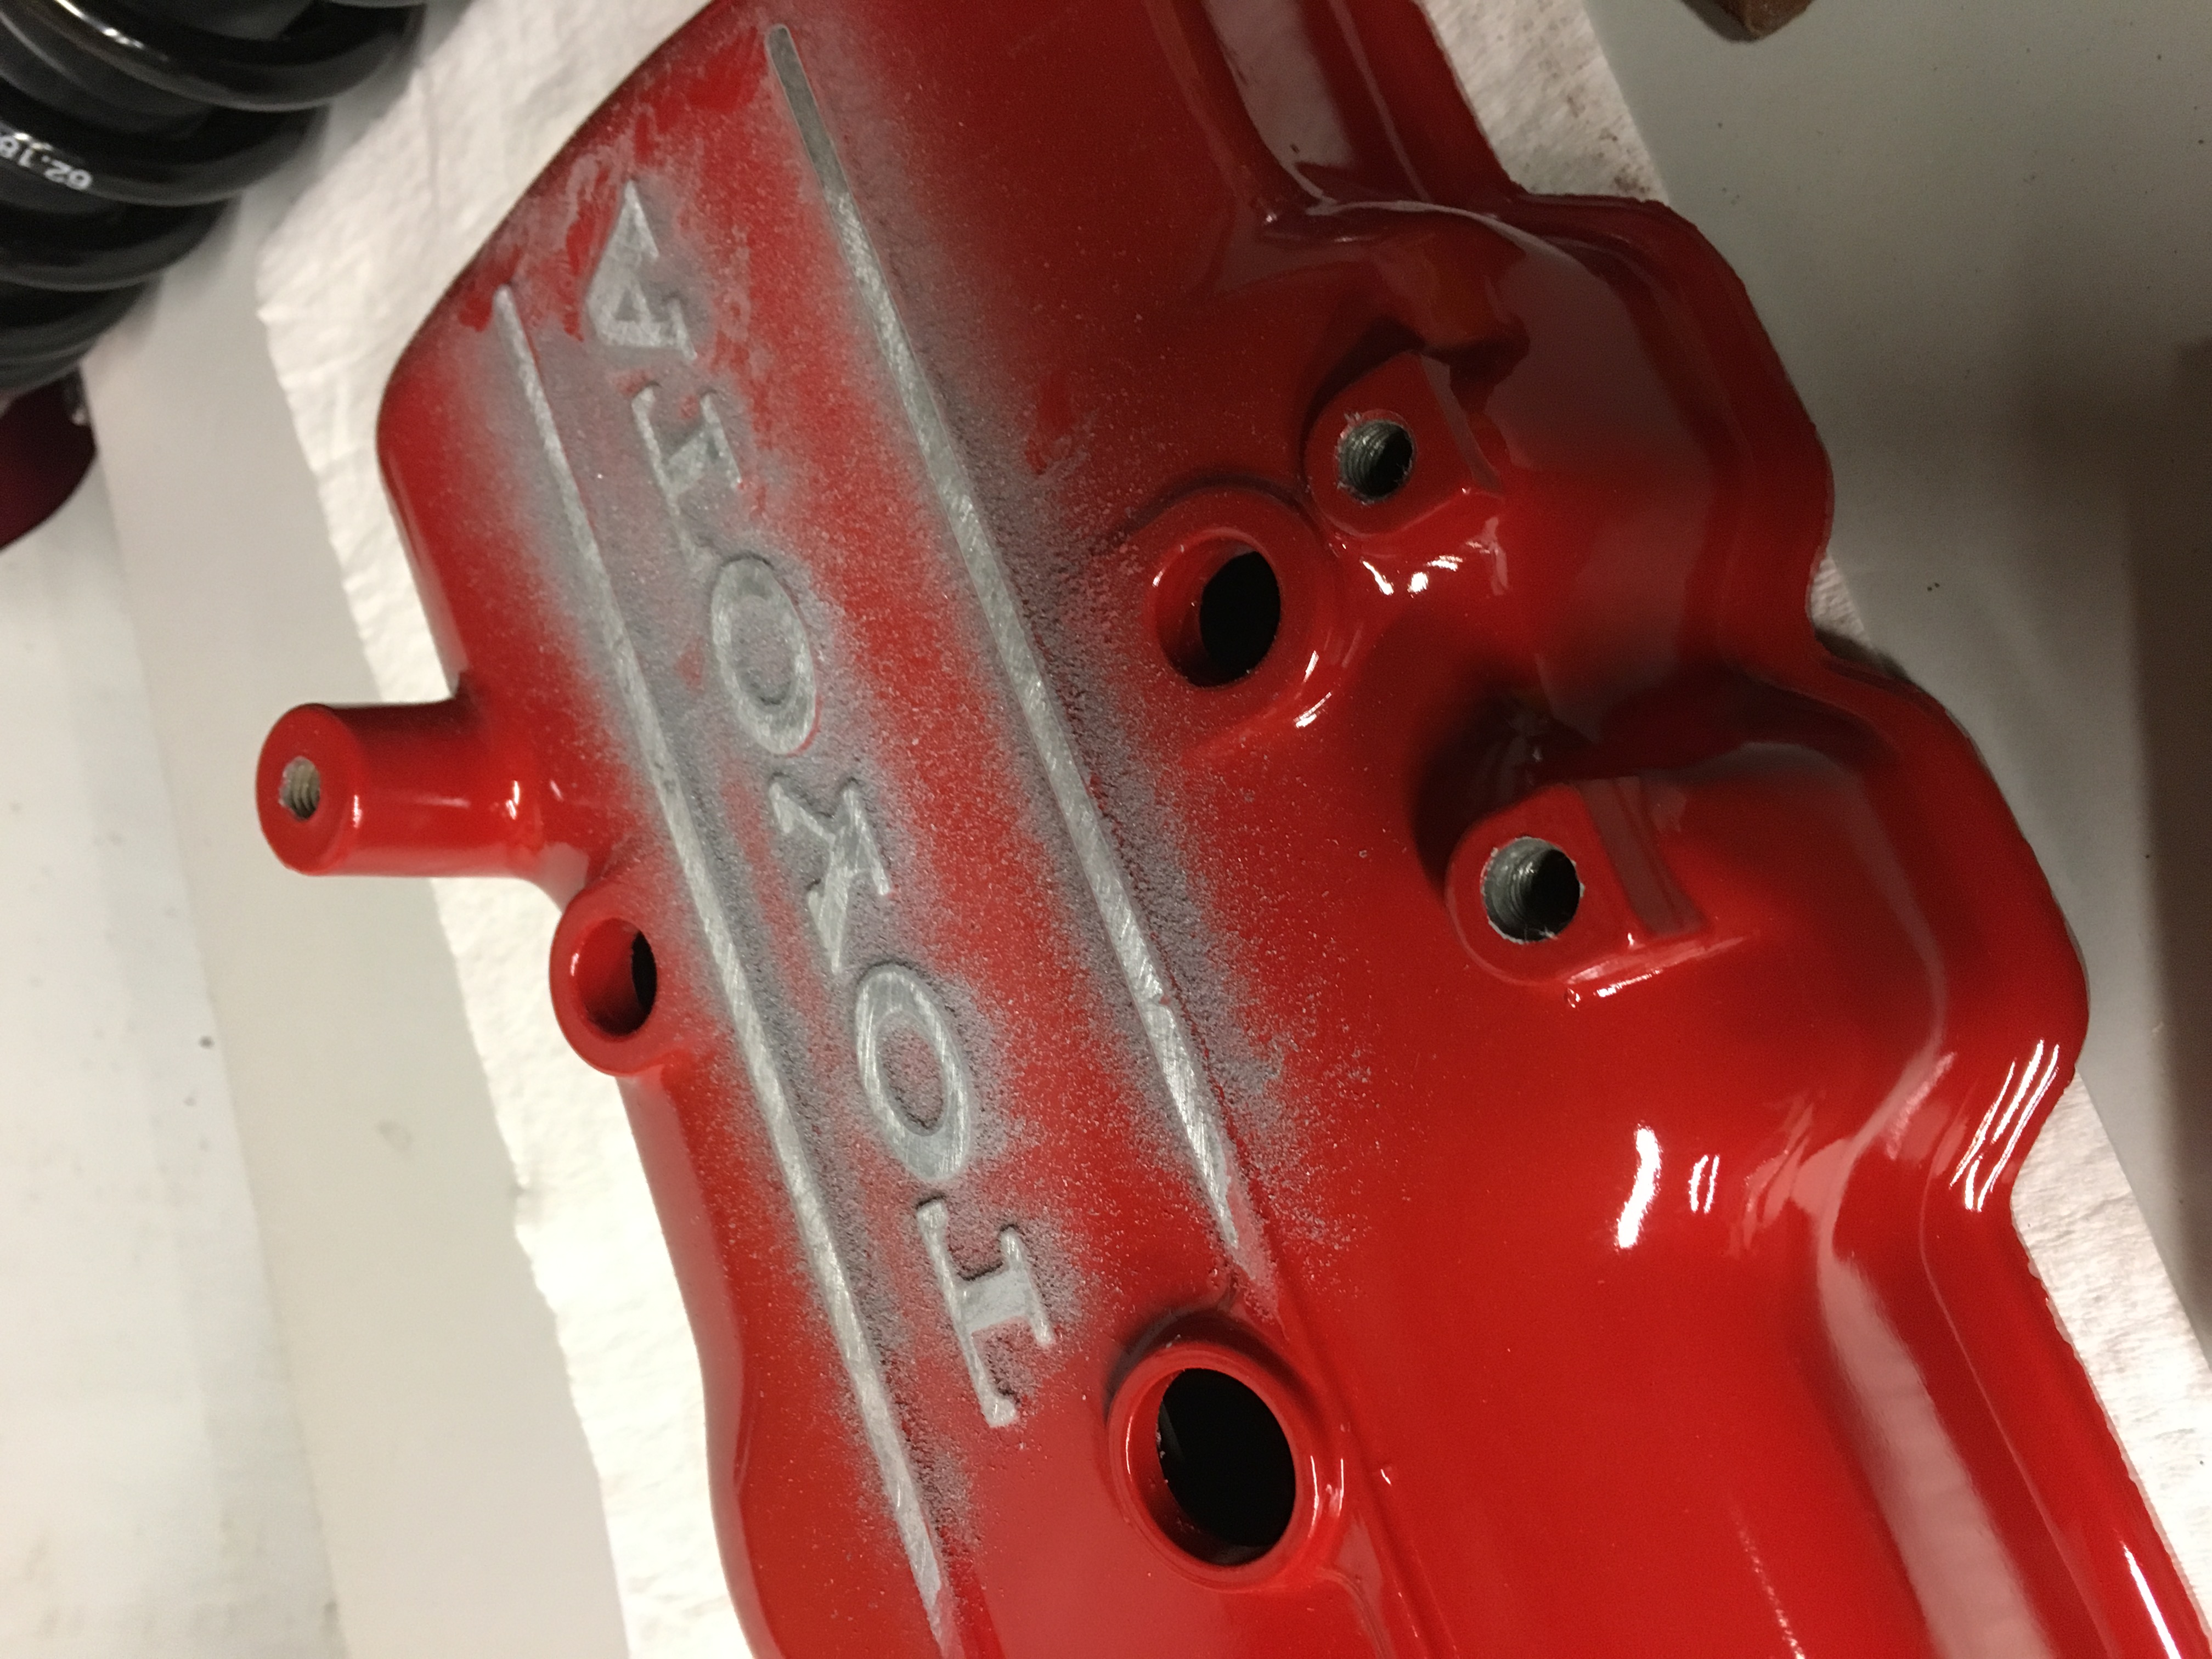
Only made one tiny mistake which I’ll keep a secret, but I loved the contrast with the red. The last step was a coat of high temp clear coat. I figured I’d stick with Dupli-Color.
Dupli-Color Clear Coat: https://amzn.to/2QQWBEv

Exhaust
After I started removing all the necessary items from the engine bay and replacing the carburetor, I decided I wanted to spend the time to make everything else look as good. The stock exhaust manifold is just an ugly cast iron block and the exhaust shield was rusting and starting to vibrate at certain rpms. I found this Pacesetter header that was a 4-1 version and it looked awesome. I had to remove the factory paint and repaint it with high heat paint, but I wasn’t convinced this would be enough to keep the temps down.
I took the time to wrap the header in heat resistant exhaust wrap. This ended up being a lot more time consuming that I imagined it would be, but in the end I loved the results, and it looks awesome. The overall diameter of this header is bigger than what is currently installed on the Chinook but the plan is to build my own exhaust in the near future, or have a shop fab something up for me.
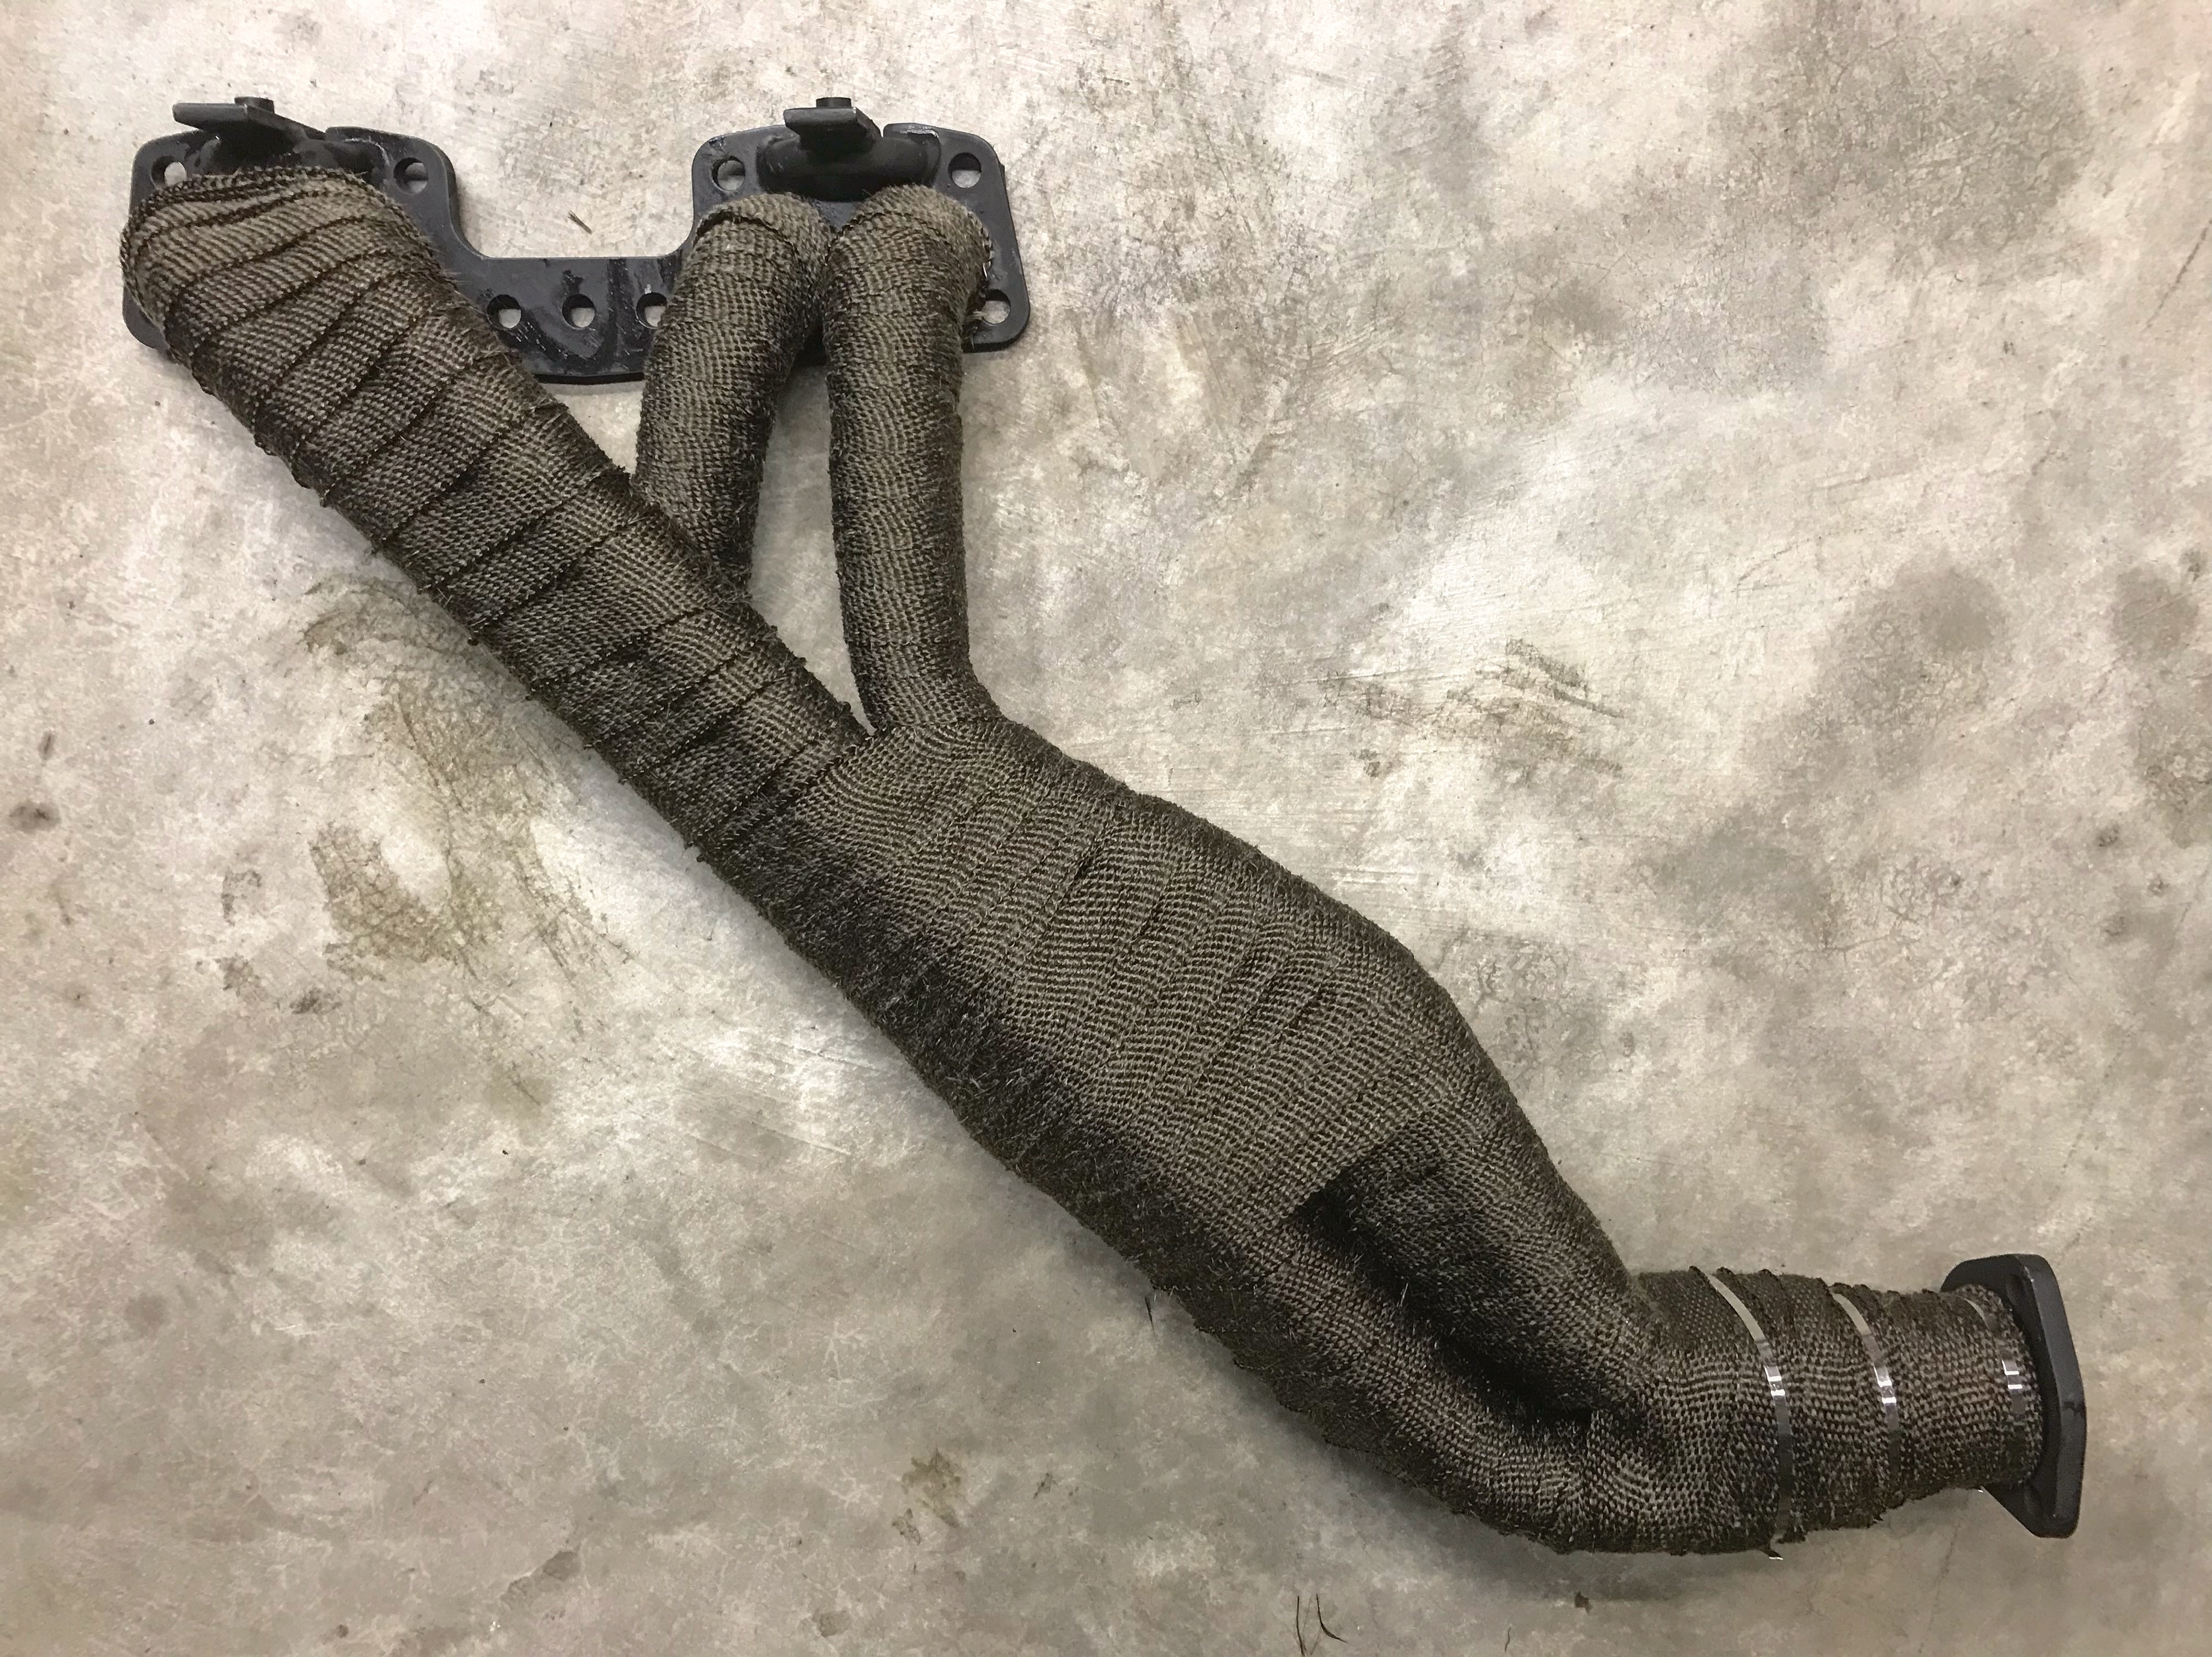
Pacesetter Header (20R): https://amzn.to/2RgL0jq
Exhaust Wrap: https://amzn.to/2P6SEdC
Engine Upgrade
During the process of getting our Chinook back on the road I picked up a parts truck. This truck has been converted as a landscaping truck at some point in it’s life, but it had something I really wanted. a 22R and a W50 5 speed transmission.
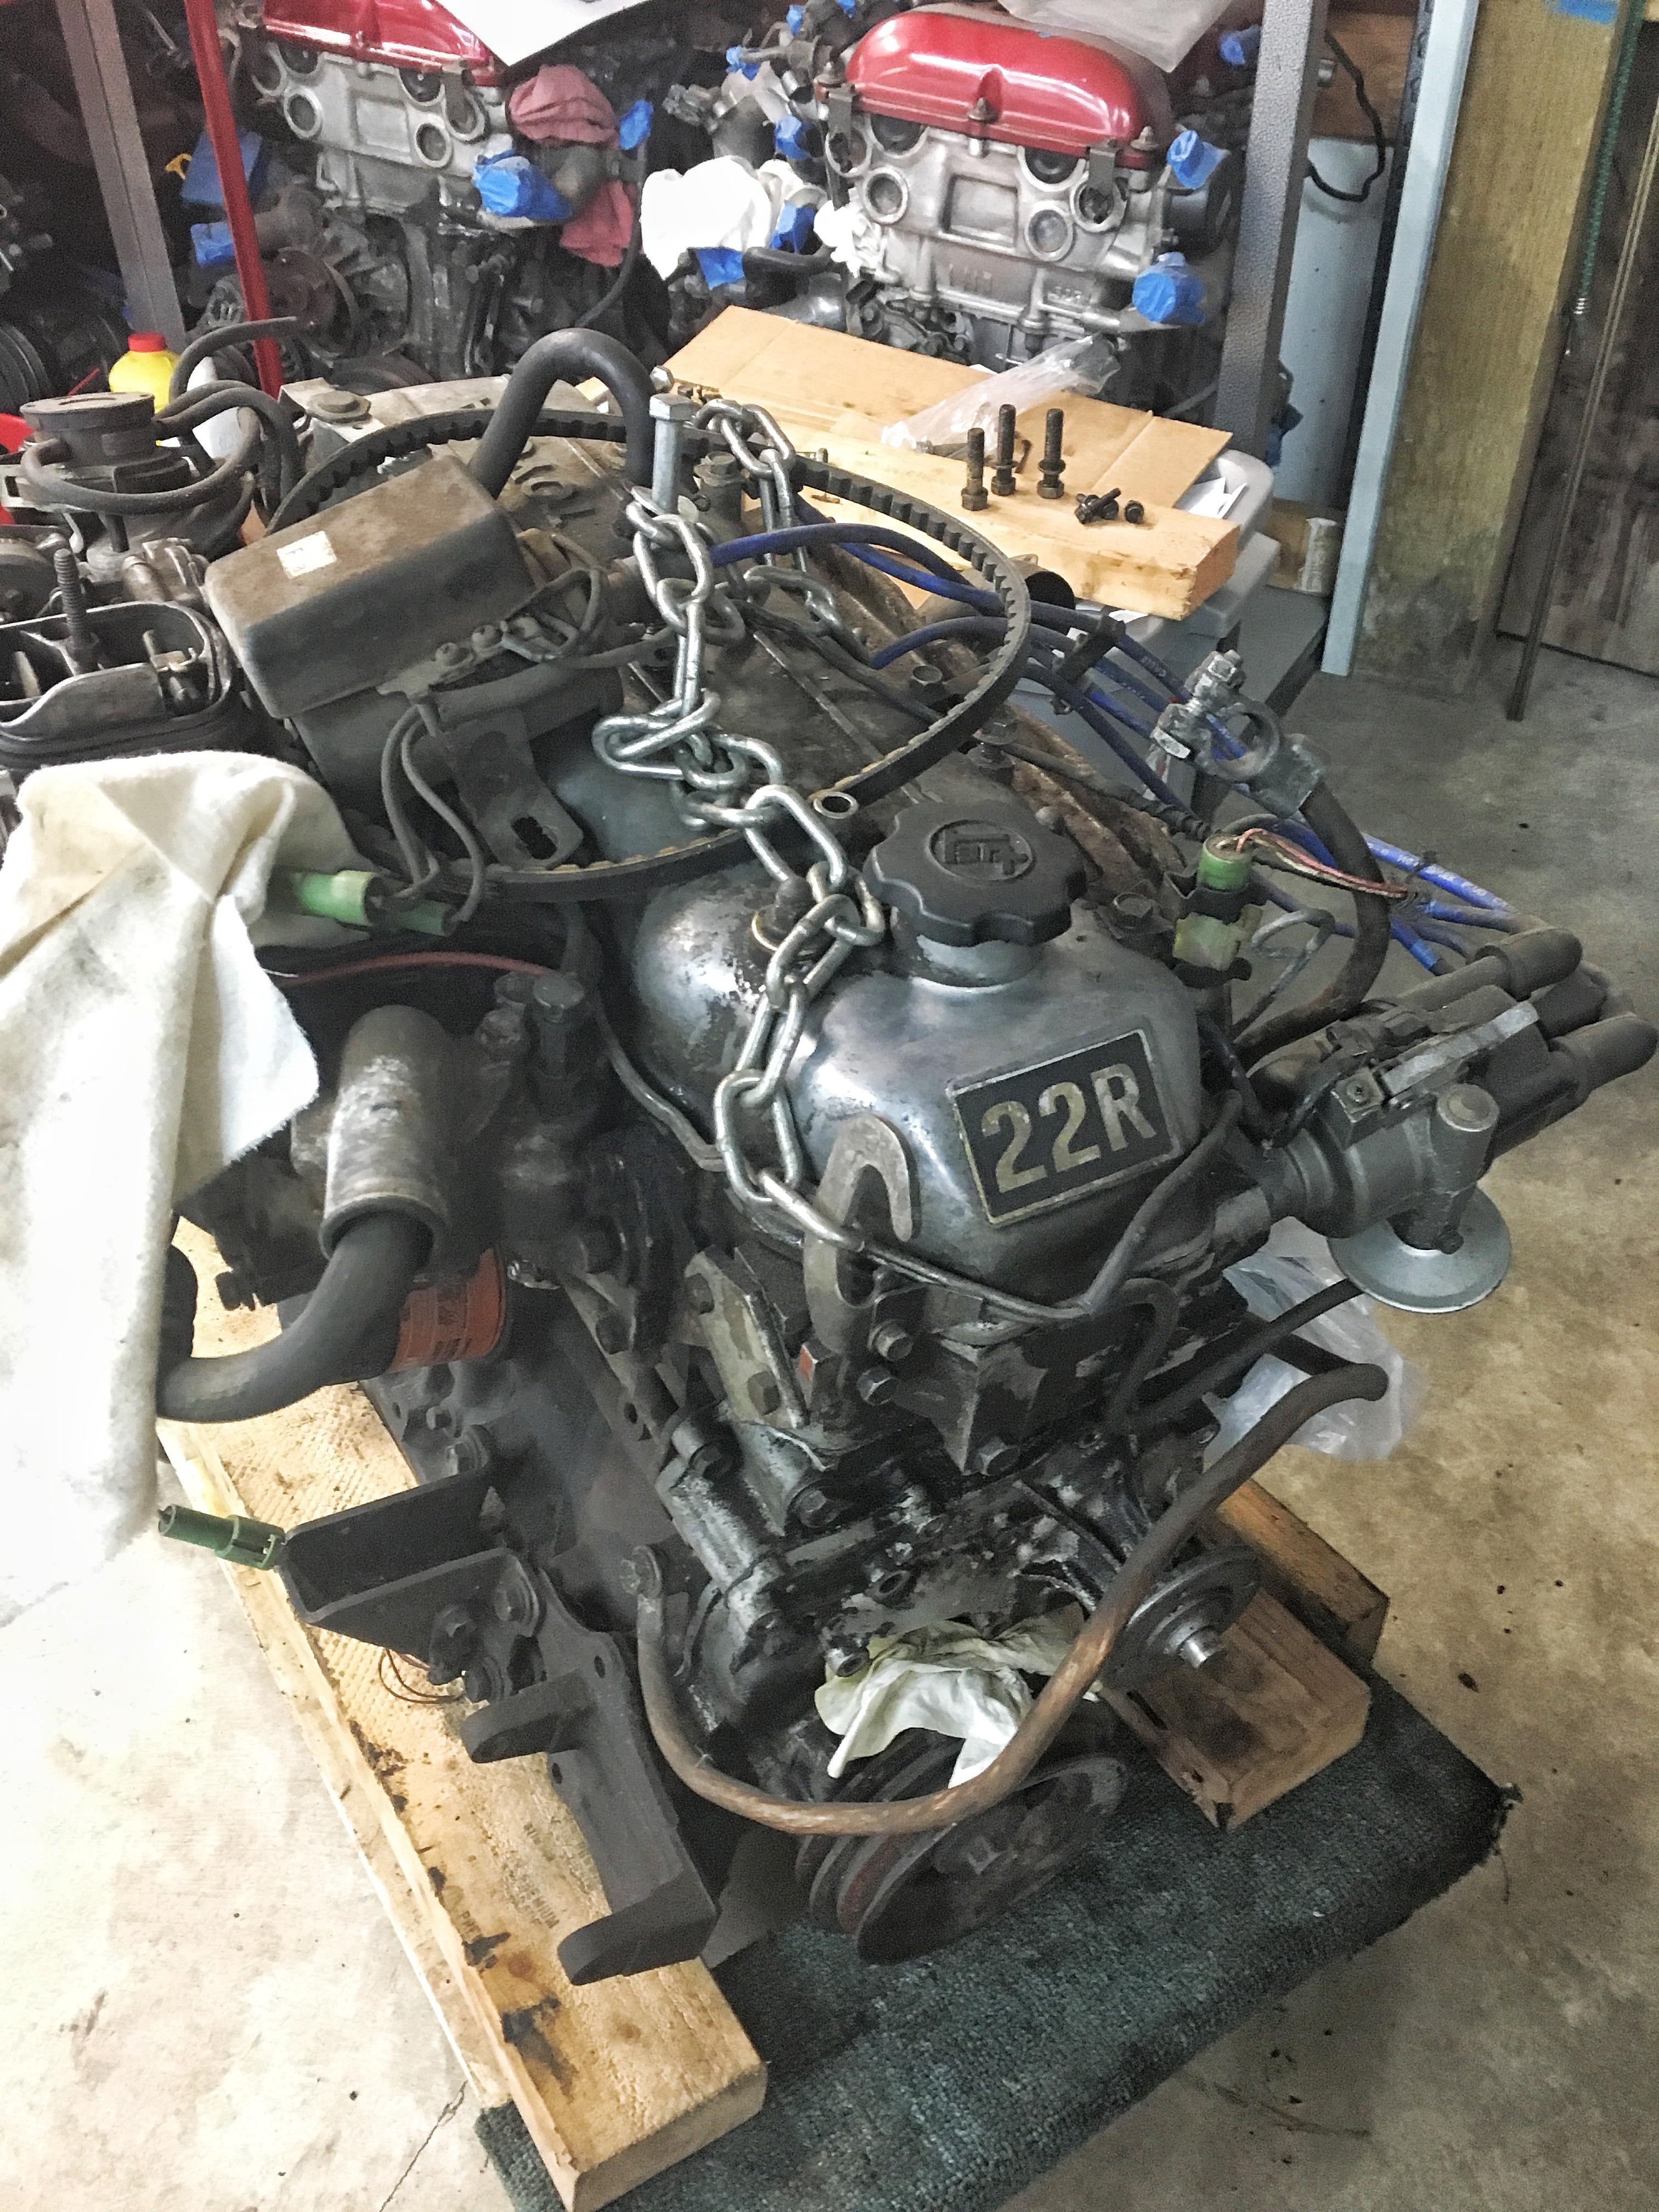
The W50 transmission was definately going in the Chinook at some point, but I’m not sure what I will do with the 22R. As far as engine swaps I could do on the Chinook this would be the easiest by far. Not only would it be a straight forward swap, but this would also allow me to reuse my new header, and Weber 32/36 carb I purchased for the 20R.
If I decide to go ahead with this swap I plan to document it with a video, and a post on this blog.
Comparison:
20R 2.2L – 97hp / 119tq
22R 2.4L – 97hp / 128tq
Carburetor
The stock Asian carb was removed and replaced with a Weber 32/36. Along with a new carb, the old and failing emissions equipment was also removed. Not only did this save a little weight up front, but cleaned up the engine bay a ton and made it much easier to diagnose and work on things.
Weber 32/36 Carb Kit w/manual choke: https://amzn.to/32NkzGd Weber 32/36 Carb Kit w/ elec. choke: http:www.lceperformace.com
When running the Weber carb on the Toyota 20/22R engines it’s recommended to limit the fuel pressure to 3psi. You can do this by placing a fuel pressure regulator in line to the carburetor. I went with the FPR that LCE sells, and also added a liquid filled fuel pressure gauge to have the ability to monitor fuel pressure if I’m having an issue.
Weber Fuel Pressure Regulator: https://www.lceperformance.com/Weber-Fuel-Pump-Regulator-1-5-12lbs-p/1035043.htm
Aeromotive Fuel Pressure Gauge 0-15psi: https://www.lceperformance.com/Aeromotive-Liquid-Filled-Fuel-Pressure-Gauge-CARBU-p/2019123.htm
Transmission
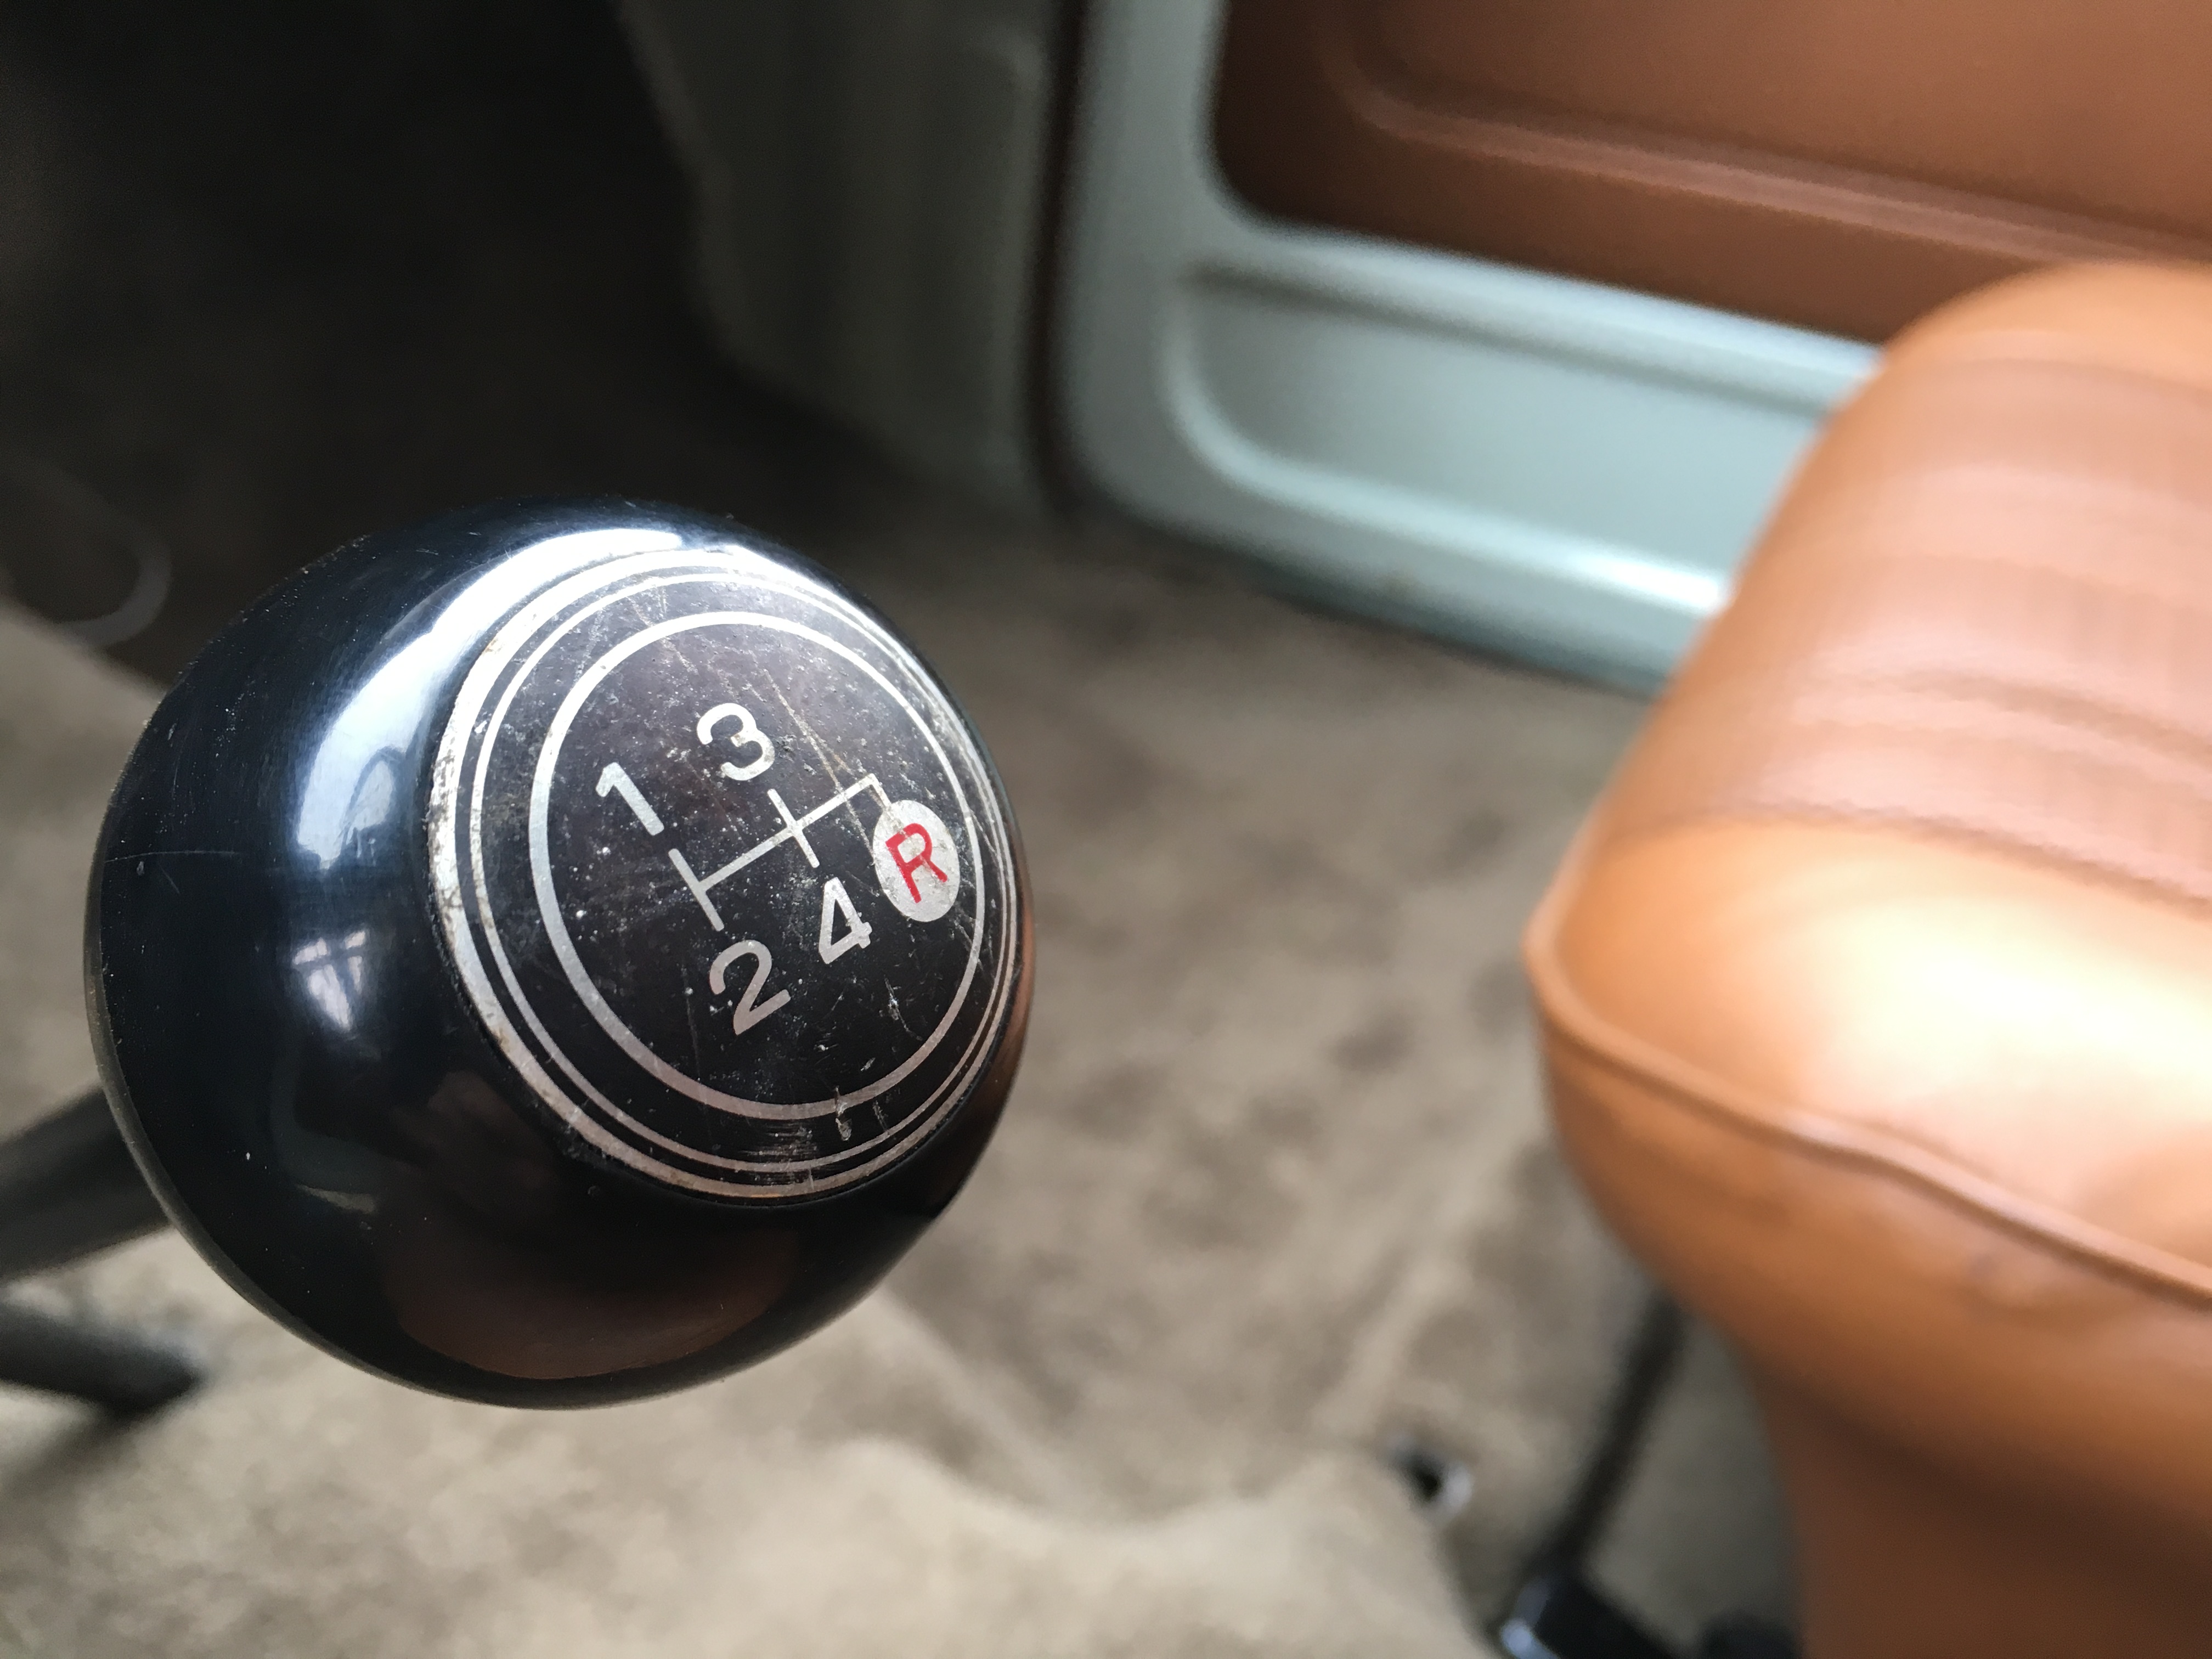
The original L43 transmission that came with the Chinook was only a 4 speed. In 1977 when the max speed limit on the highways was only 55mph this would have been fine. Nowadays the speed limit on some of the interstate highways can be up to 70mph and the 4 speed just wasn’t made for it. We would use the interstate for small distances but we’d usually stick with local highways were the transmission was more comfortable.
The easiest transmission upgrade for the Toyota Chinook is the W50.
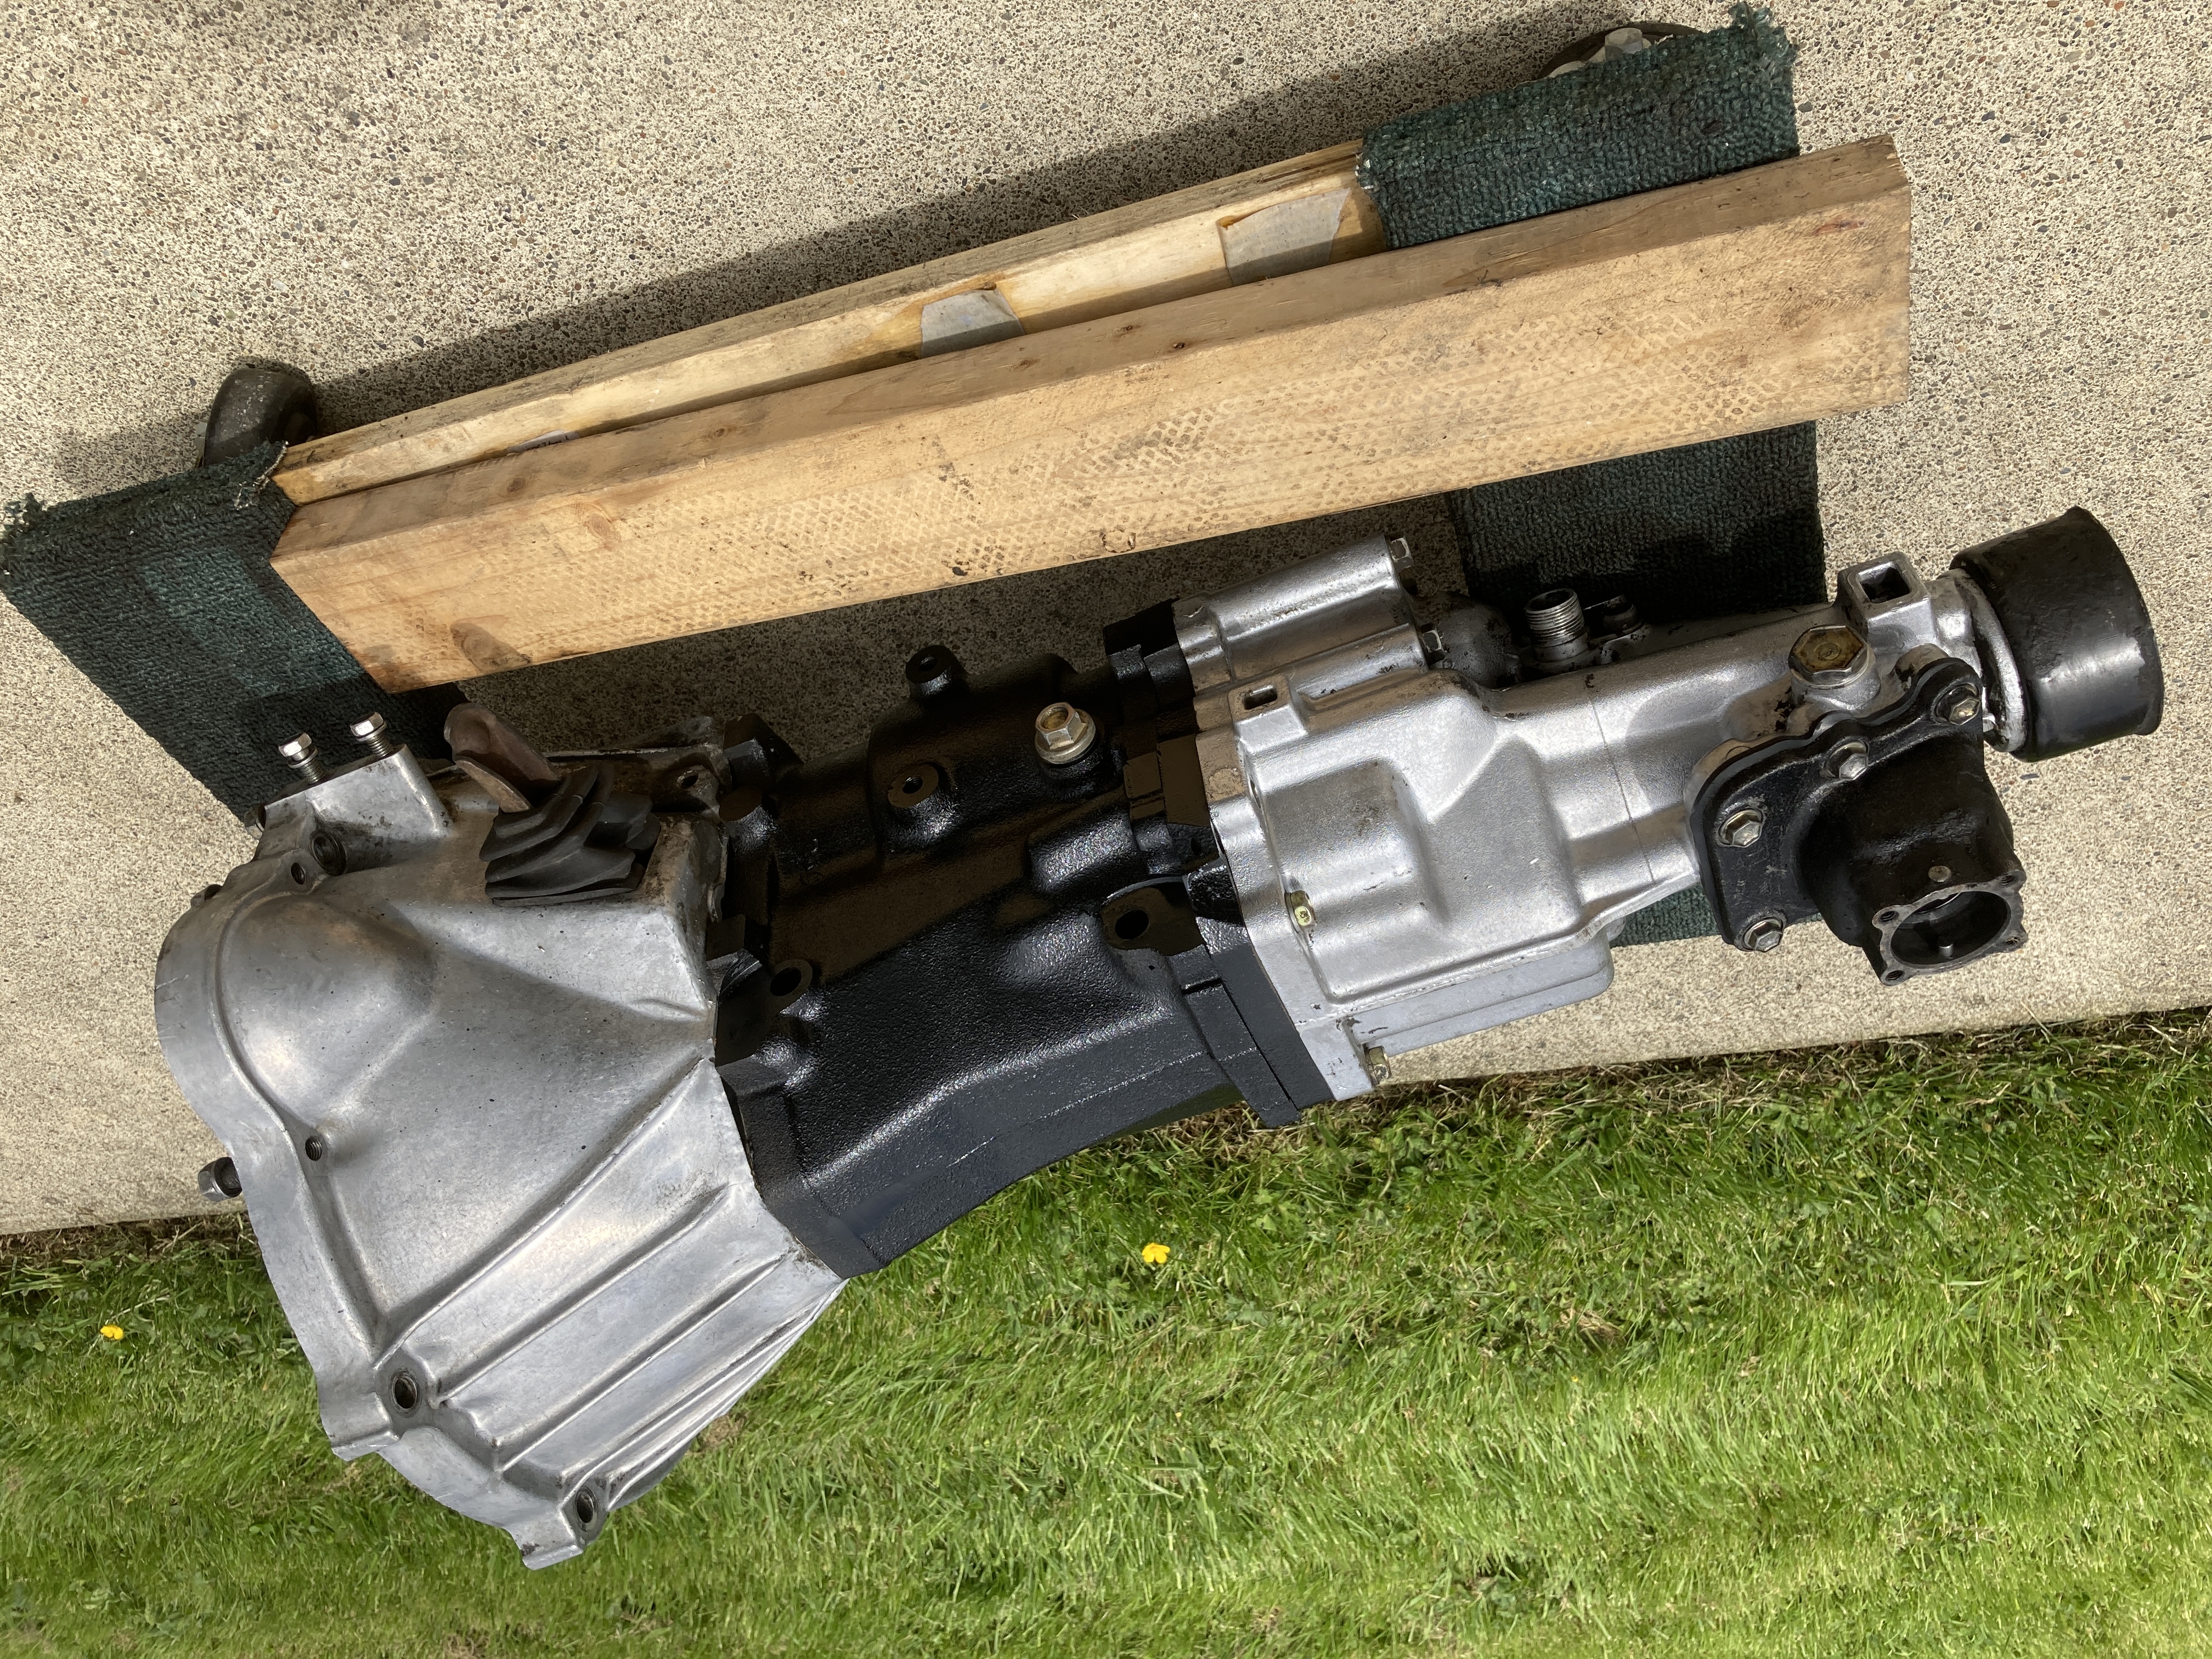
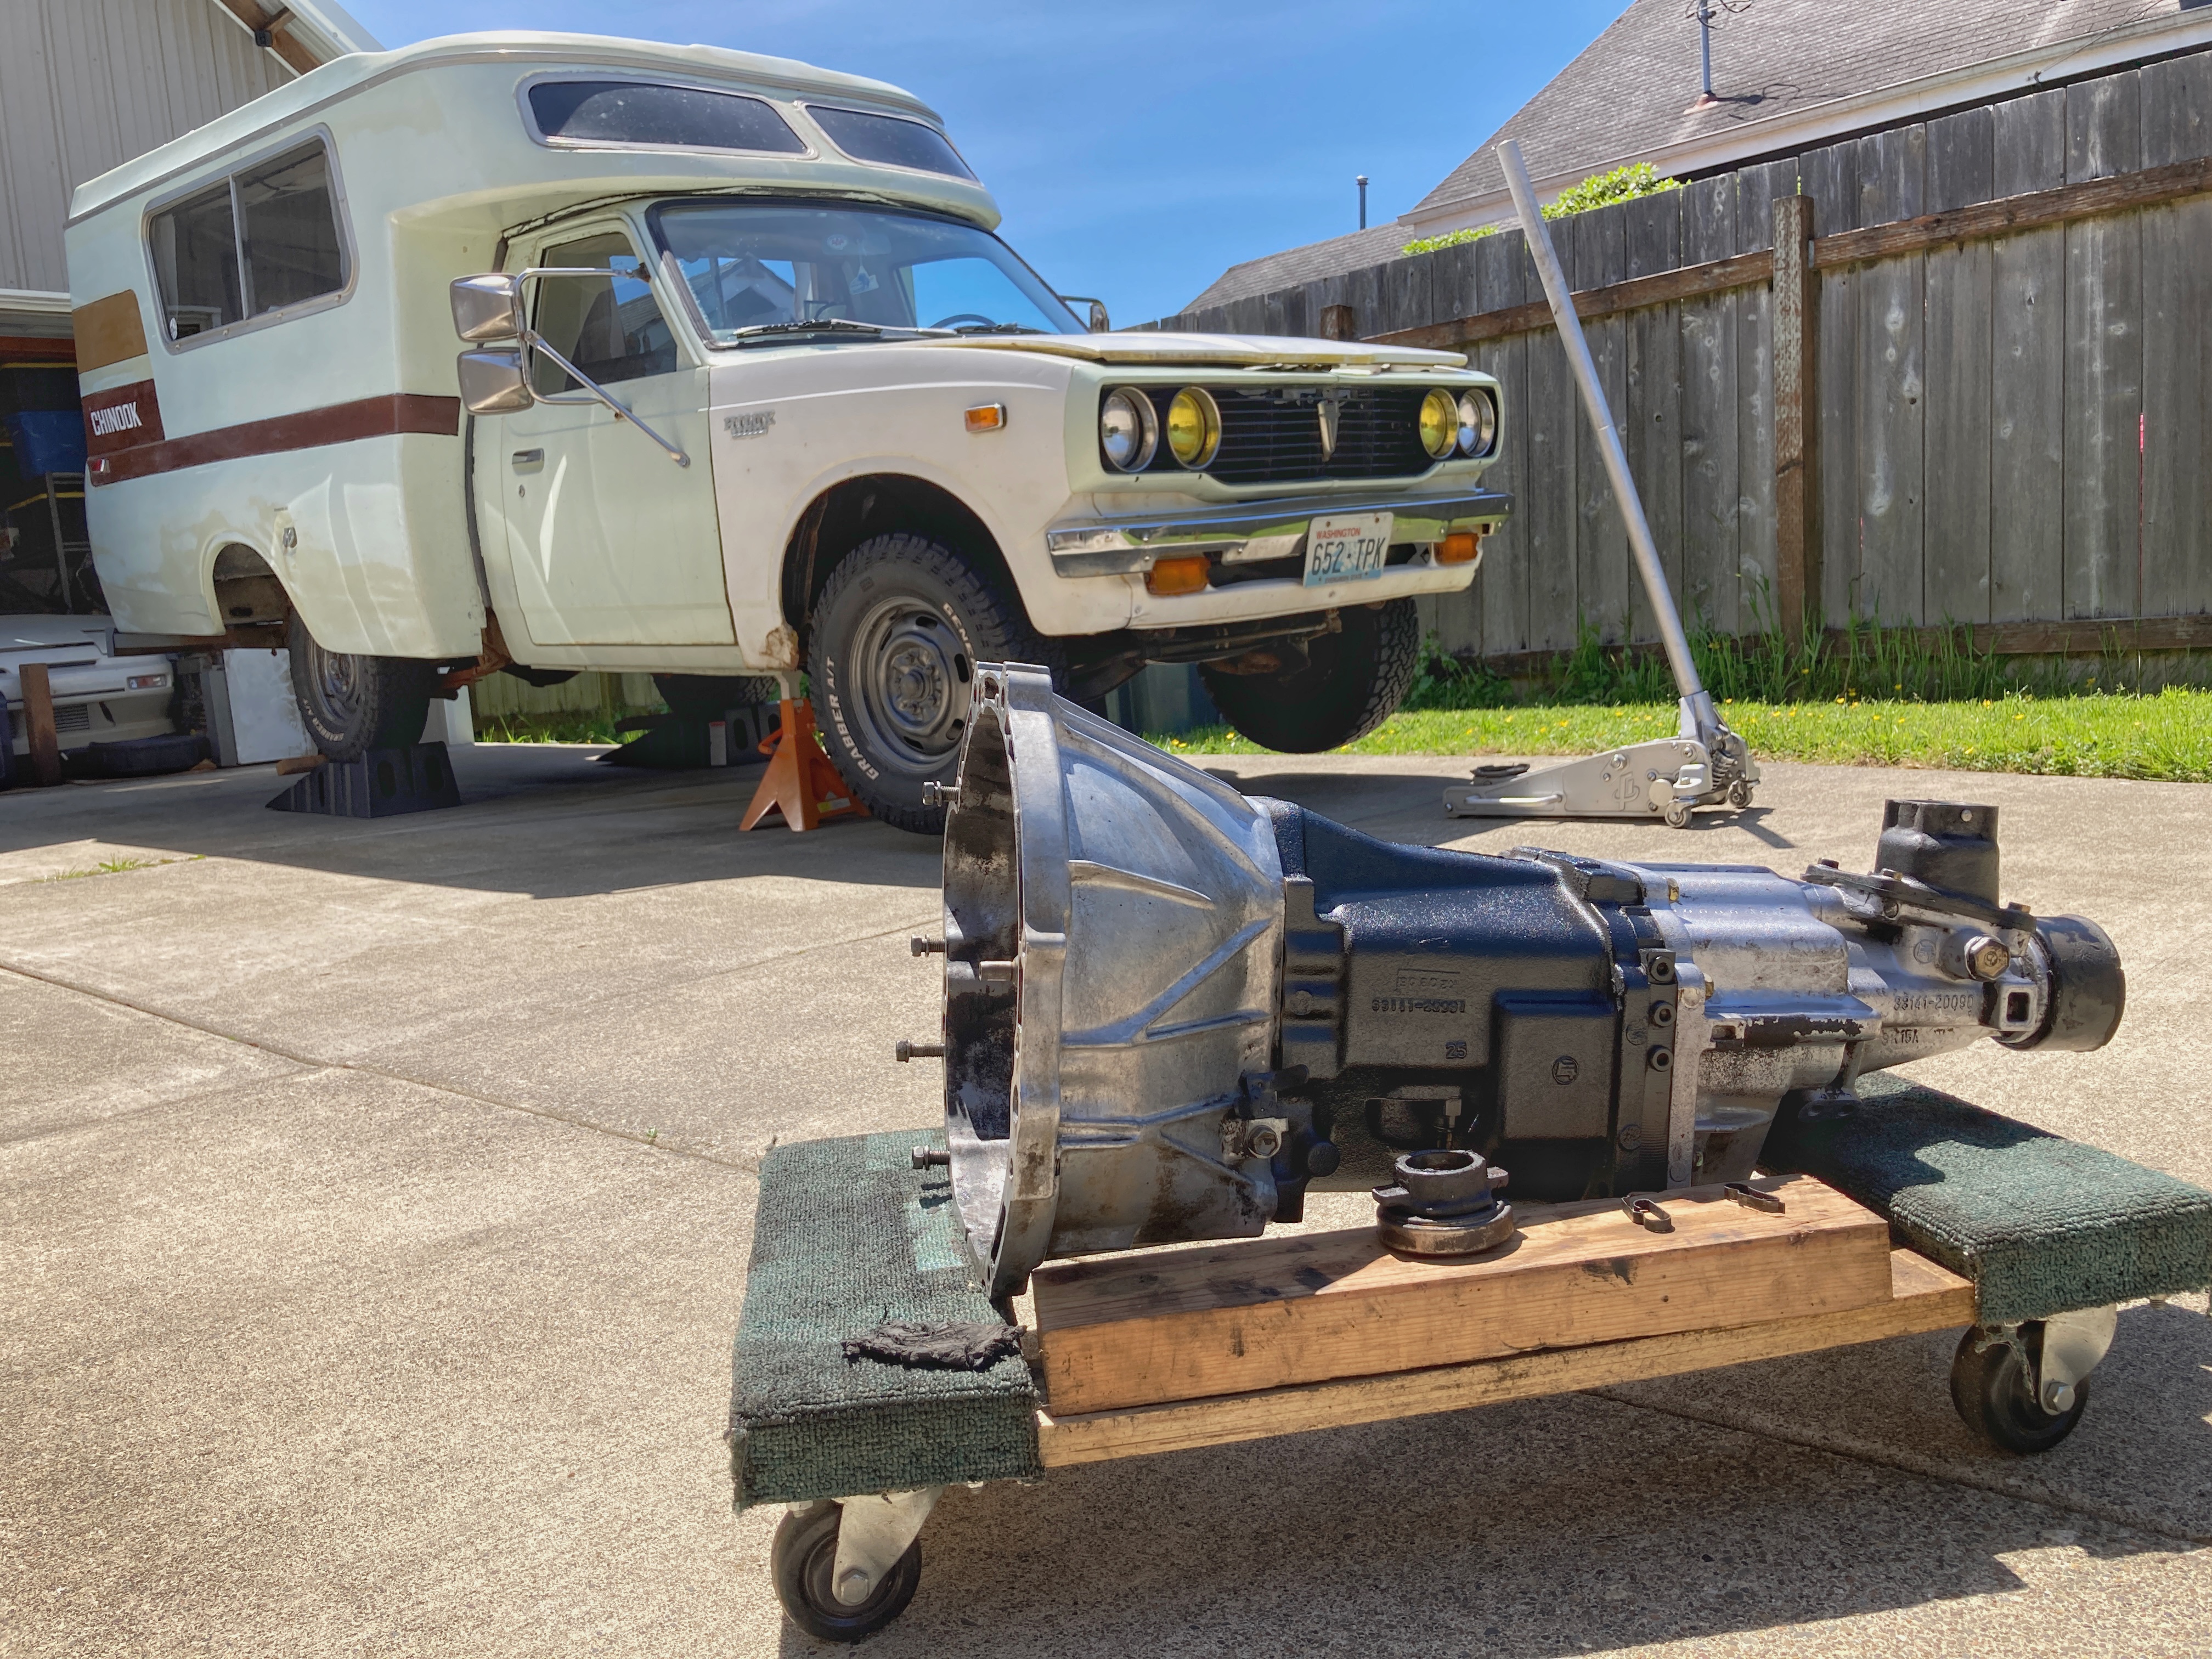
The W50 is a 5 speed, and the gearing is very similar to the L43 4 speed. The L43 has a shorter 1st gear, but the rest of the gears on the W50 felt very similar.
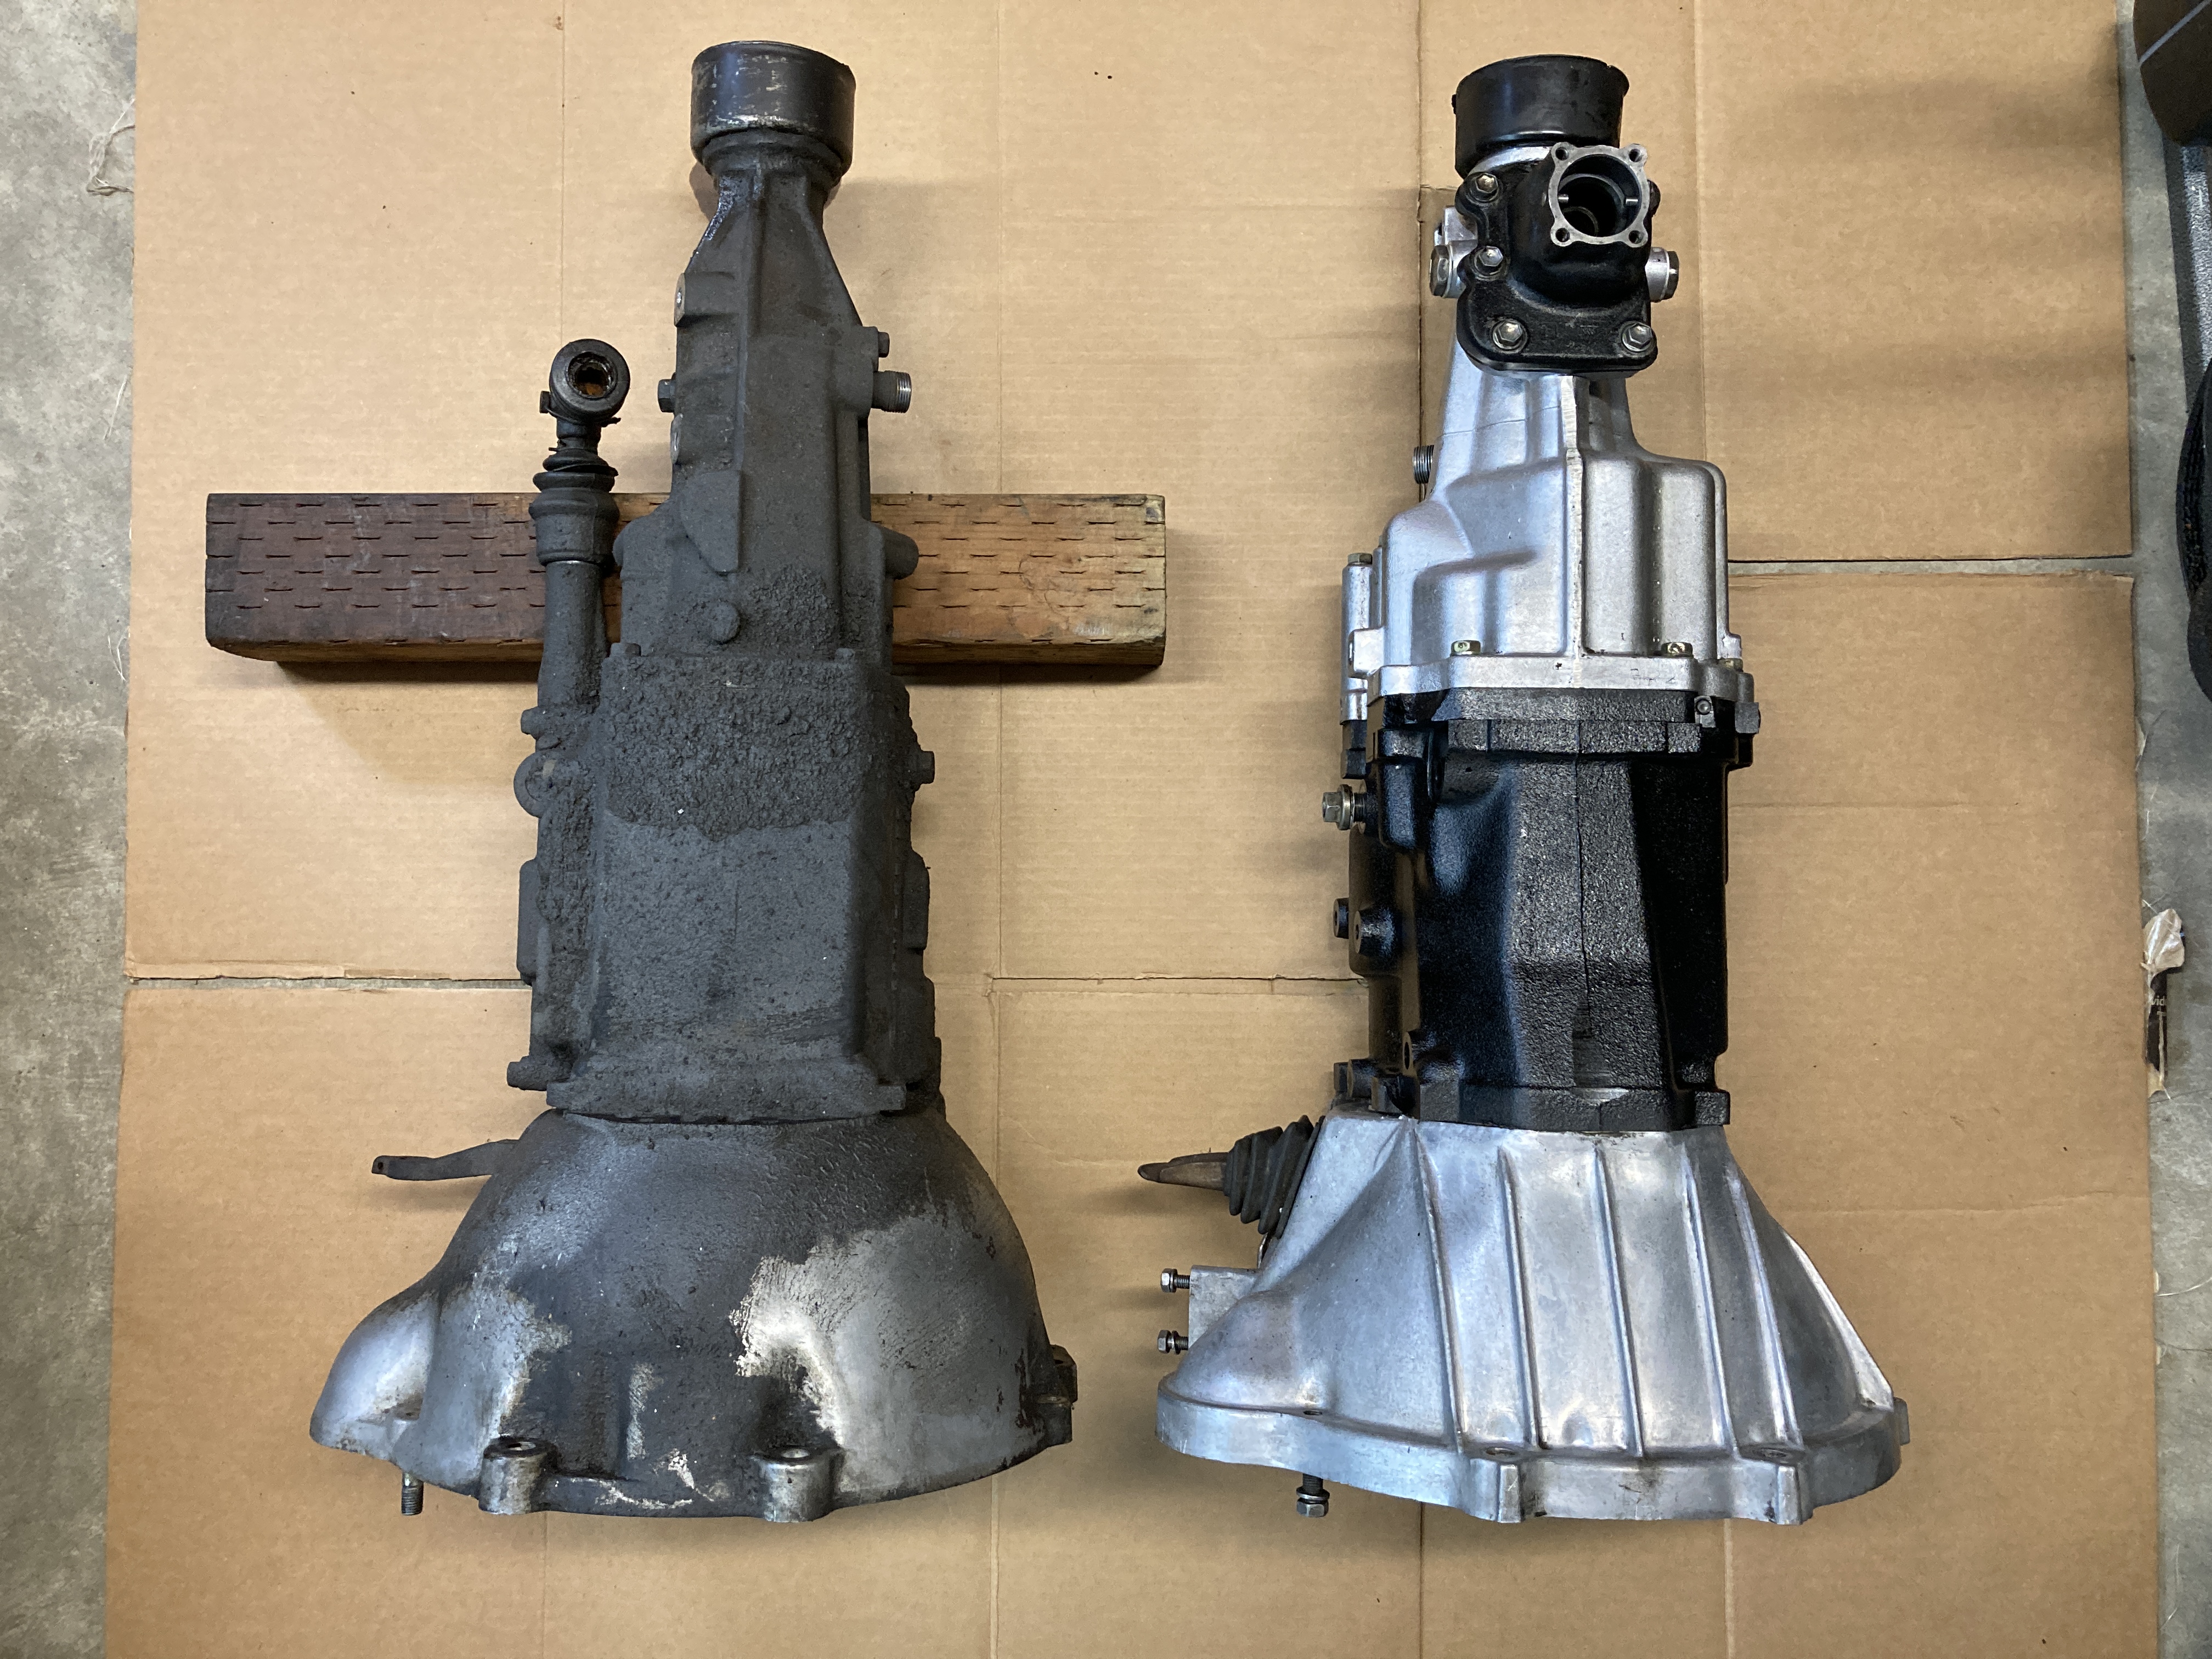
Toyota L43 4 speed vs Toyota W50 5 speed Transmission
As you can see the basic overall dimensions of the transmissions are the same, but the shifter location sits back a few inches on the 5 speed.
Wheels
The original 14in wheels we long overdue for a refresh when we bought the Chinook. I’m not sure what these are called but I’ve always referred them as the 14in slotted steel wheels (steelies). You can find them with holes instead of slots, but they are basically the same wheel otherwise.

After having the local tire shop remove the old tire, the first step is to degrease and sand the face of the steel wheel until everything is as smooth as you can get it. Depending on the condition of the wheel is you may need to start with a much higher grit sandpaper and work your way down to something finer. Leaving a little bit of texture from the sandpaper is fine because you’ll need a surface to allow the primer/paint to have something to bond to.
*Note I forgot to tell the tireshop to remove the old wheel weight, and valve stem.

After taping up the valve stem, and degreasing the surface one more time, I applied two coats of wheel primer. I’m not sure if this necessarily needs to be wheel primer specific, but I’m sure there are plenty of other primers that would also work in this application.
Dupli-Color Scratch Filler& Primer Gray :https://amzn.to/3lF2Cm1
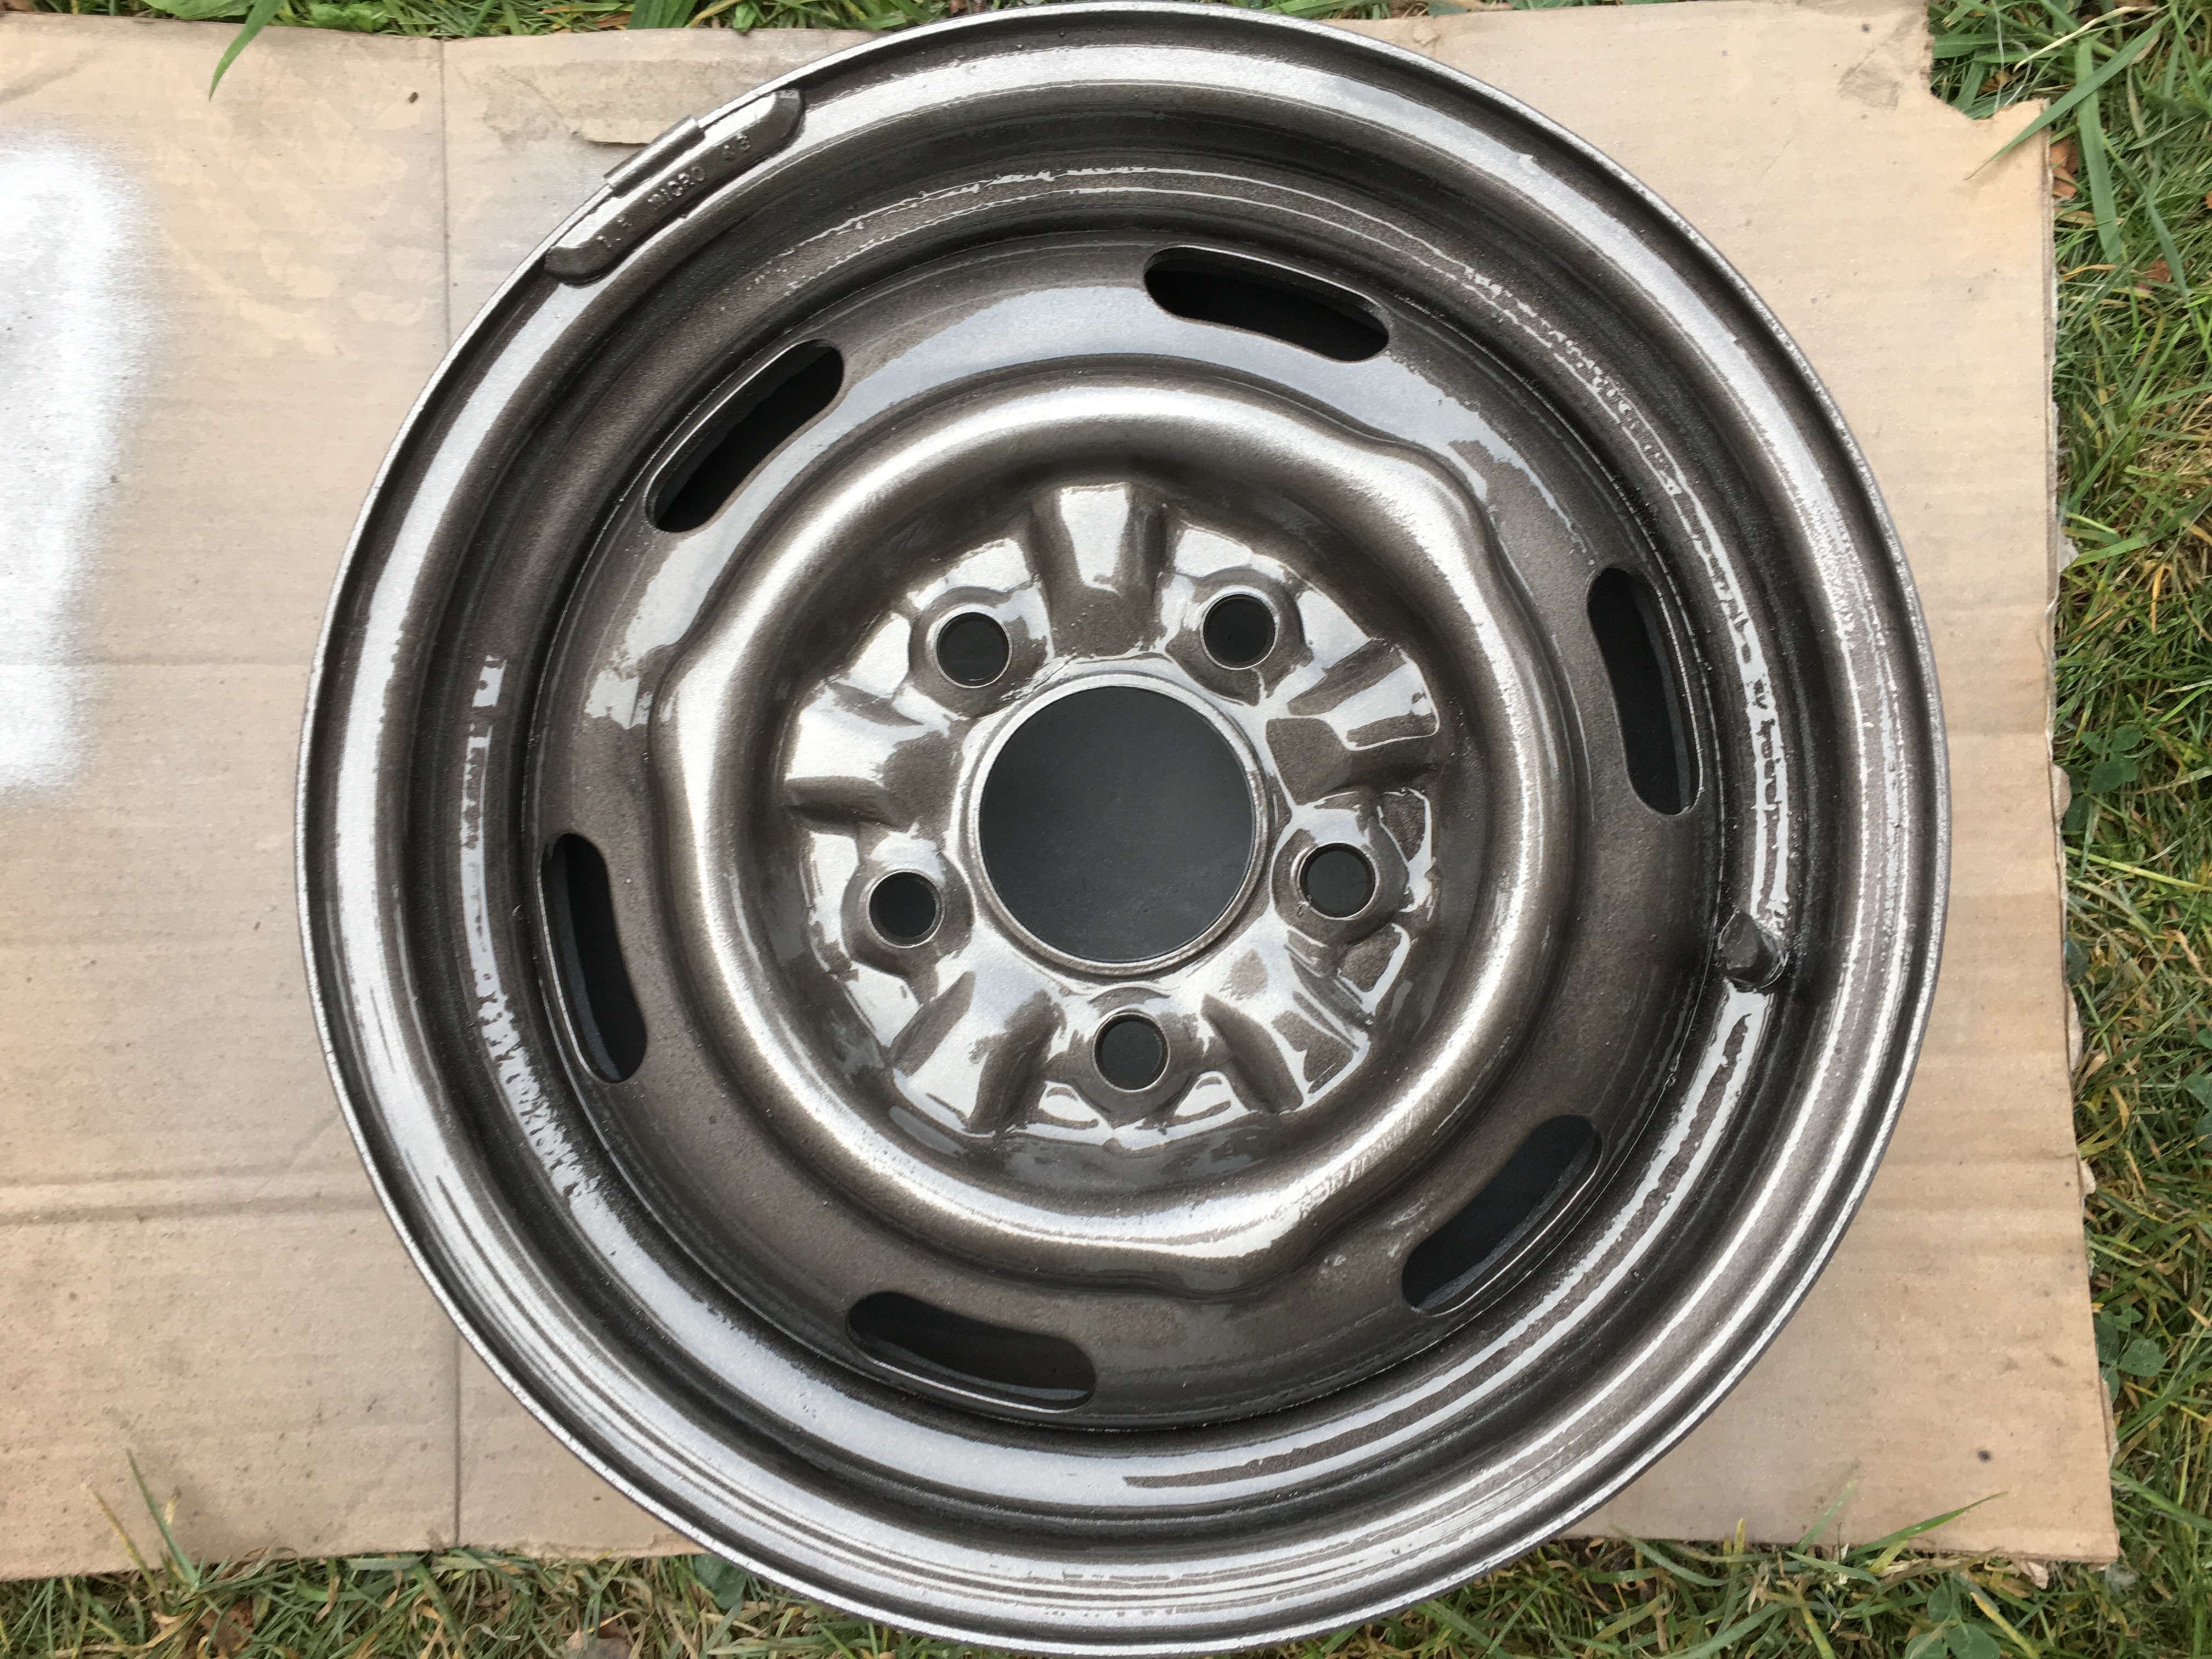
After the primer had dried, I applied two coats of Dupli-Color Graphite wheel paint. I liked the darker color along with a small amount of flake that is in the paint. Dupli-Color sells a few different colors to choose from, but at the point you could probably get away with just about any color spray paint.
Dupli-Color HWP102 Graphite : https://amzn.to/3jBVwgd
I don’t recall the actual time I waited, but I followed the directions on when to apply the clearcoat after the paint has dried a bit. I was careful to apply this because in my experience it’s very easy to get runs if you apply too much at once.

Overall I was happy with the results considering this was done with spray paint cans. If these were wheels that I really loved I would have spent the extra money to have them sand blasted, and powder coated. Doing that would have produced a much higher quality finish and offered me a lot more colors to choose from. In the end this has worked out great and the finish has held up since I painted them back in early 2019.
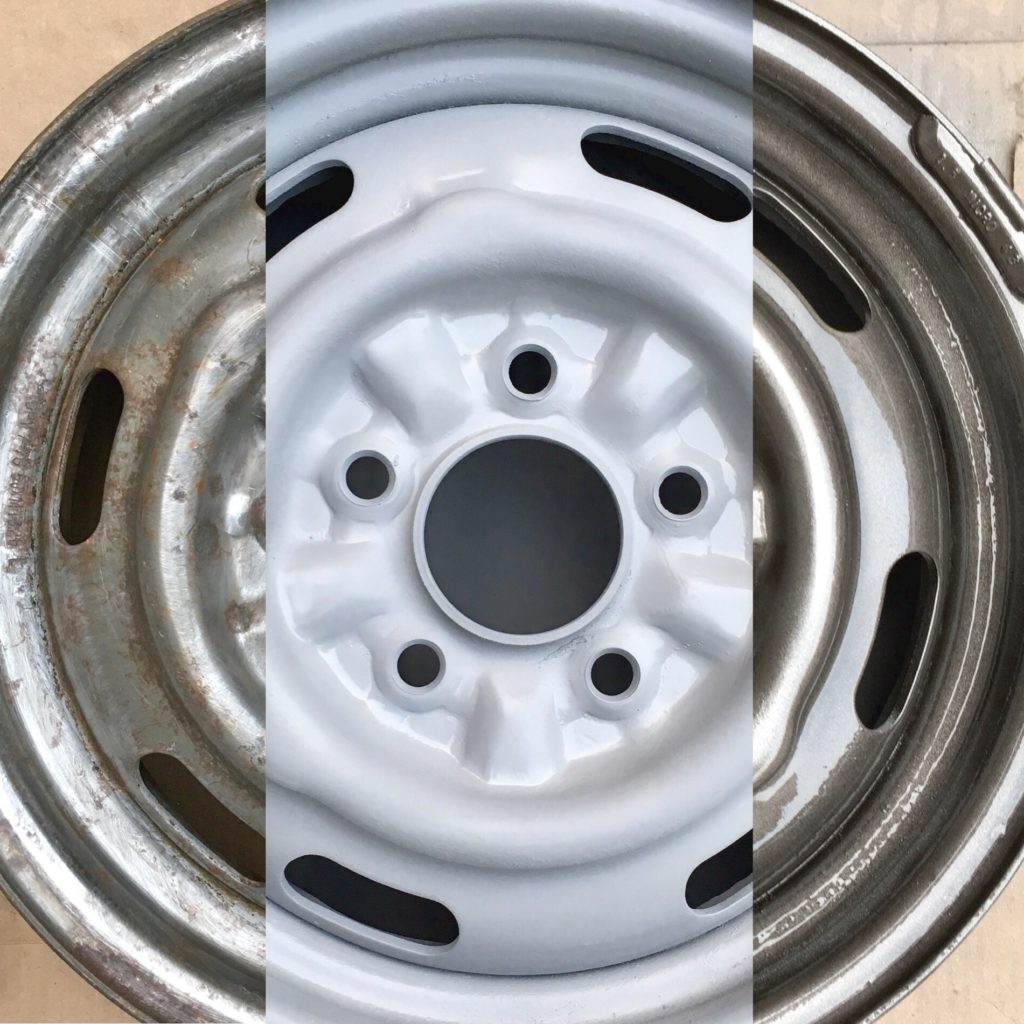
Sanded || Primed || Painted/Clearcoated
Tires

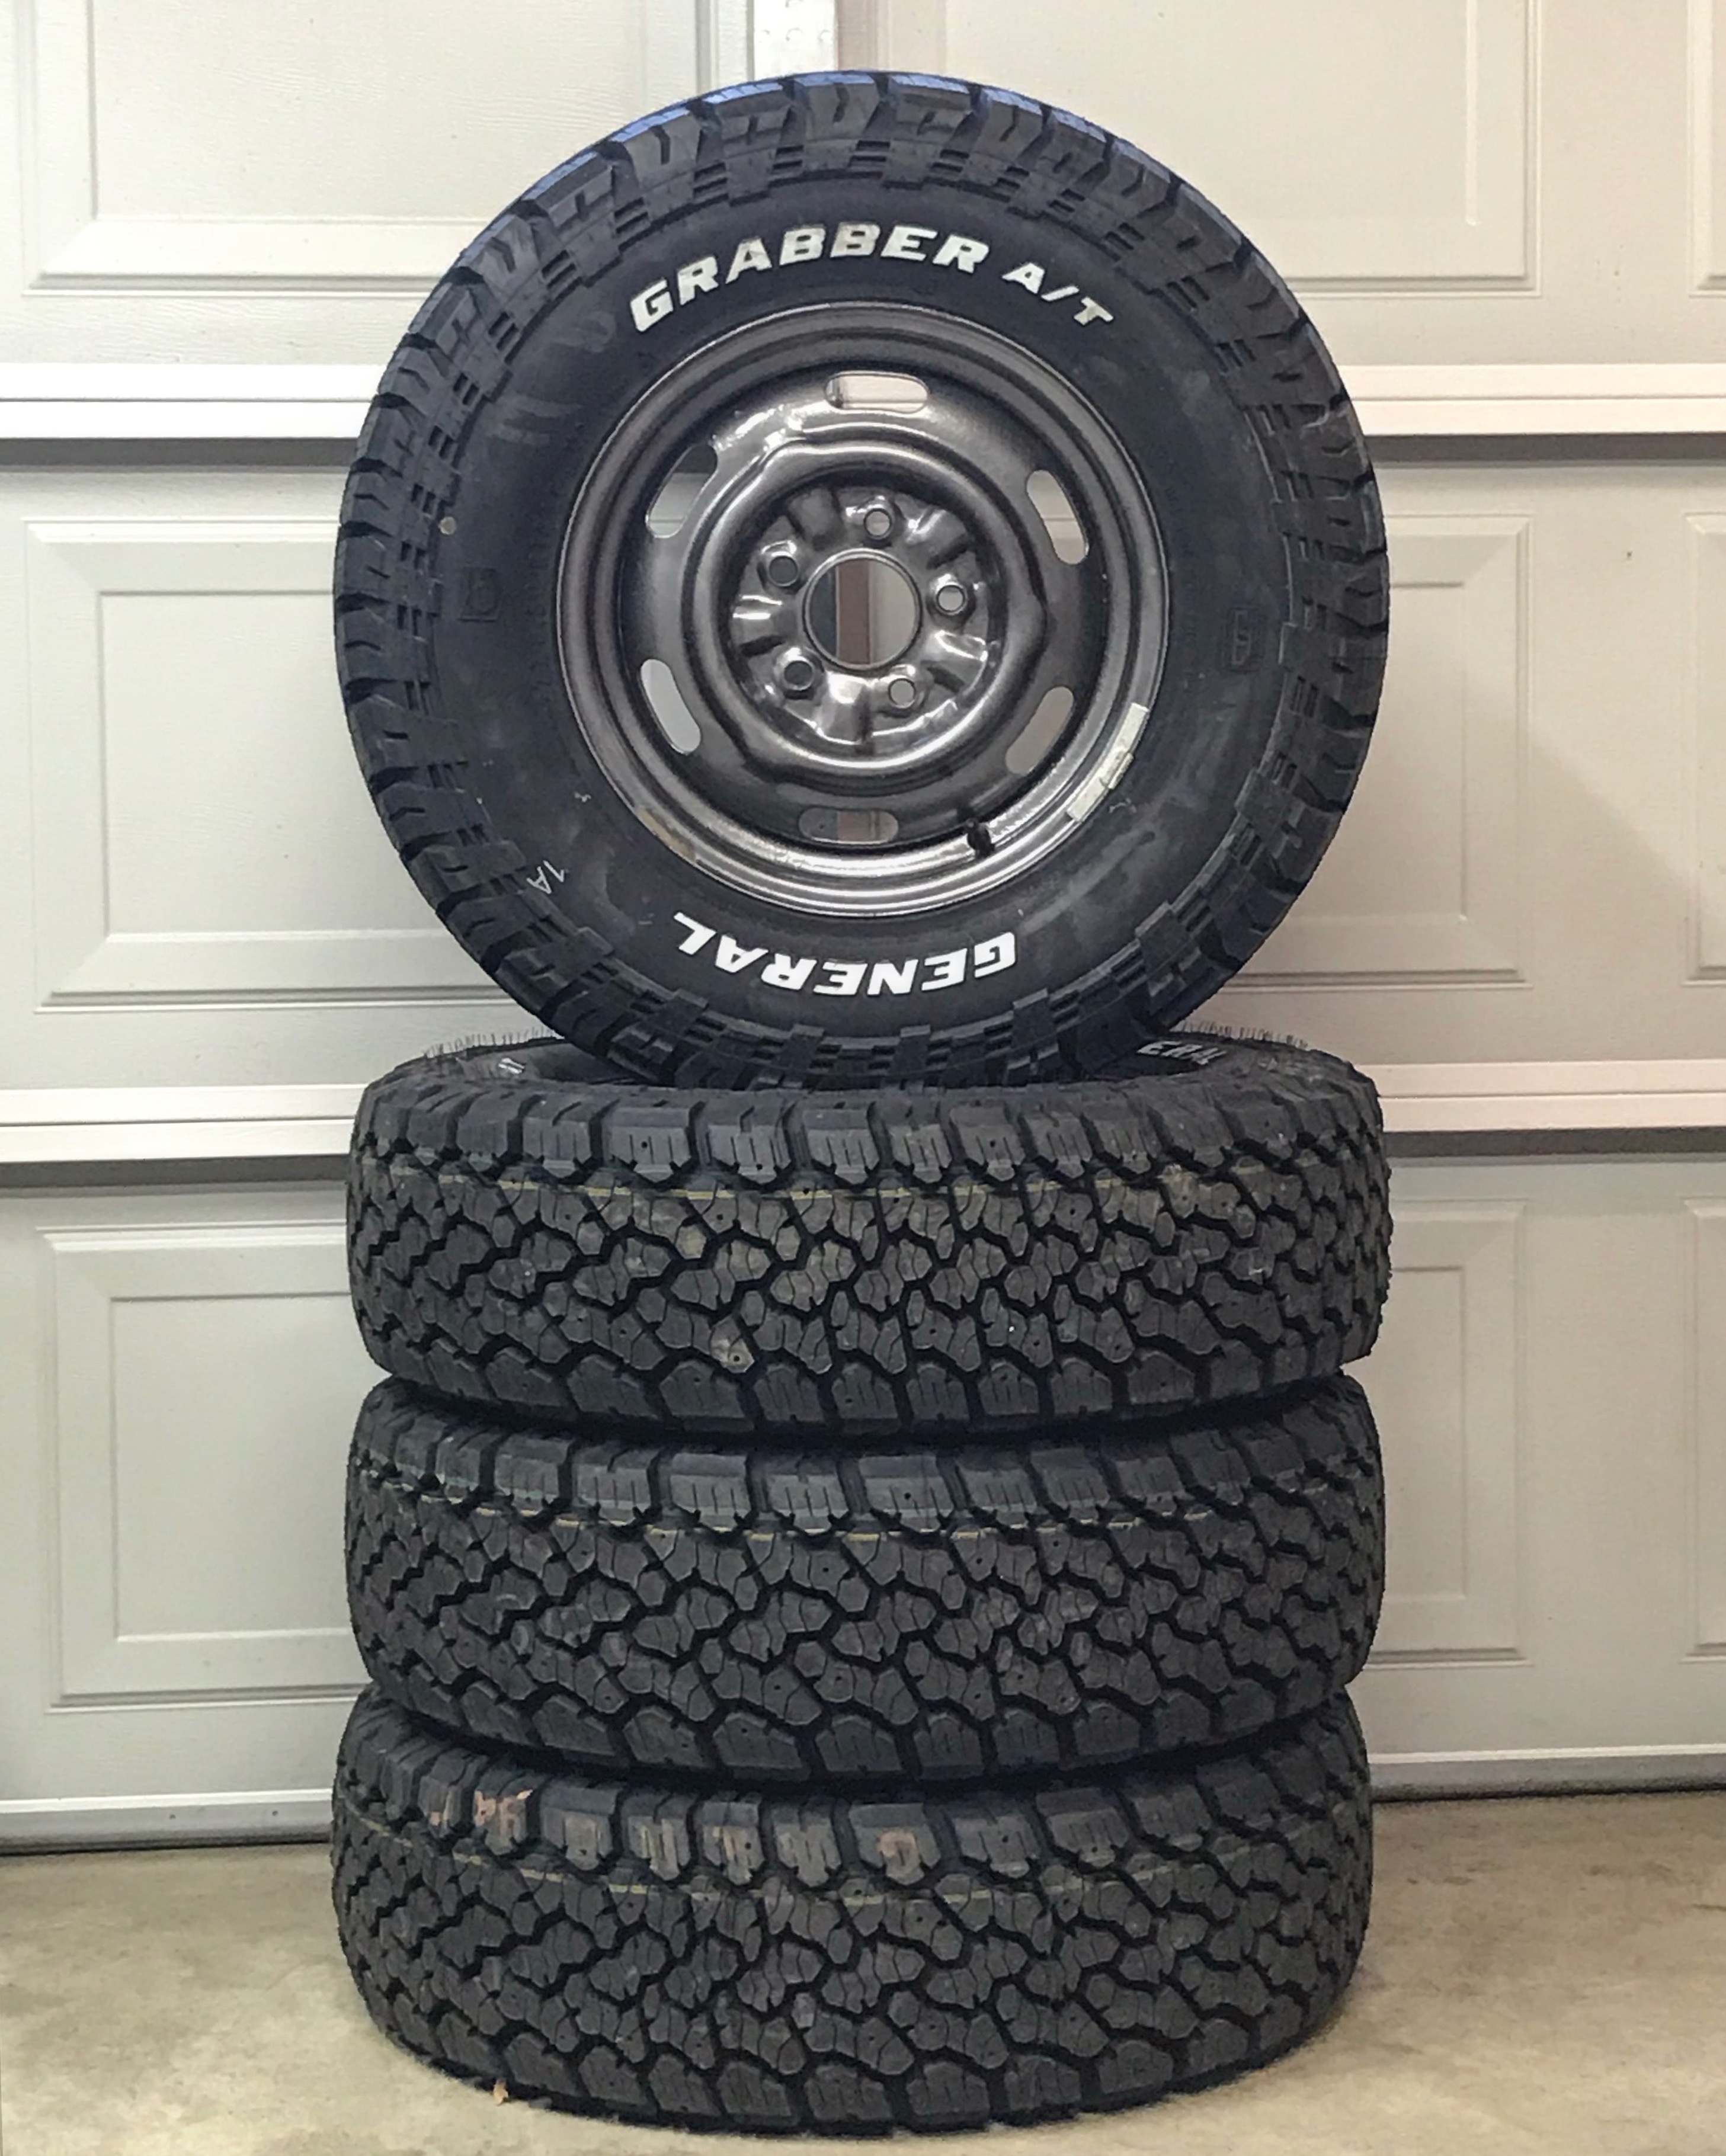
The tires that came on our Chinook were long overdue to be replaced. I wanted to keep the original 14in steel wheels for the time being to keep the costs down, but finding 14in tires that can handle the weight of the camper can be a challenge. What we ended up buying…
(4) General Grabber AT/X 27 x 8.50 R14: https://amzn.to/34Sv11R
Since we plan to travel a fair amount on forest roads, I decided on a set of AT tires for the additional traction they provide. Along with the traction they are also wider than the stock tires we had which has given us a little more stability on the road. I haven’t noticed a decrease in MPG due to the extra weight of the tires, but I’m sure we lost .5 MPG or so, but we may have gained a few MPG with the engine upgrades. To give you a better idea we’re averaging 22mpg fully loaded (3,800lbs).
Why four AT tires? It’s common to use only AT tires in the rear, but I decided it would be best to keep them on all four wheels, and change the spare over to an AT tire so I’m able to rotate them, or use the spare on any corner if needed.
Suspension/Steering/Brakes
Almost all of the suspension, steering and brake hardware appears to be original. Everything was working correctly, but it was in need of a refresh. I started with replacing the brake discs, pads and lines first. The front calipers and rear drums looked in good condition so they were reused. New ones are available if you needed them. While doing this job I also took the time to repack and grease the front bearings. To finish it off I also replaced the brake master, and slave cylinder along with replacing the old brake fluid.
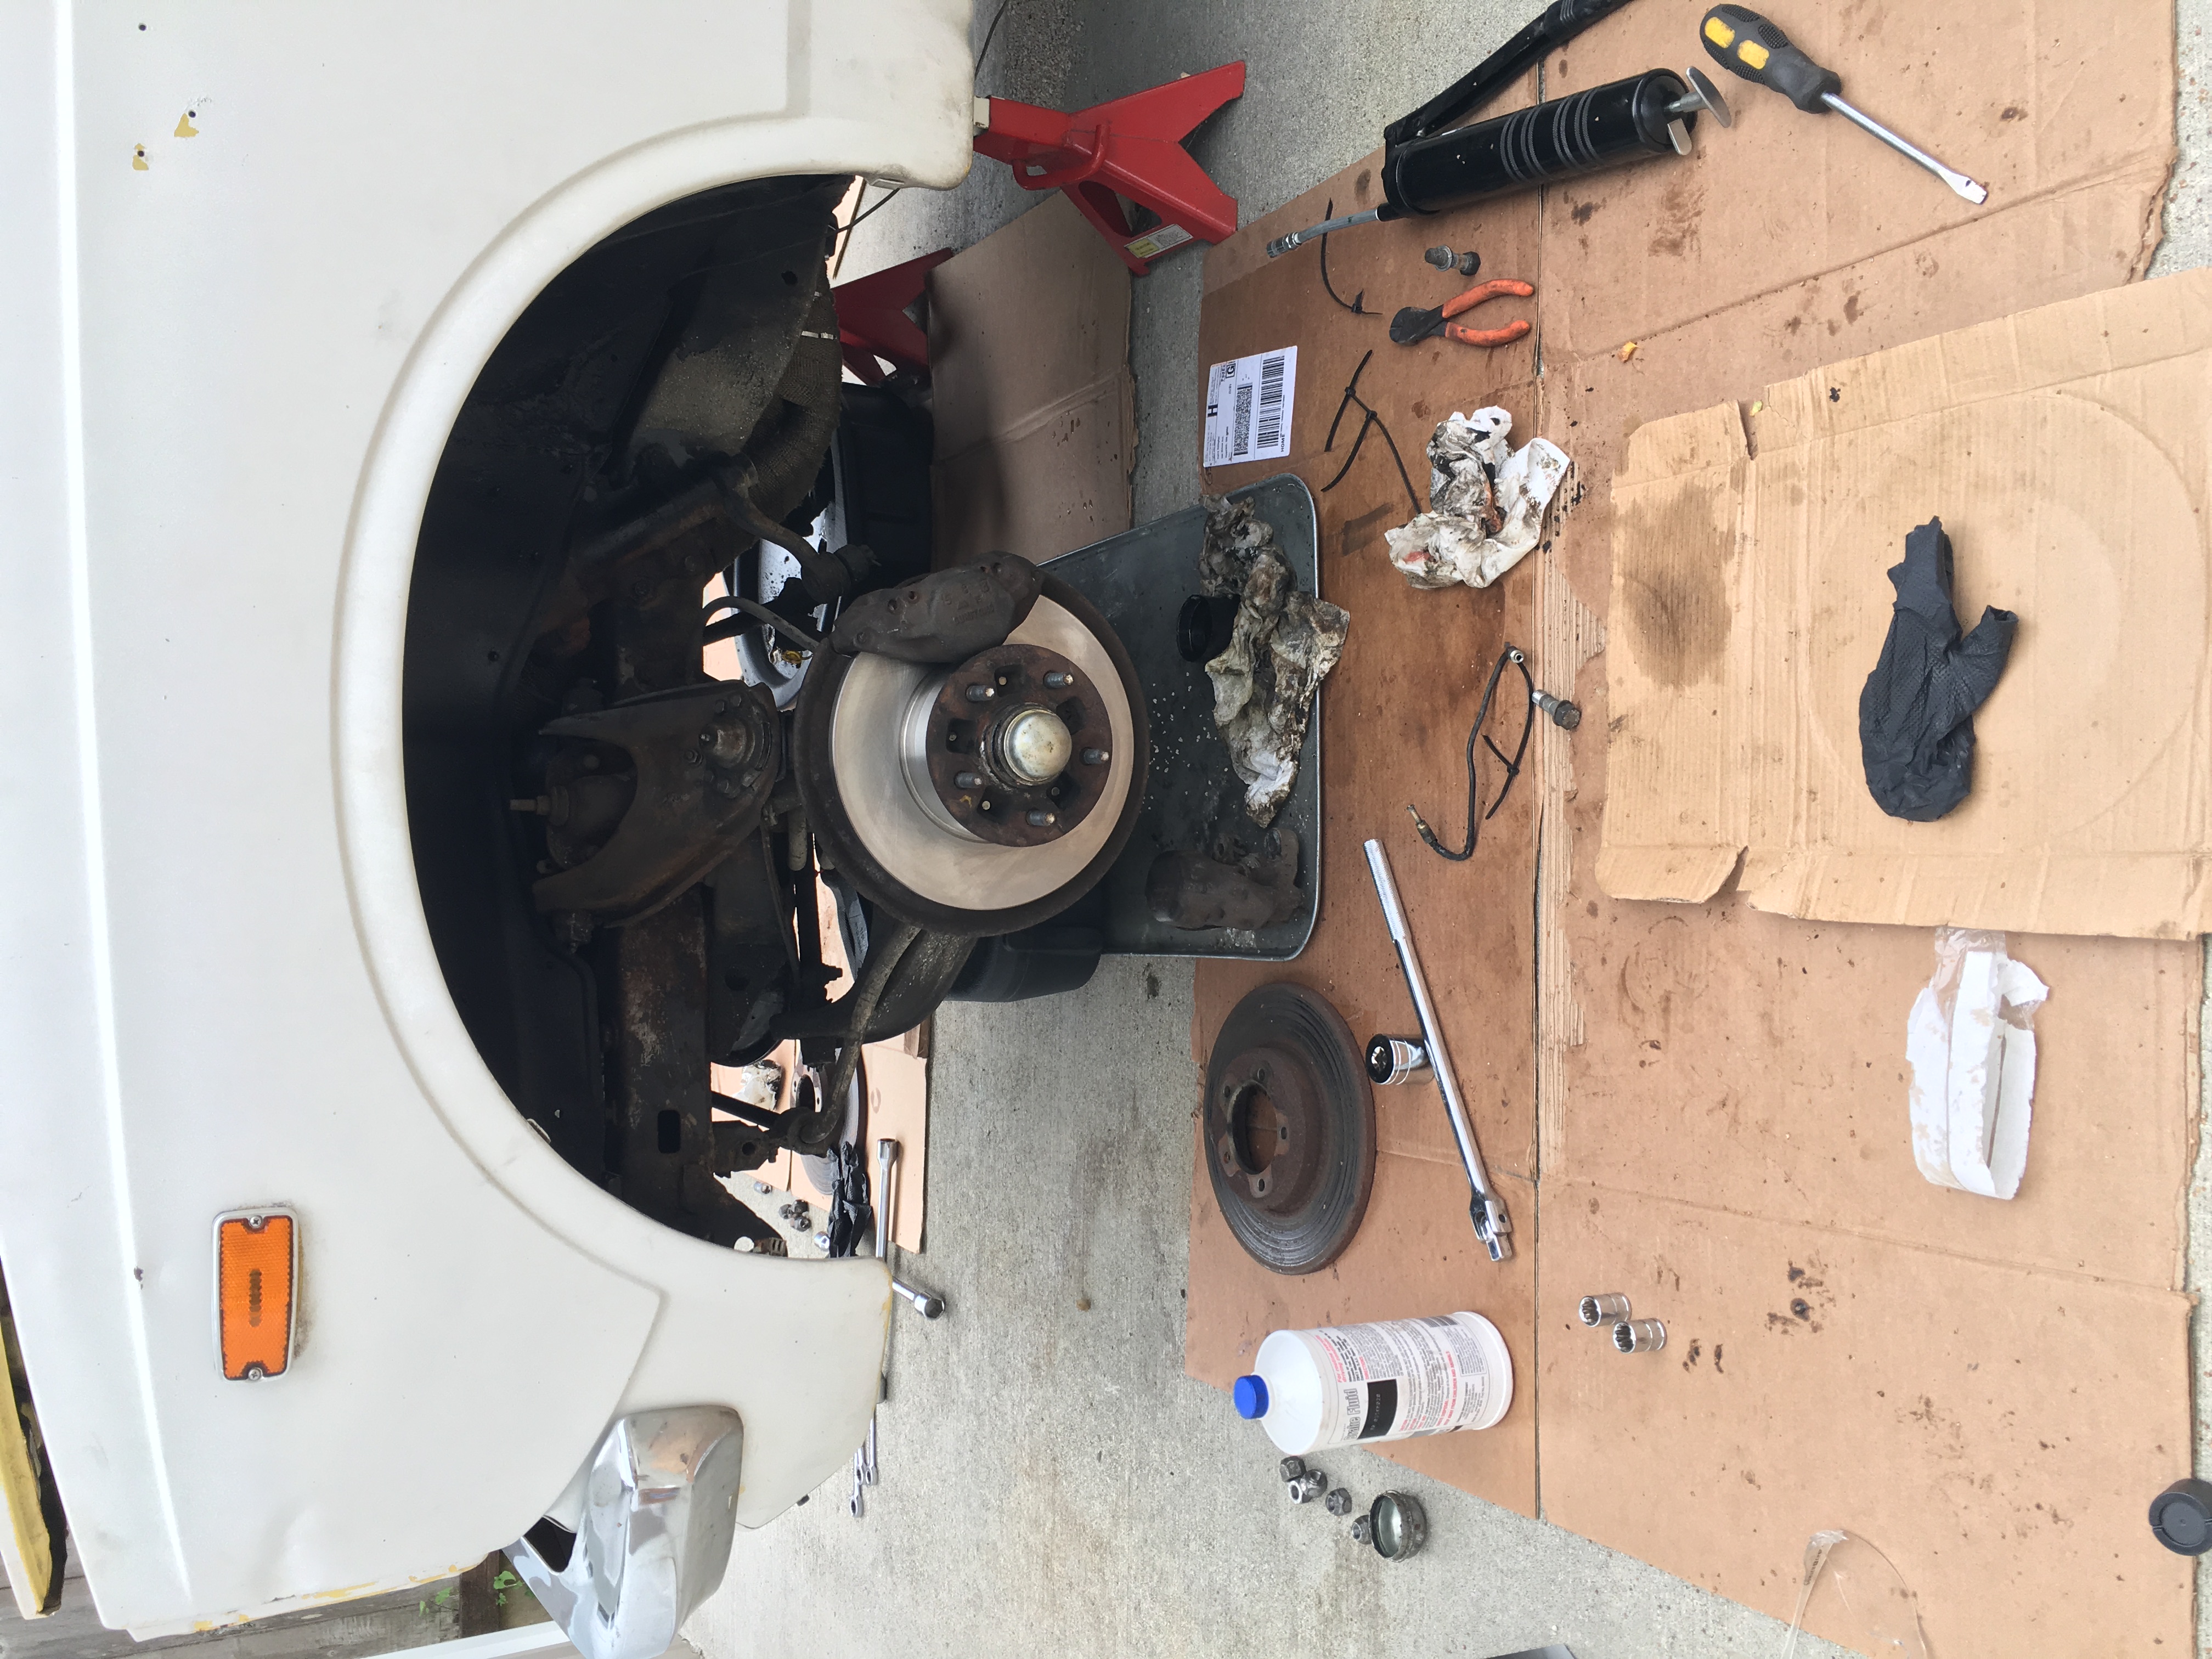
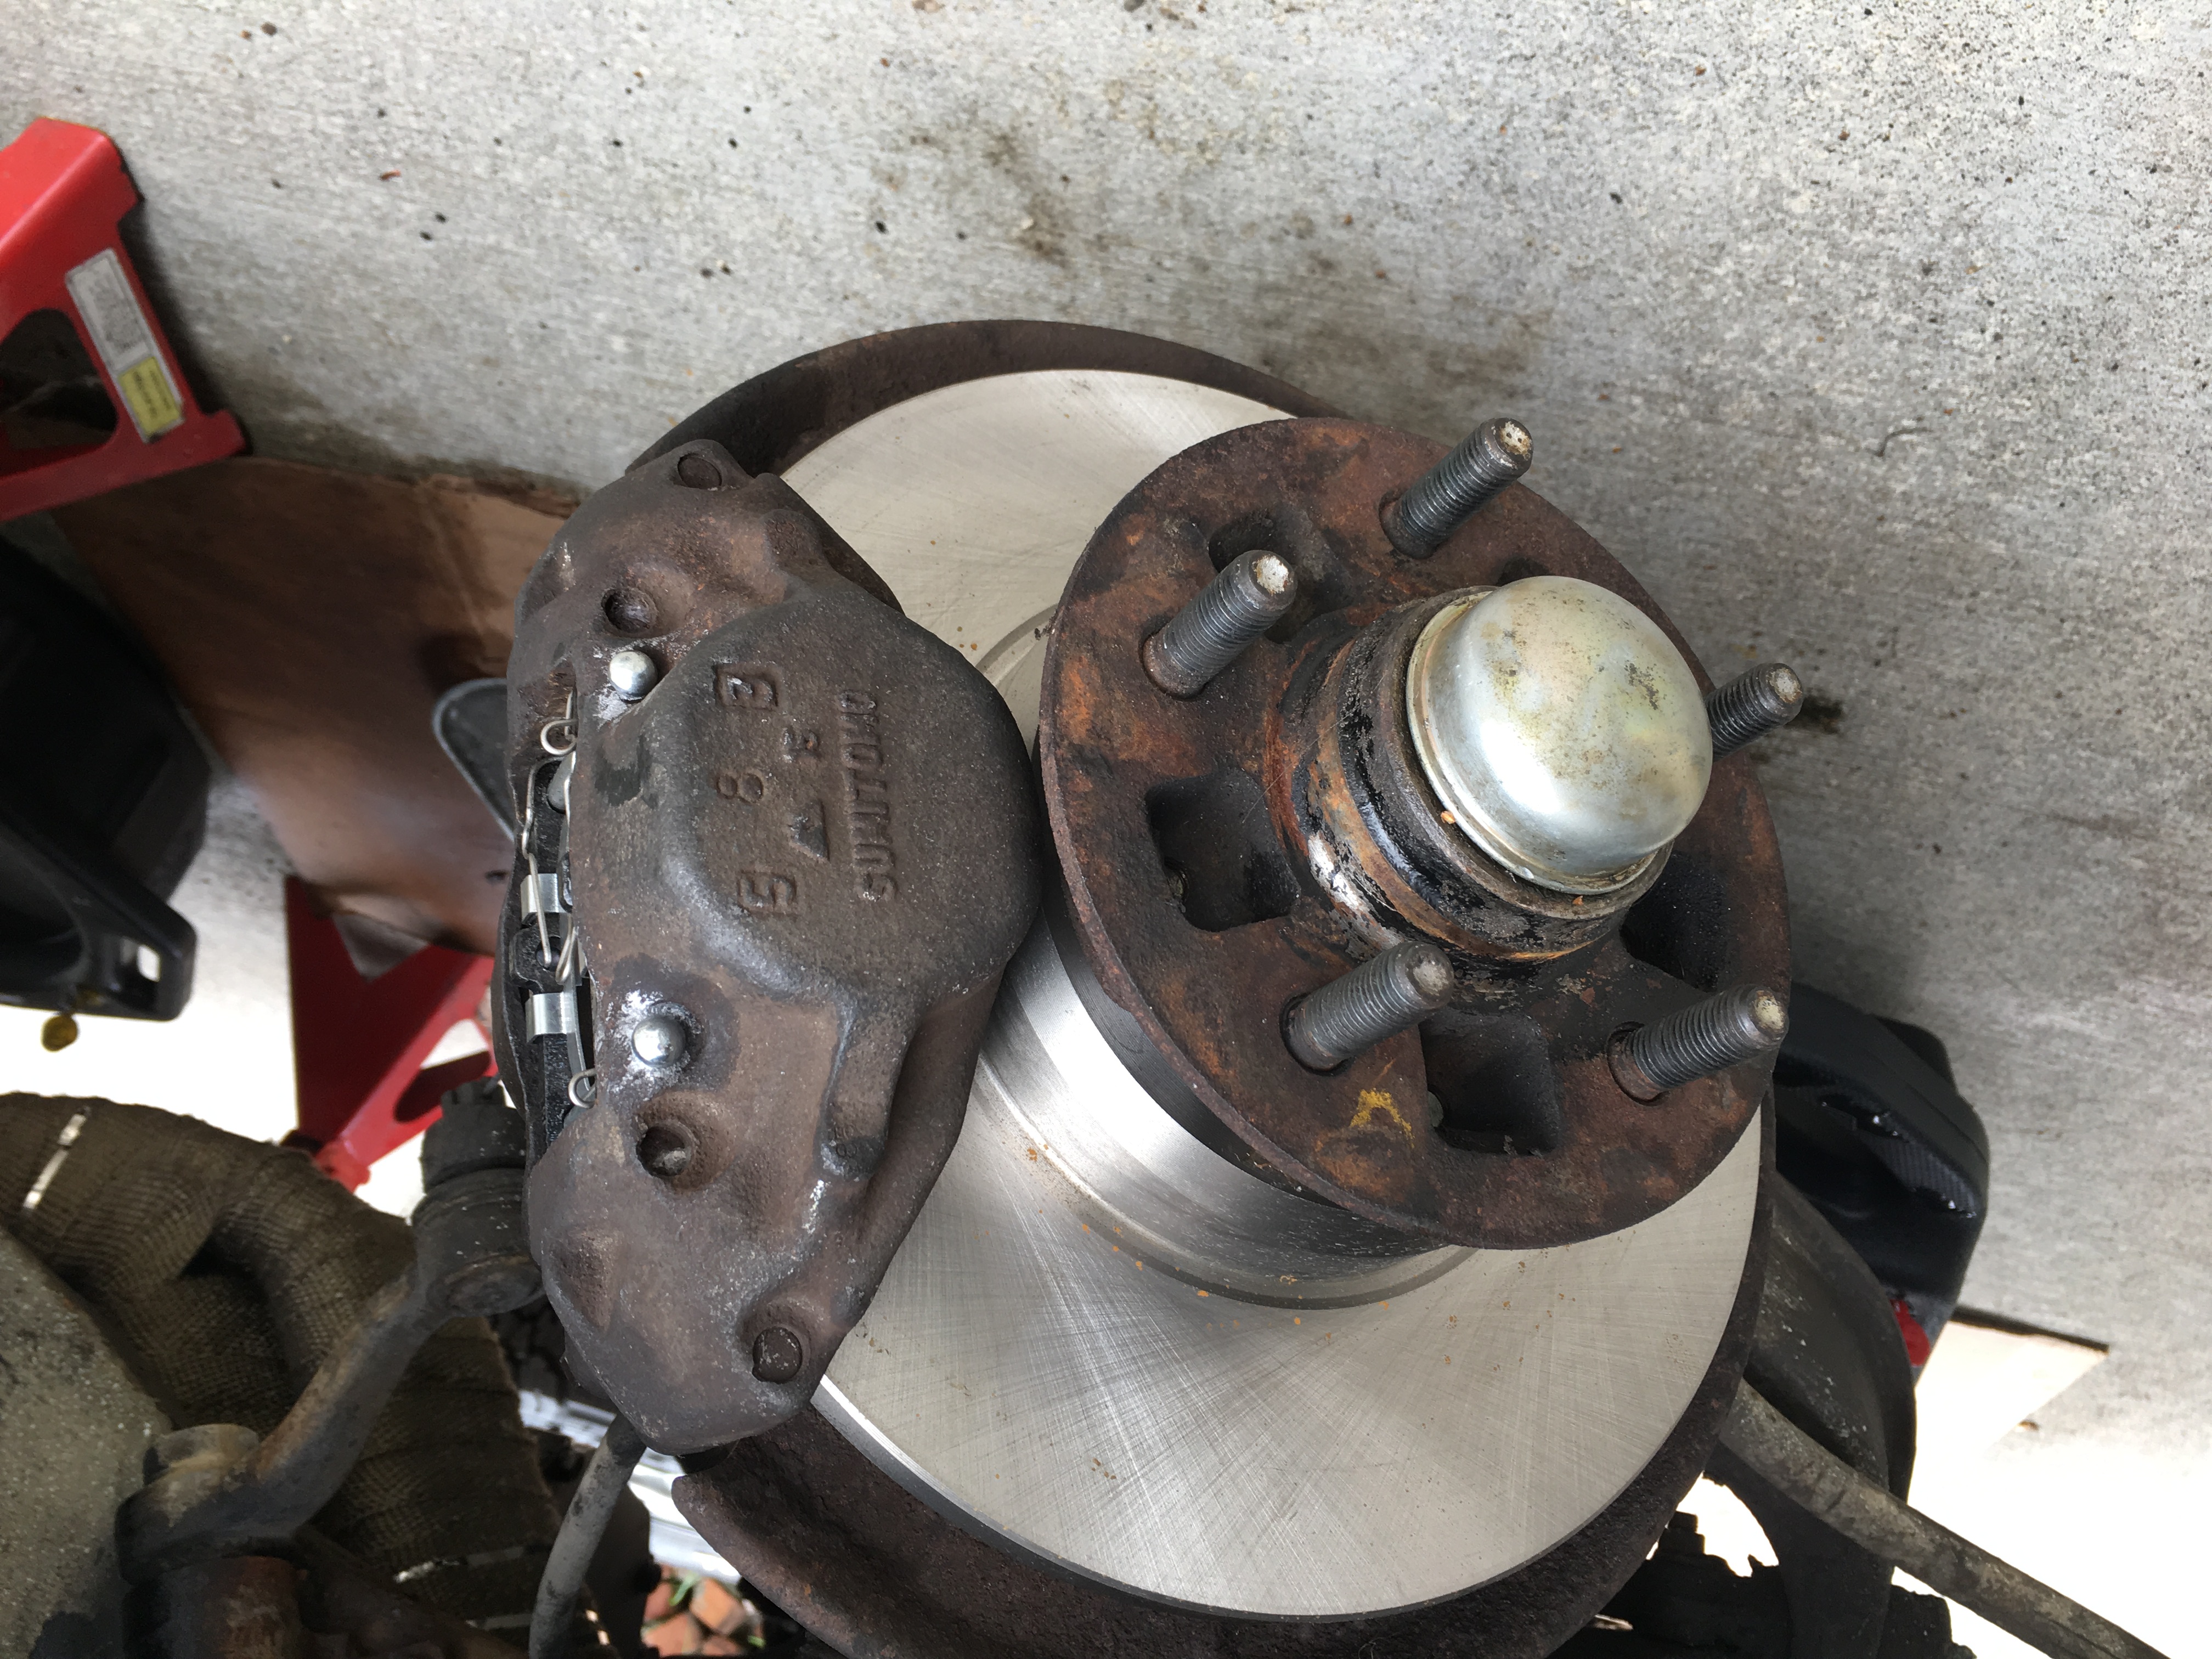
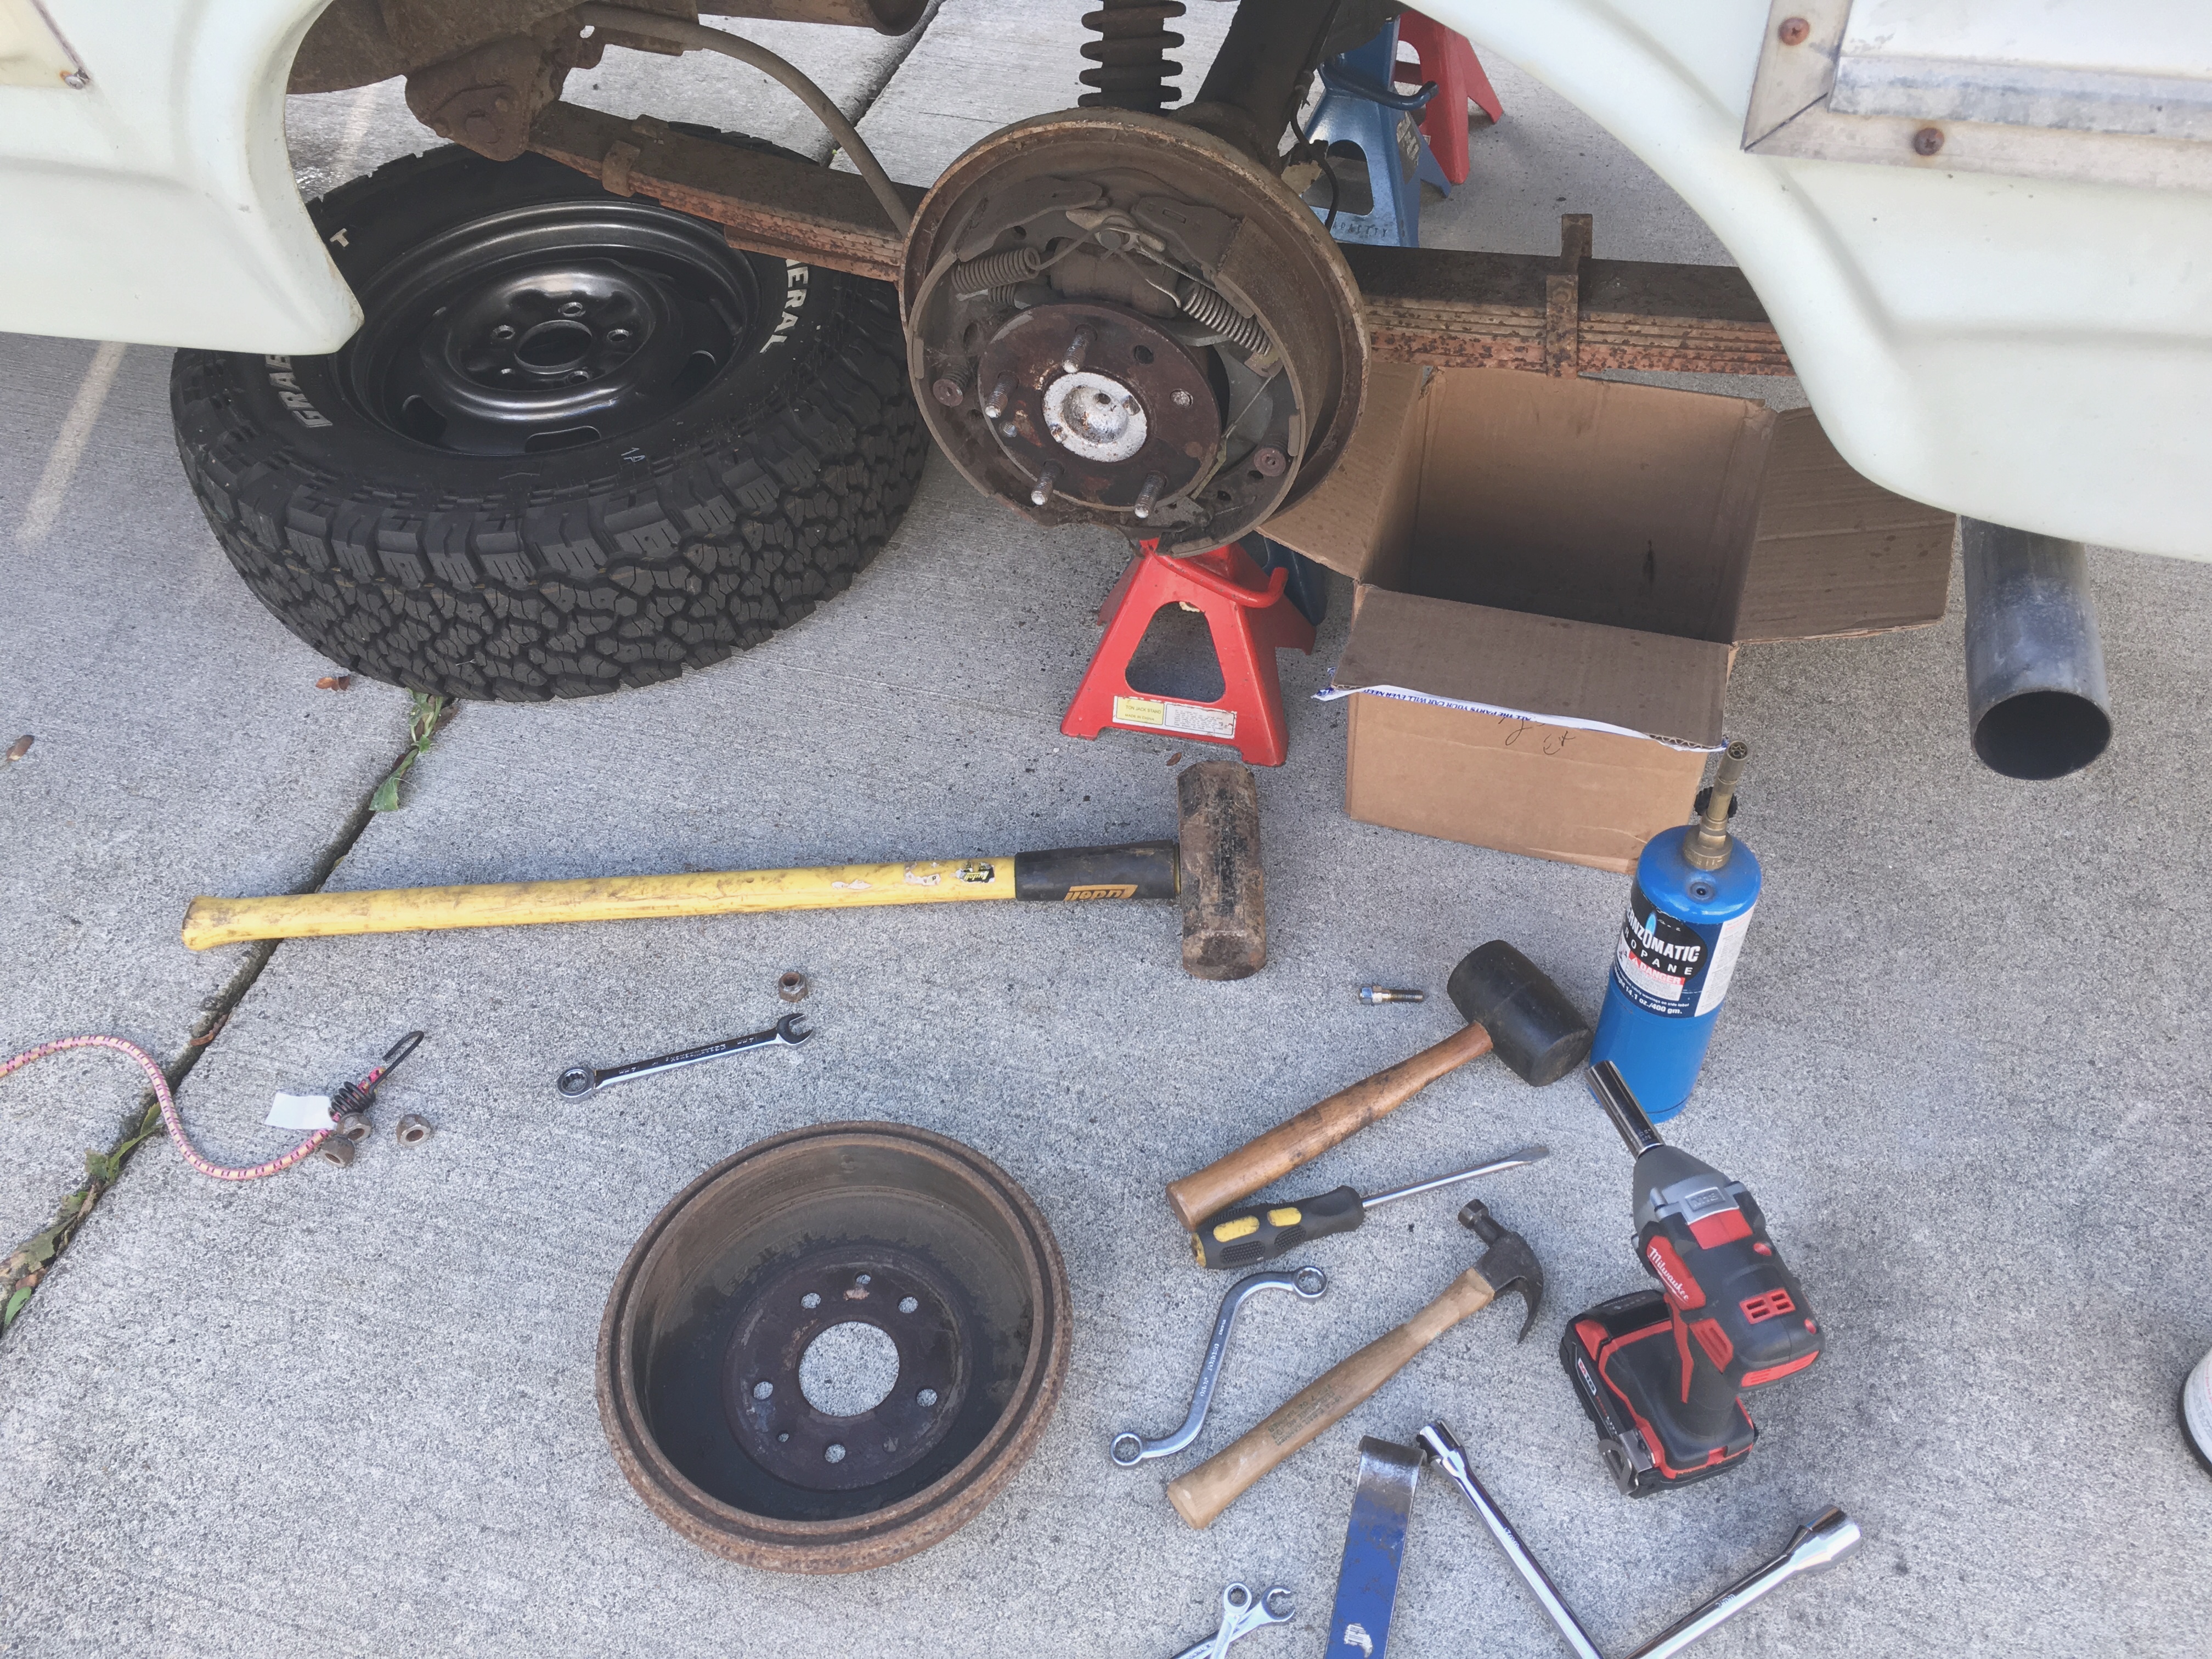
The front shocks were replaced with a set of KYB Shocks. Along with the new shocks I also replaced the upper and lower ball joints. This definitely has given the front end a tighter feel while on the road.
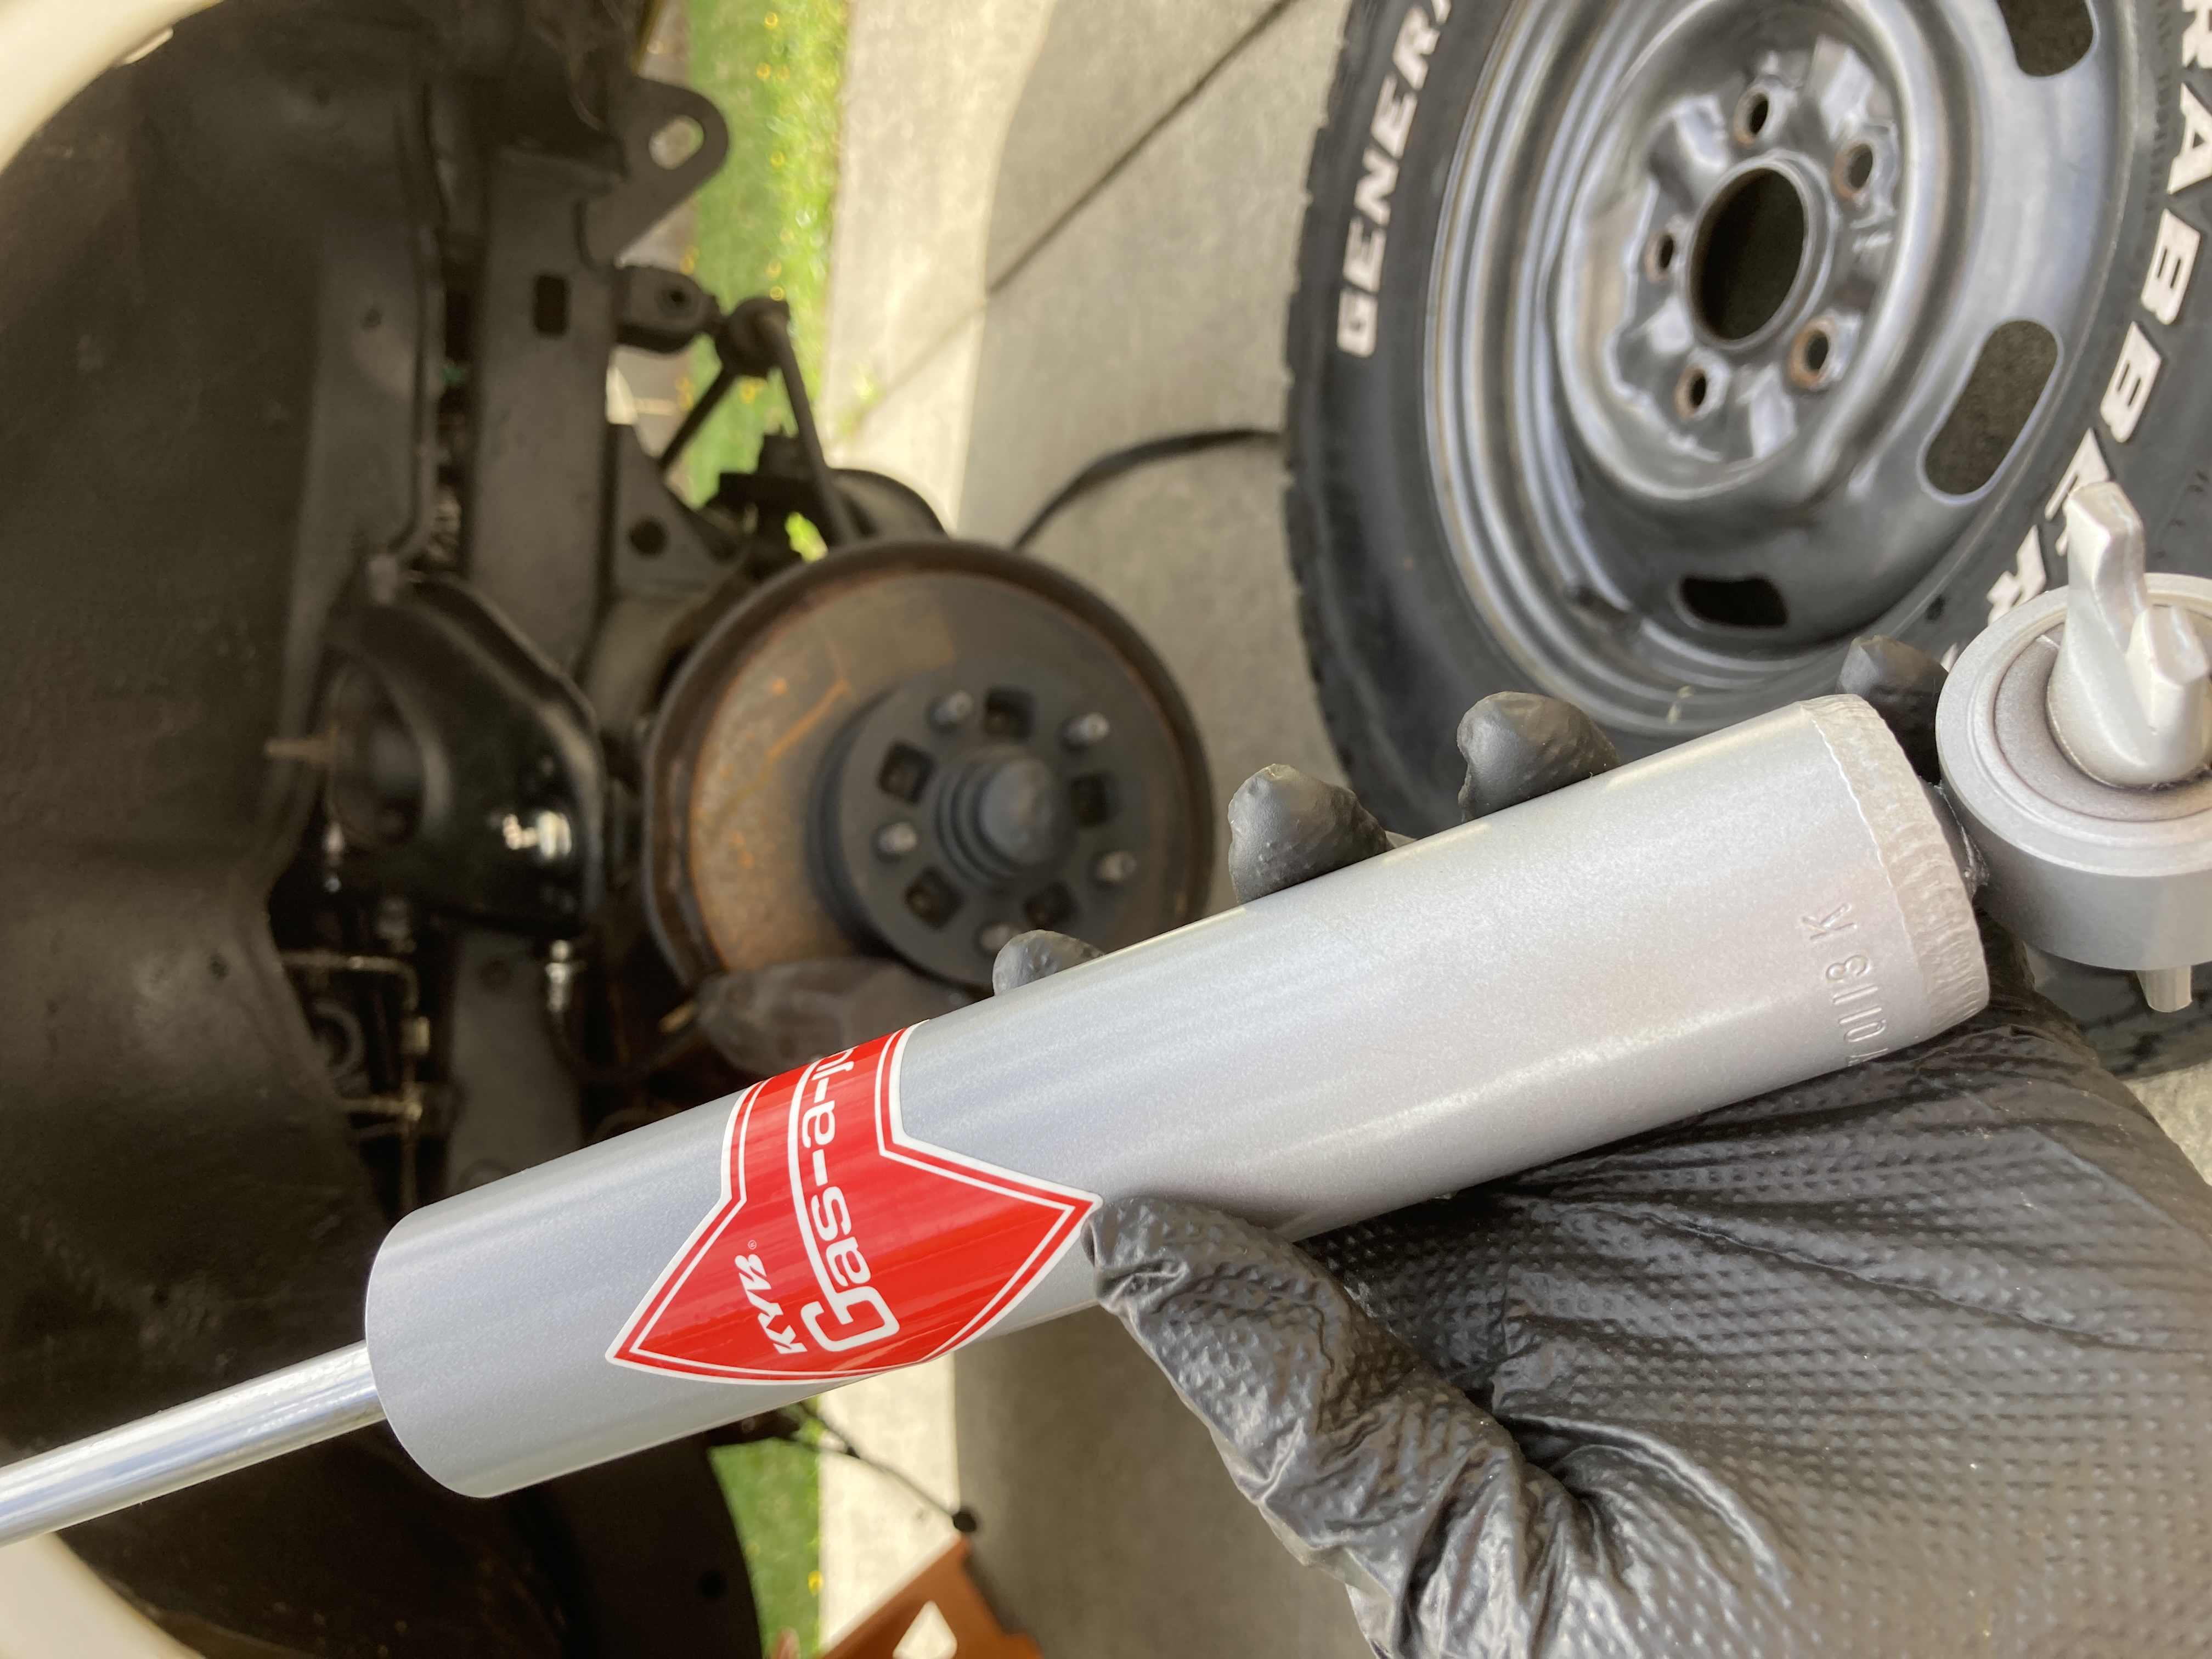
The rear shocks haven’t been replaced because I’m not sure which brand I will be going with, or if I should spend the money and upgrade to a set of airbags for the extra support. For the moment I’ll keep the rear shocks, and leaf pack since they appear to be in good shape.
The sway bar bushings and ends have also been replaced. The swaybar bushing ends had worn down to the point were they would rattle while going over bumps in the road.
Parts that have been replaced so far:
Front Shocks – KYB Gas Adjust Shocks
Upper Ball Joints – [Rock Auto]
Lower Ball Joints – [Rock Auto]
SwayBar Bushings – [Rock Auto]
Front Brake Discs – [Rock Auto]
Front Brake Pads – [Rock Auto]
Front Brake Lines – [Rock Auto]
Brake Master Cylinder – [Rock Auto]
Brake Slave Cylinder – [Rock Auto]
Rear Brake Cylinders – [Rock Auto]
Rear Brake Hardware – [Rock Auto]
Rear Brake Line – [Rock Auto]
Camper Exterior
The camper exterior is in good condition, but after many years out in the elements of the PNW it was in need of some cleaning. The previous owner thought it would be a great idea to spray clear coat on the camper exterior and eventually it started to fade and turn yellow.
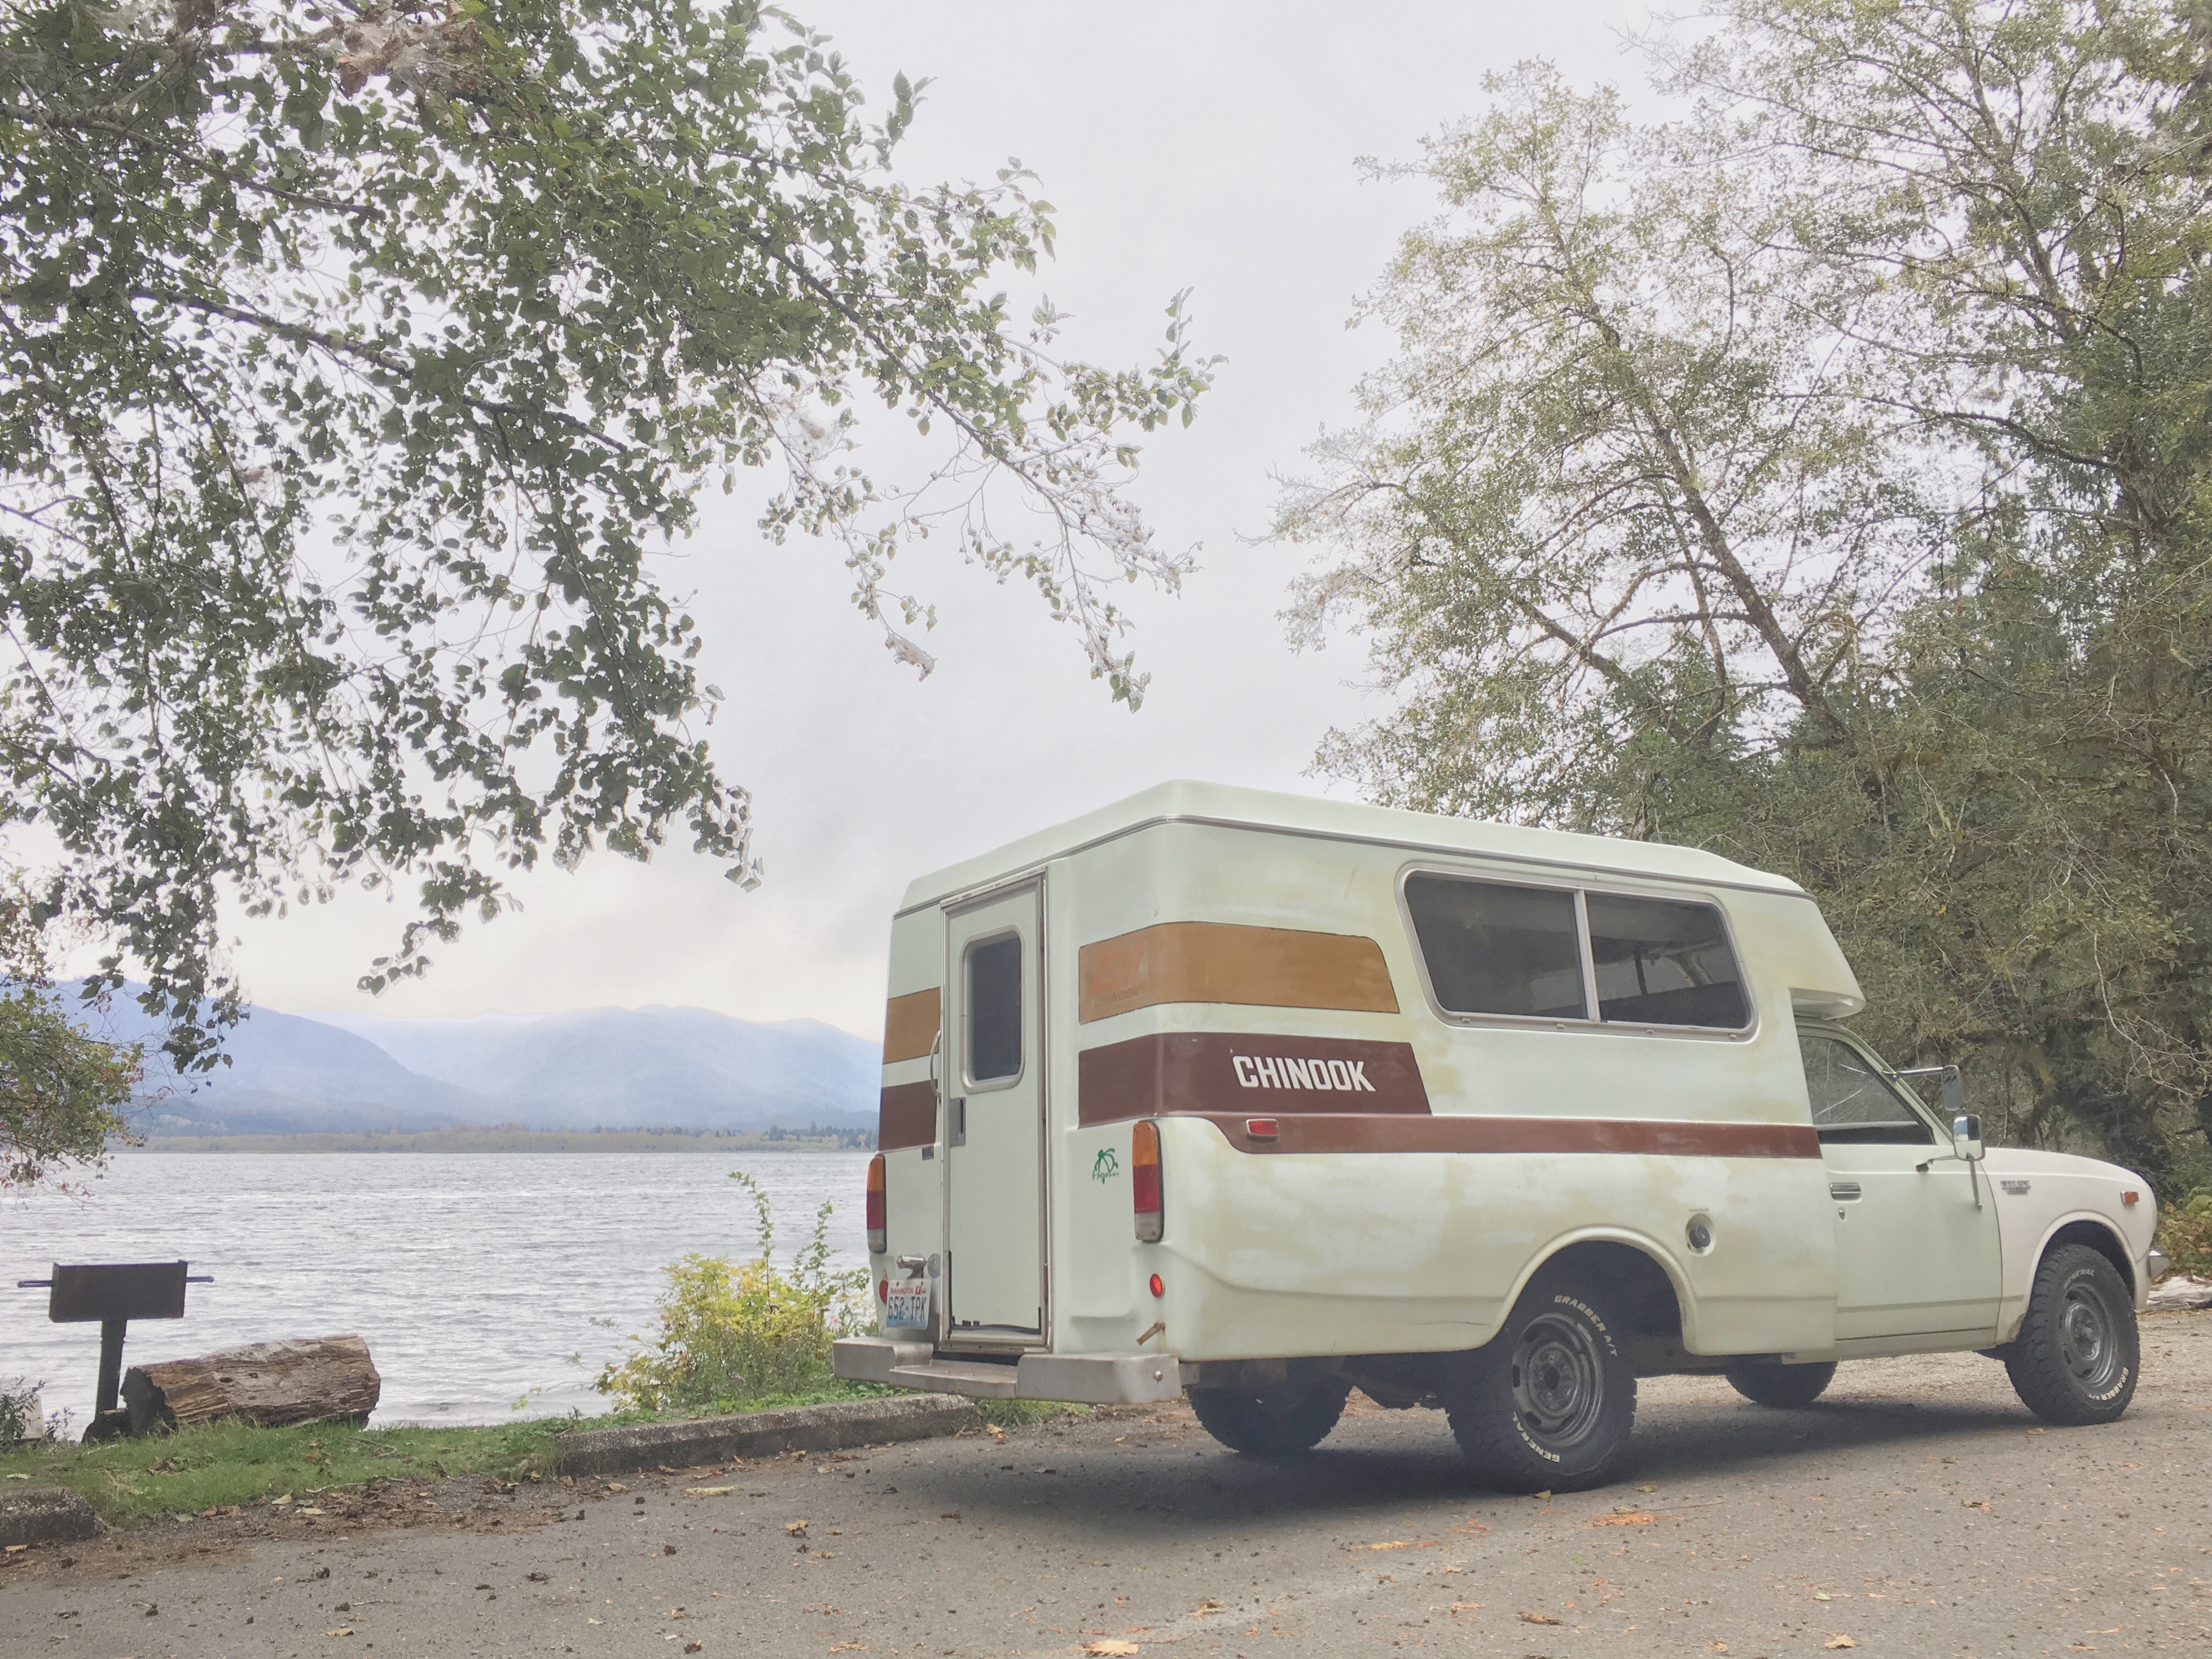
To tackle this project I needed to start by carefully removing the added clear coat. A quick wash, and claybar was first to completely clean the surface. I tried using a slightly abrasive compound like Meguiars M205, but it wasn’t enough. In the end I had to wet sand the entire camper shell with 1500-2000 grit sand paper to remove the clear coat.
Afterwards I used the Meguiars M205 with an orange pad on my Porter Cable polisher to remove the fine scratches left behind by the wet sanding process. Most people won’t need to wetsand the exterior and could benefit from starting with a polish from a dual action polisher like the Porter Cable. I then switched to a black pad to polish the shell, and a final protective coat of Collinite No. 845.

The dual action polisher I used: Porter Cable 7424XP
Steps needed to polish the camper exterior:
- Wash
- Claybar
- Wet sand using 2000, and 1500 grit sandpaper
- Meguiars 205 + orange pad
- Polish + black pad
- Collinite No. 845 Wax
Mirror Replacement
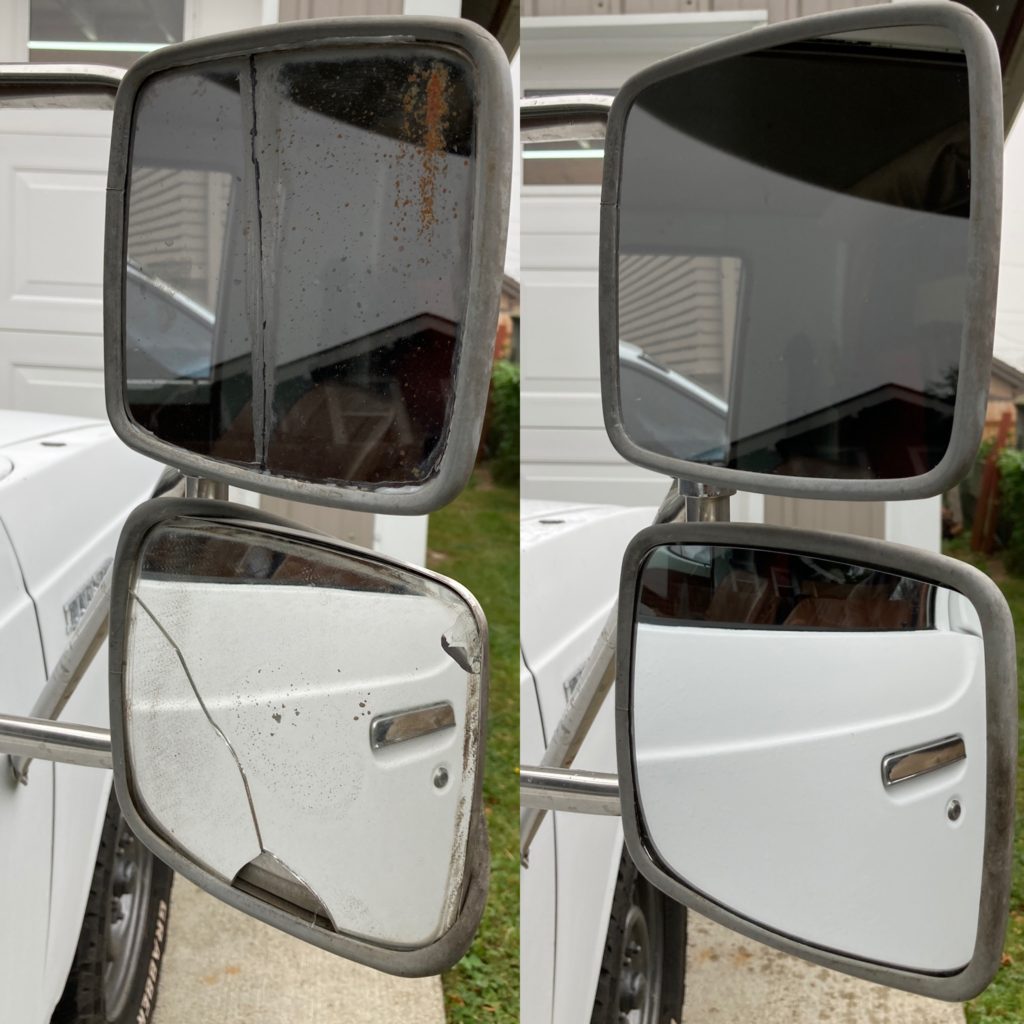
The mirrors on the driver side were in descent condition, but the passenger side was horrible. While driving they were basically useless due to the vibration, and cracks across the glass.
I found the correct replacements for the top and bottom mirror glass. I also found the metal housing, and the rubber trim that holds in the glass in place. I was able to reuse our trim, and housing.

The curved glass almost fits perfectly. It’s held in by a piece of 3m tape material that centers the glass. I installed ours a bit too low so there is a small gap at the top.
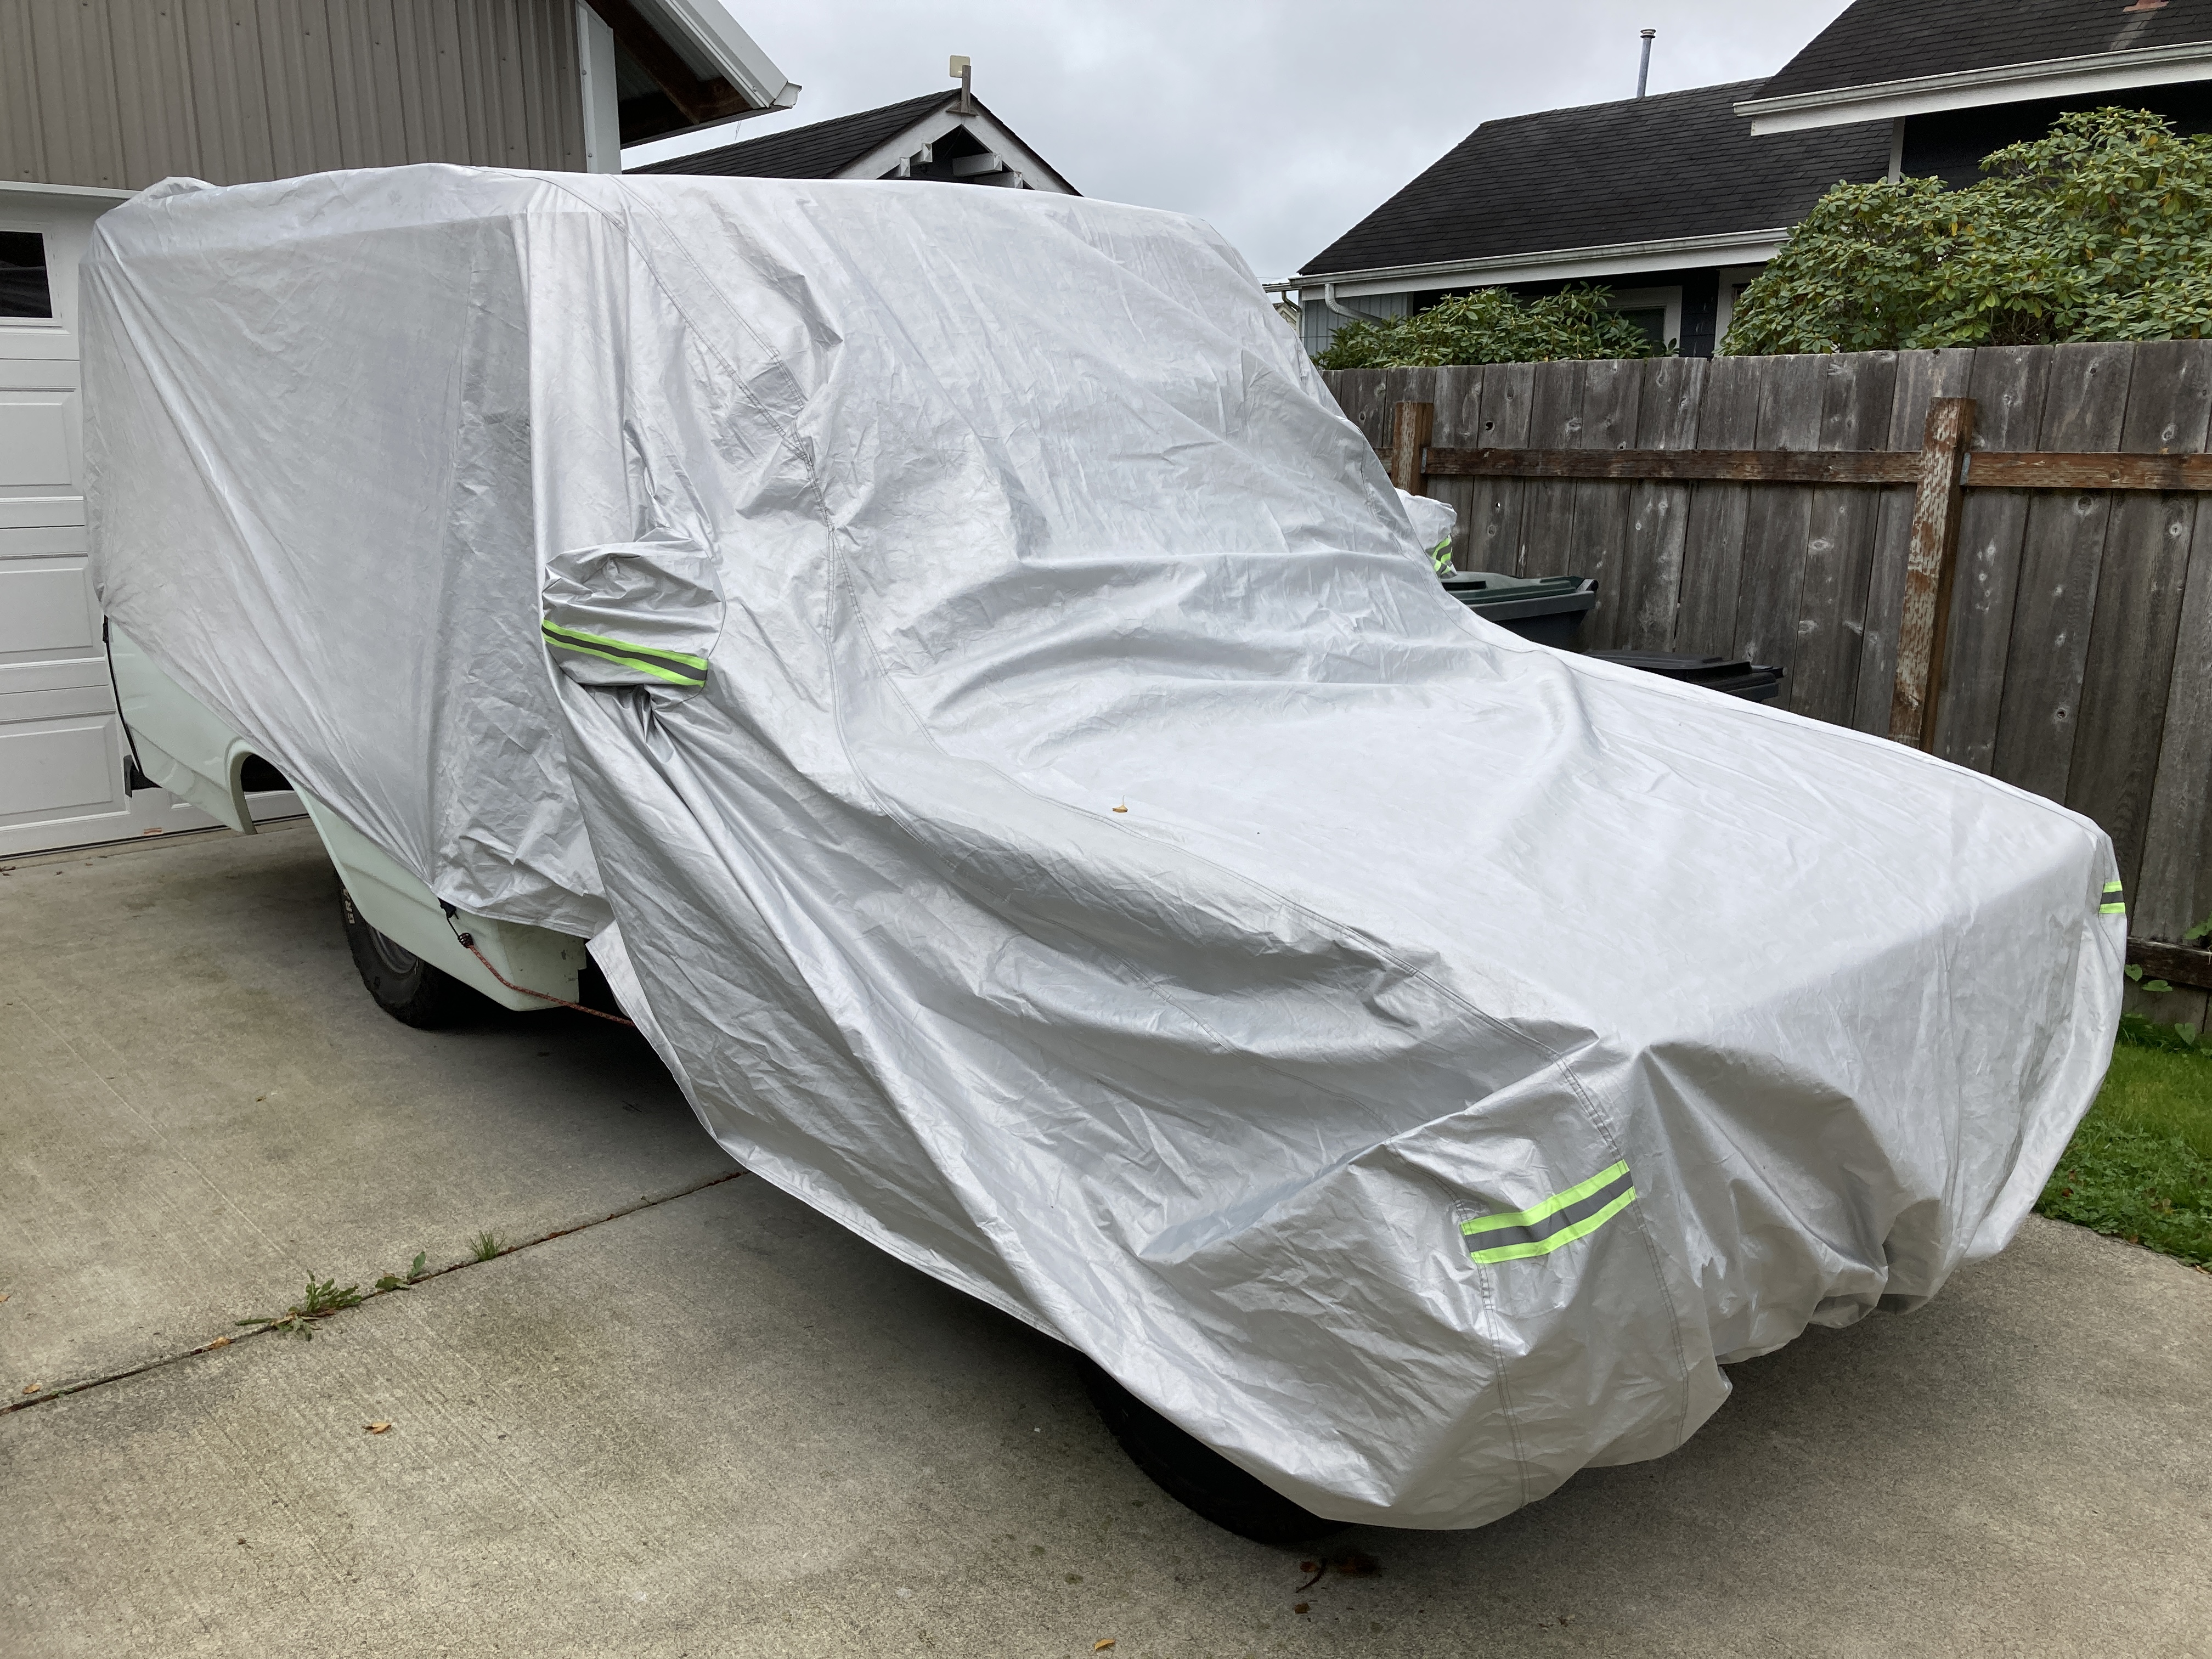
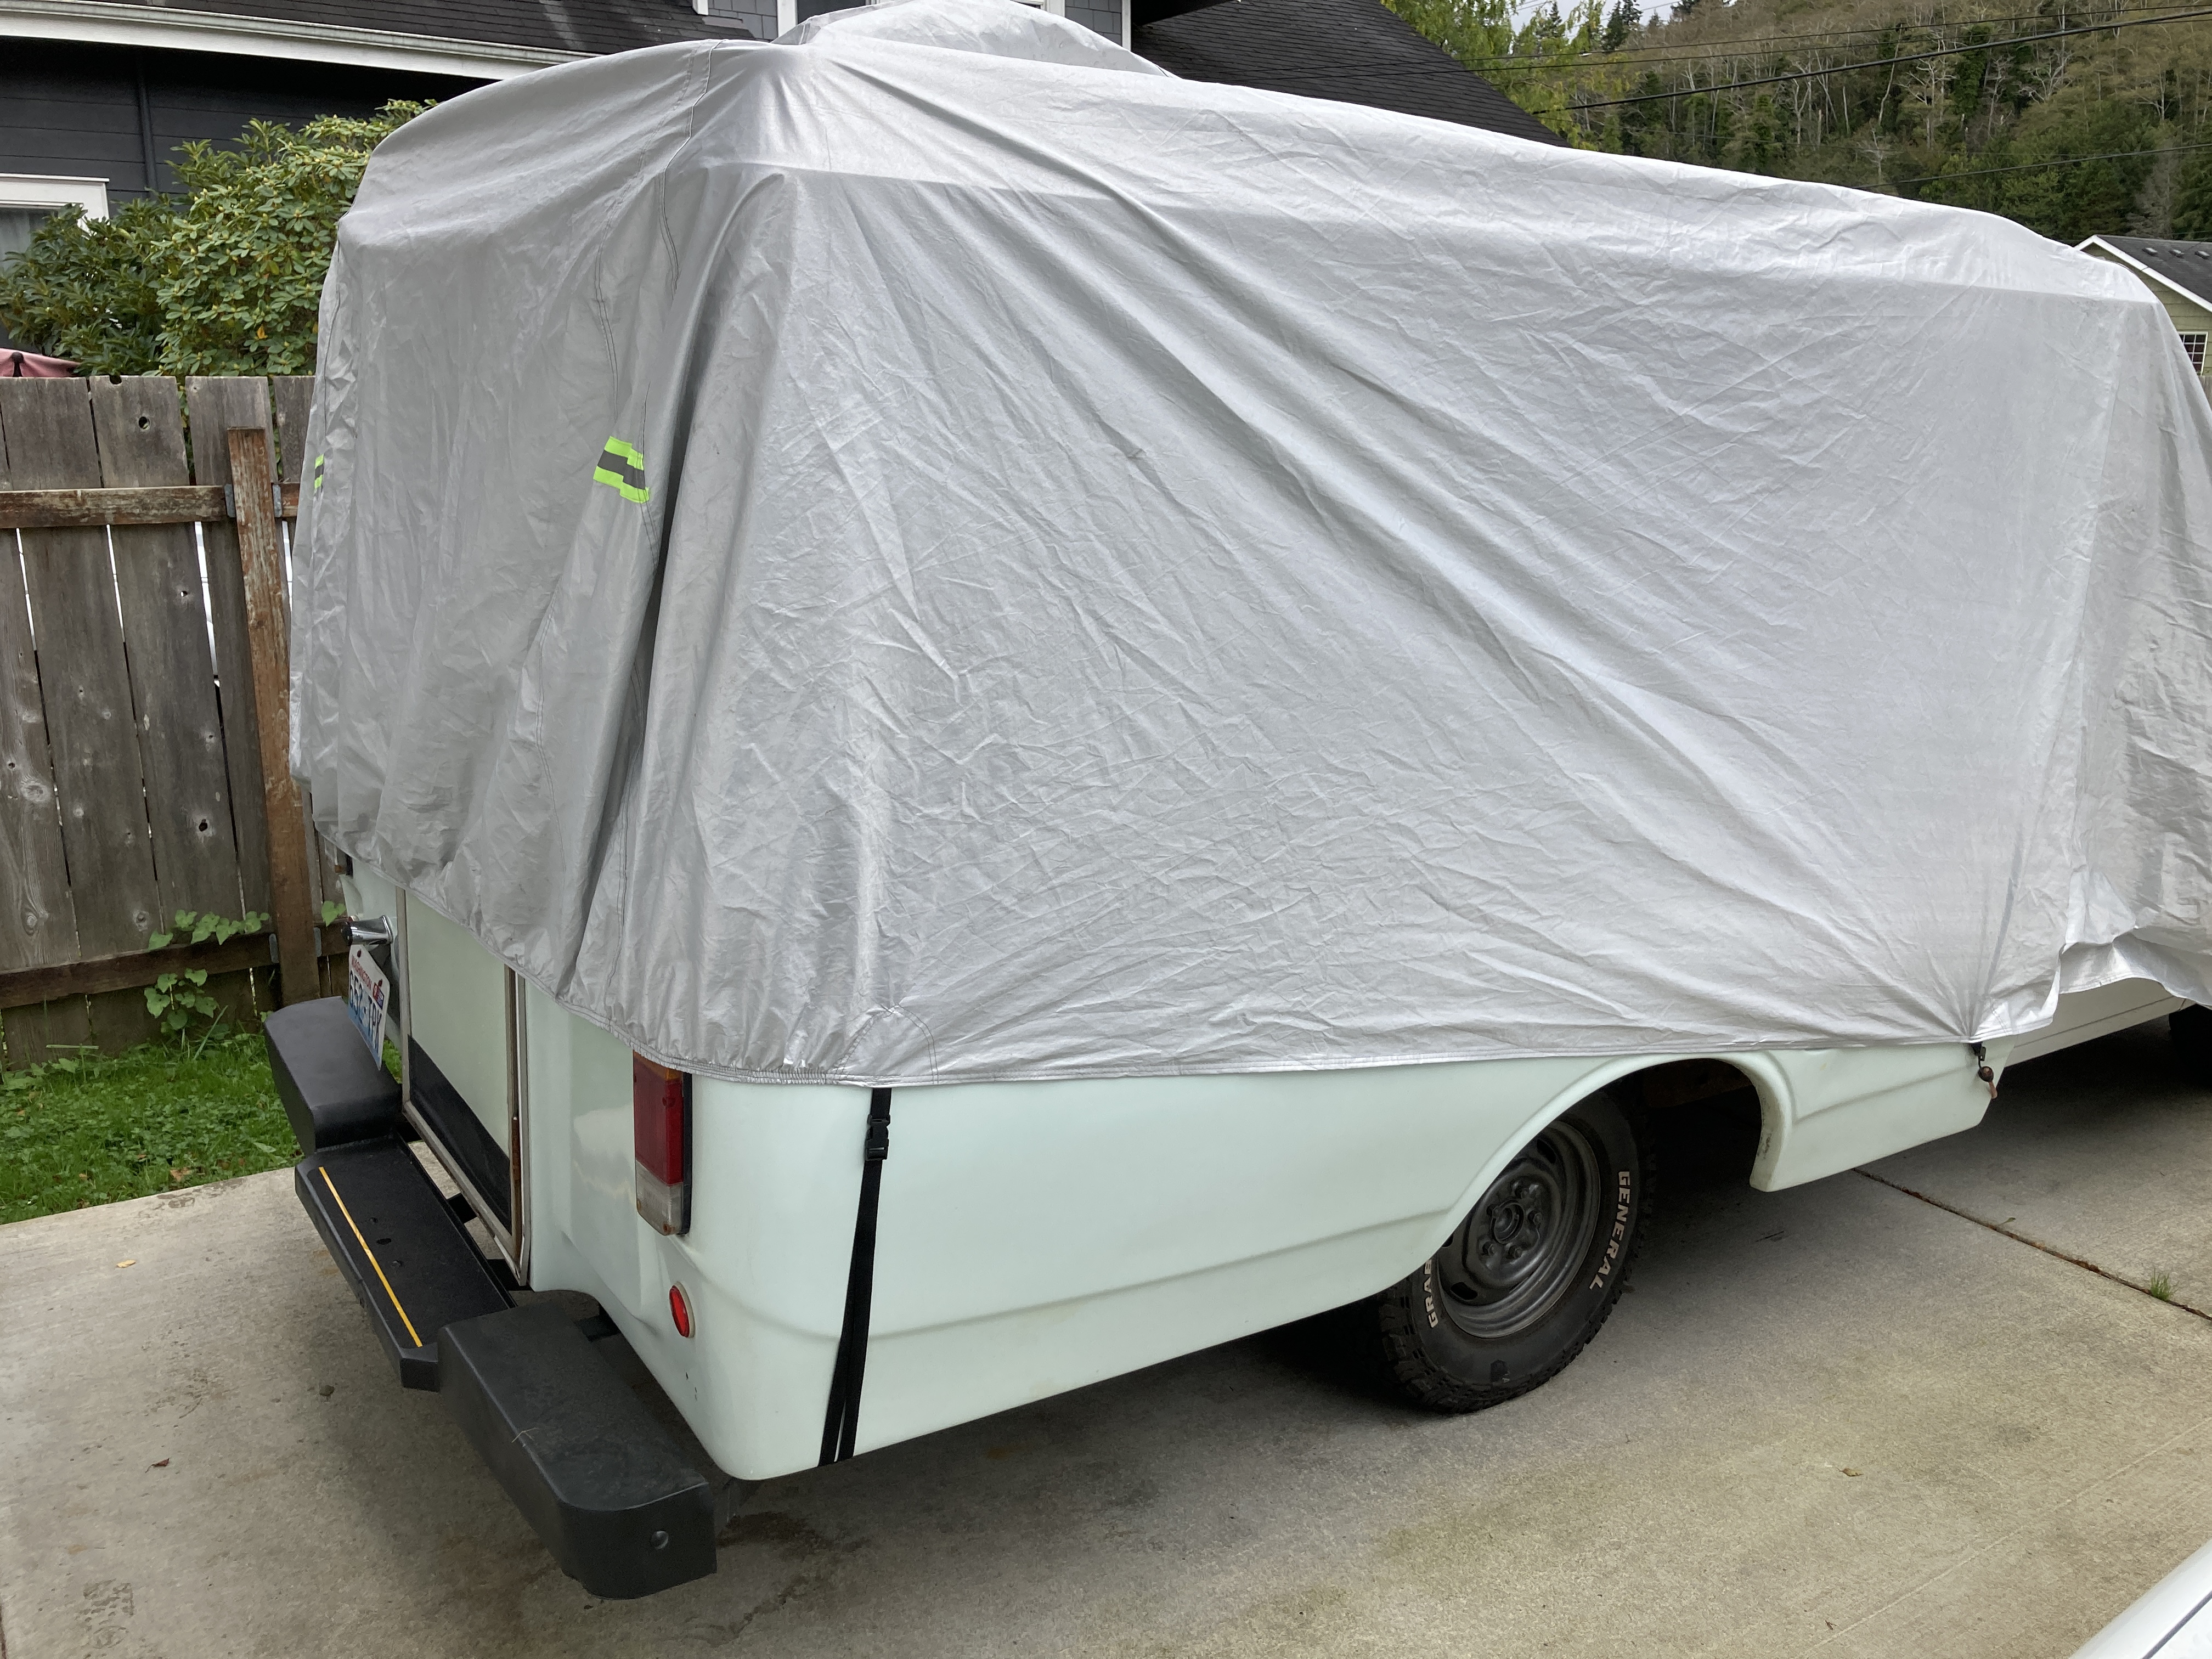
The chinook spends some of the time in the garage, but it’s mostly left outside. It took a while to find this but I found a car cover that “fits” the chinook. It’s not a perfect fit it covers the important parts of the camper and it’s held up fine in high winds.
Car Cover: https://amzn.to/31fKJoq
Cab Interior
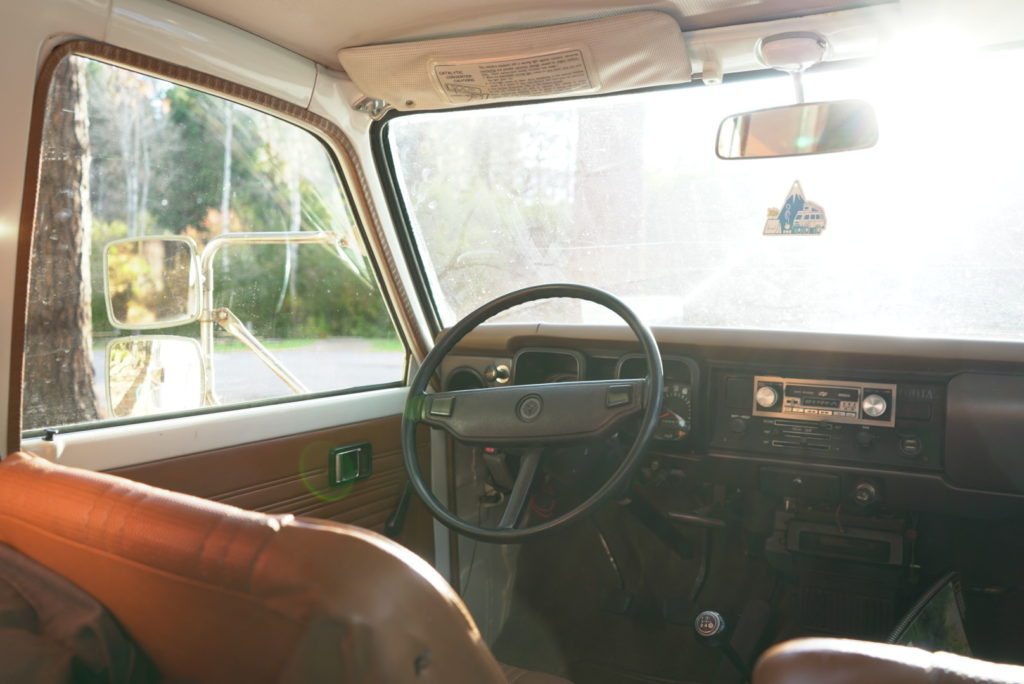
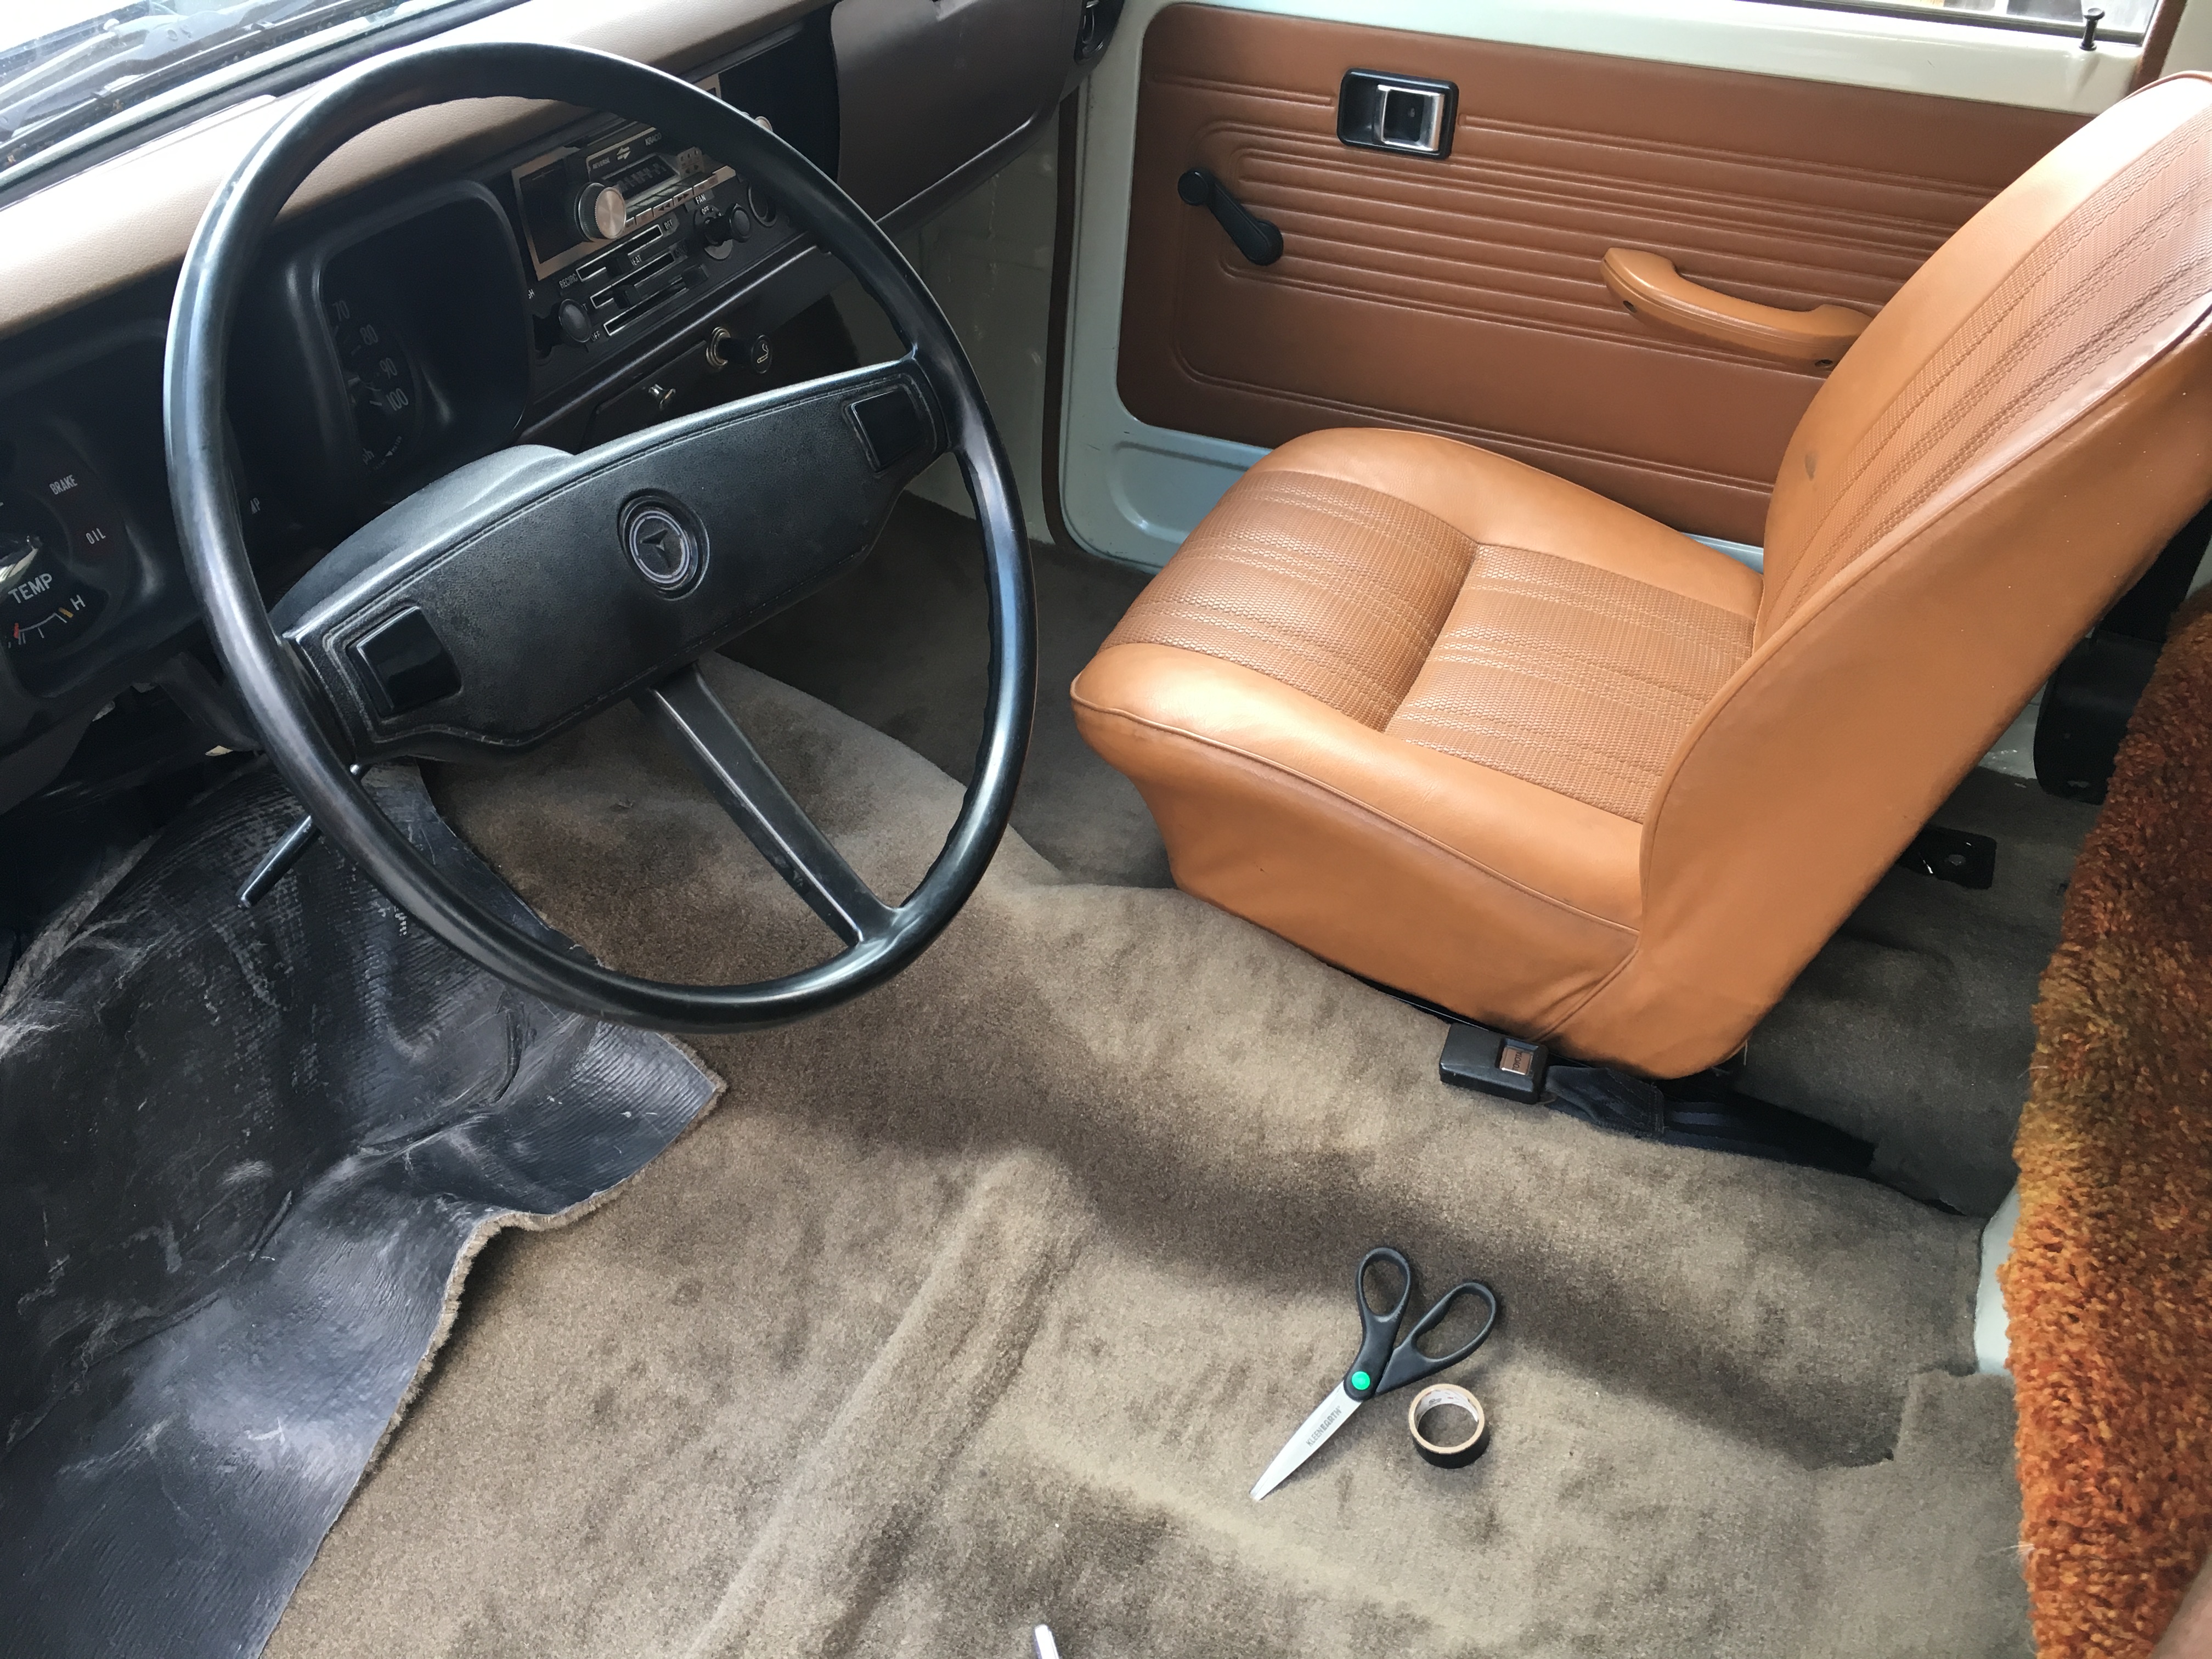
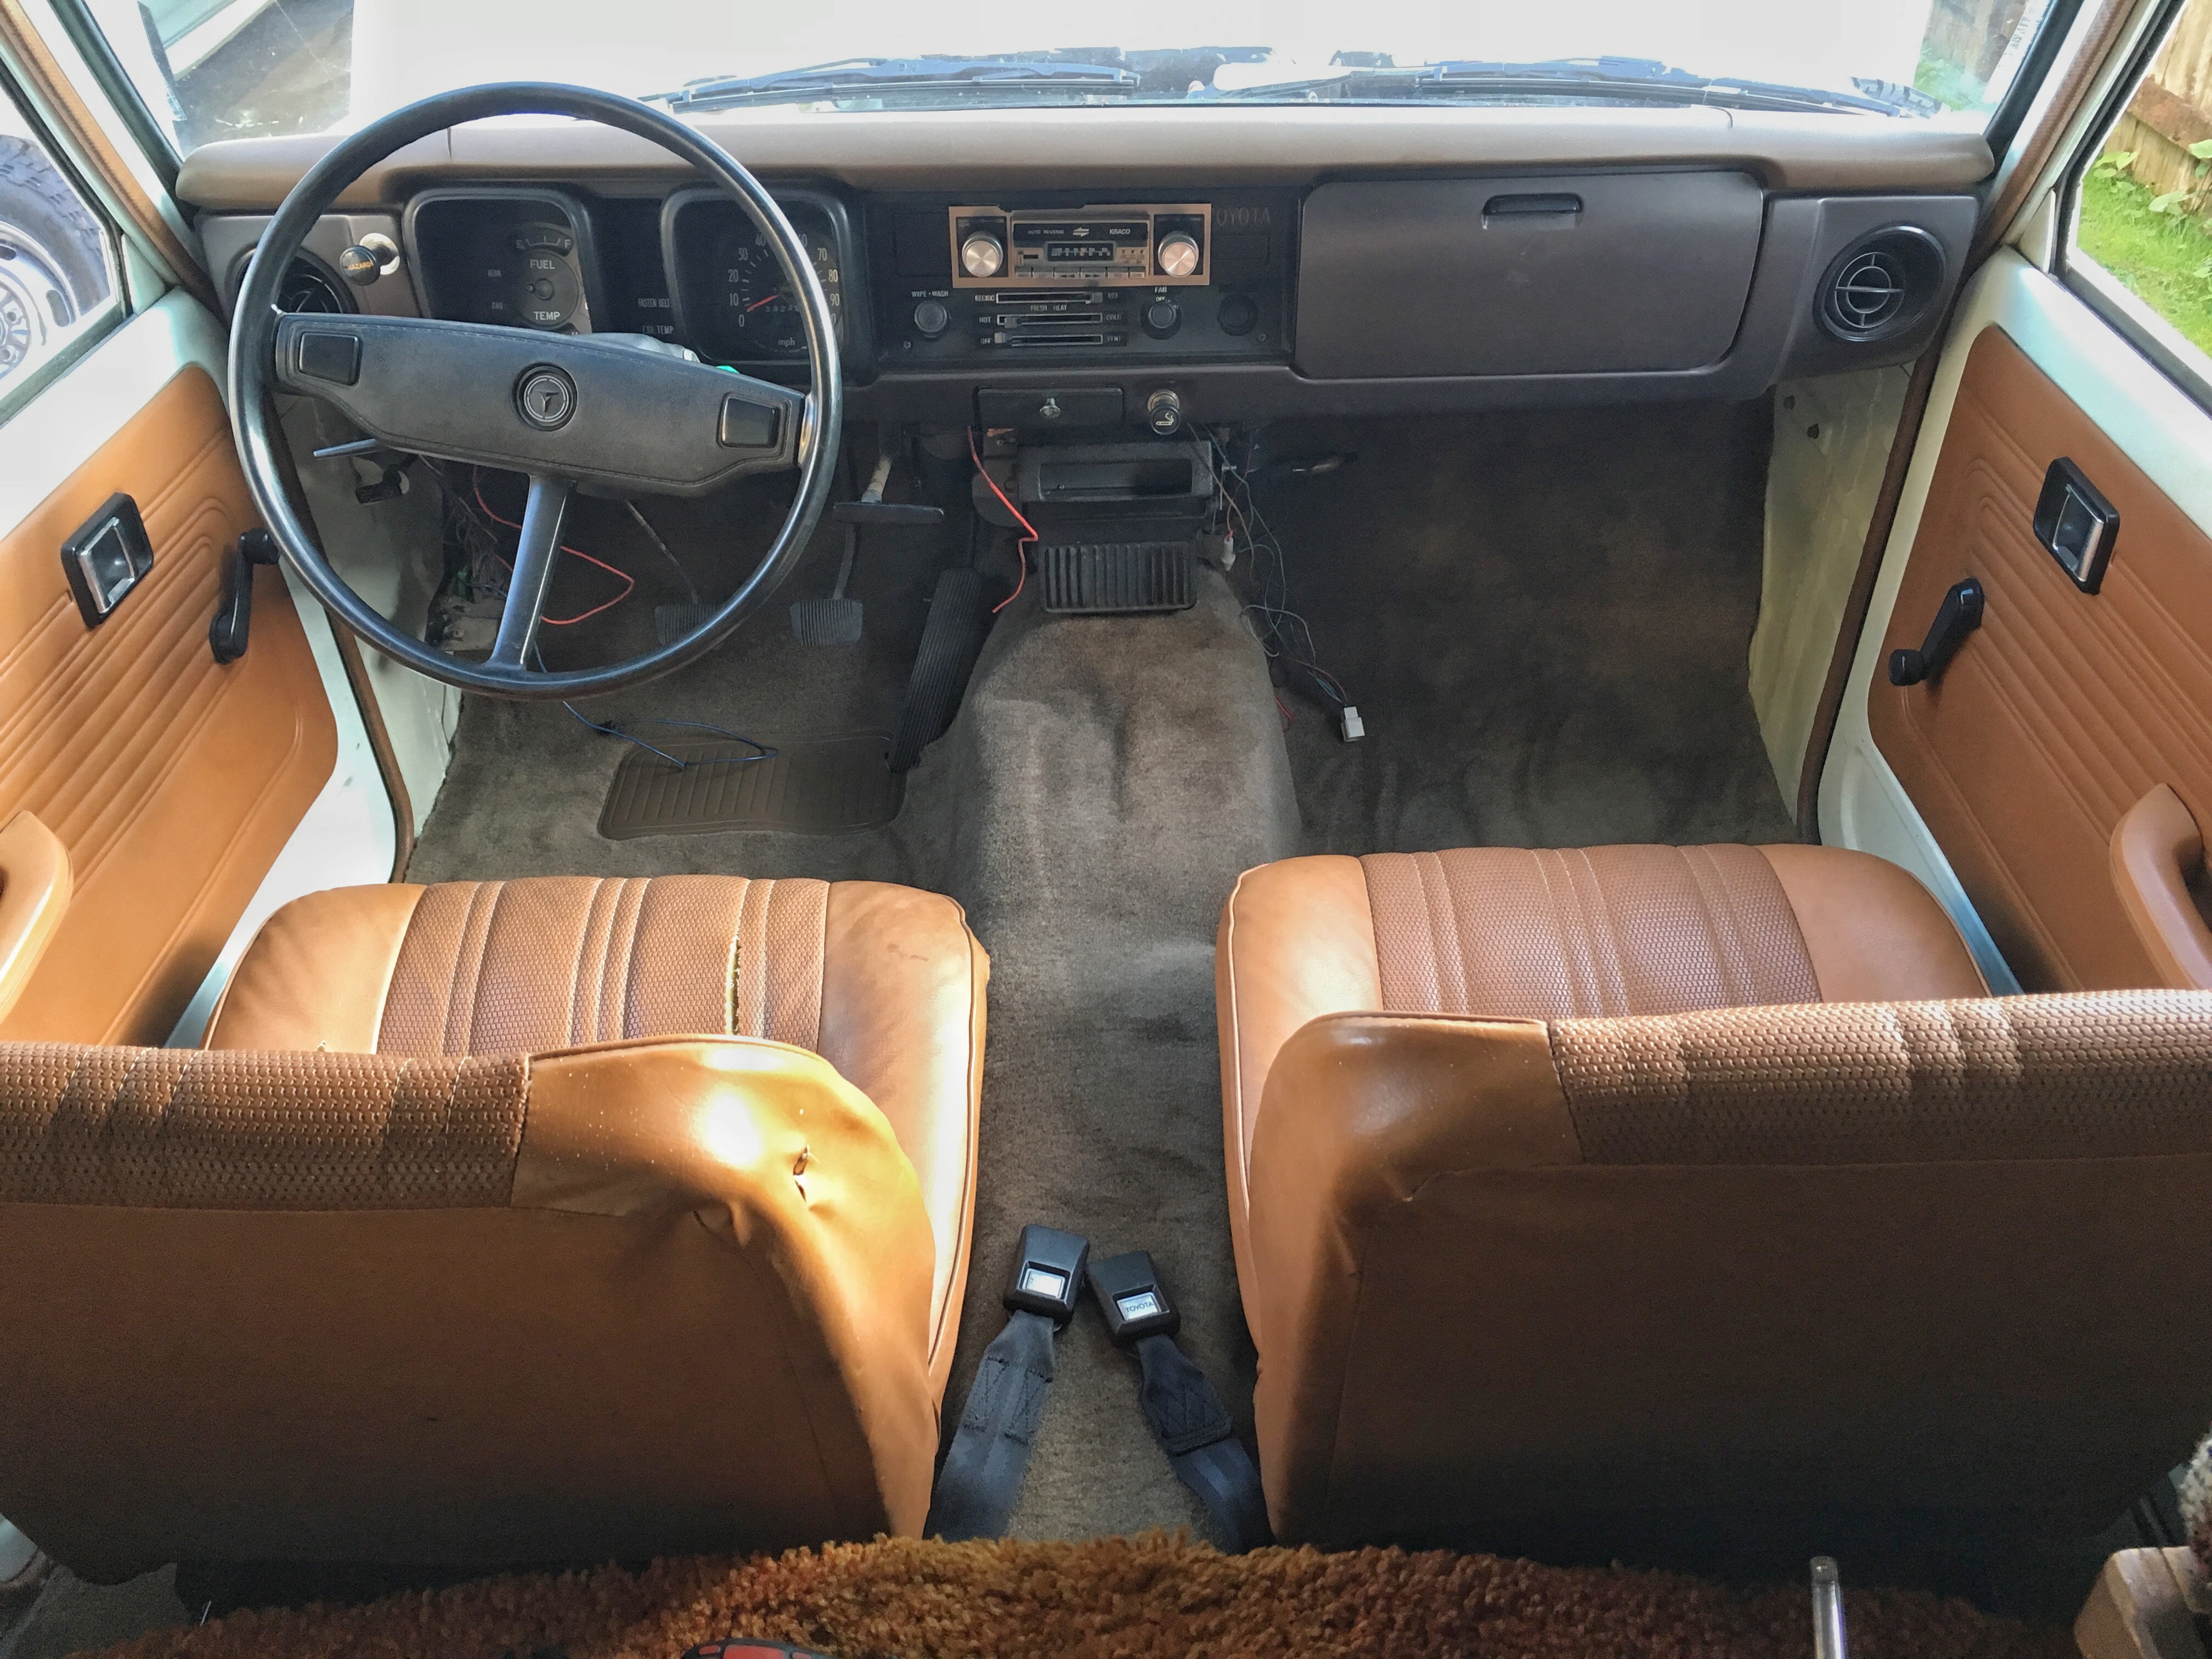
We love the look of the 70s interior of the cab so any upgrades will be done with this in mind. The seats will eventually be replaced with something that is period correct, but offers a little more support. The old shag carpet couldn’t be saved, but we did find a company that sold carpet that “fit” the late 70’s Toyota pickups.
We ordered a brown color that would match with the rest of the interior. Before we installed that I wanted to add some sound deadening to the floor since I had to remove some of the original material when I painted it. The cab is pretty loud on the highway so this will help to cut down some of the noise.
I went with 25sq/ft of Kilmat and that was more than enough to cover the floor. I have a little left and I may line the inside of the doors to quiet down the road noise even more.
Sound deadening material: 25 sq/ft Kilmat
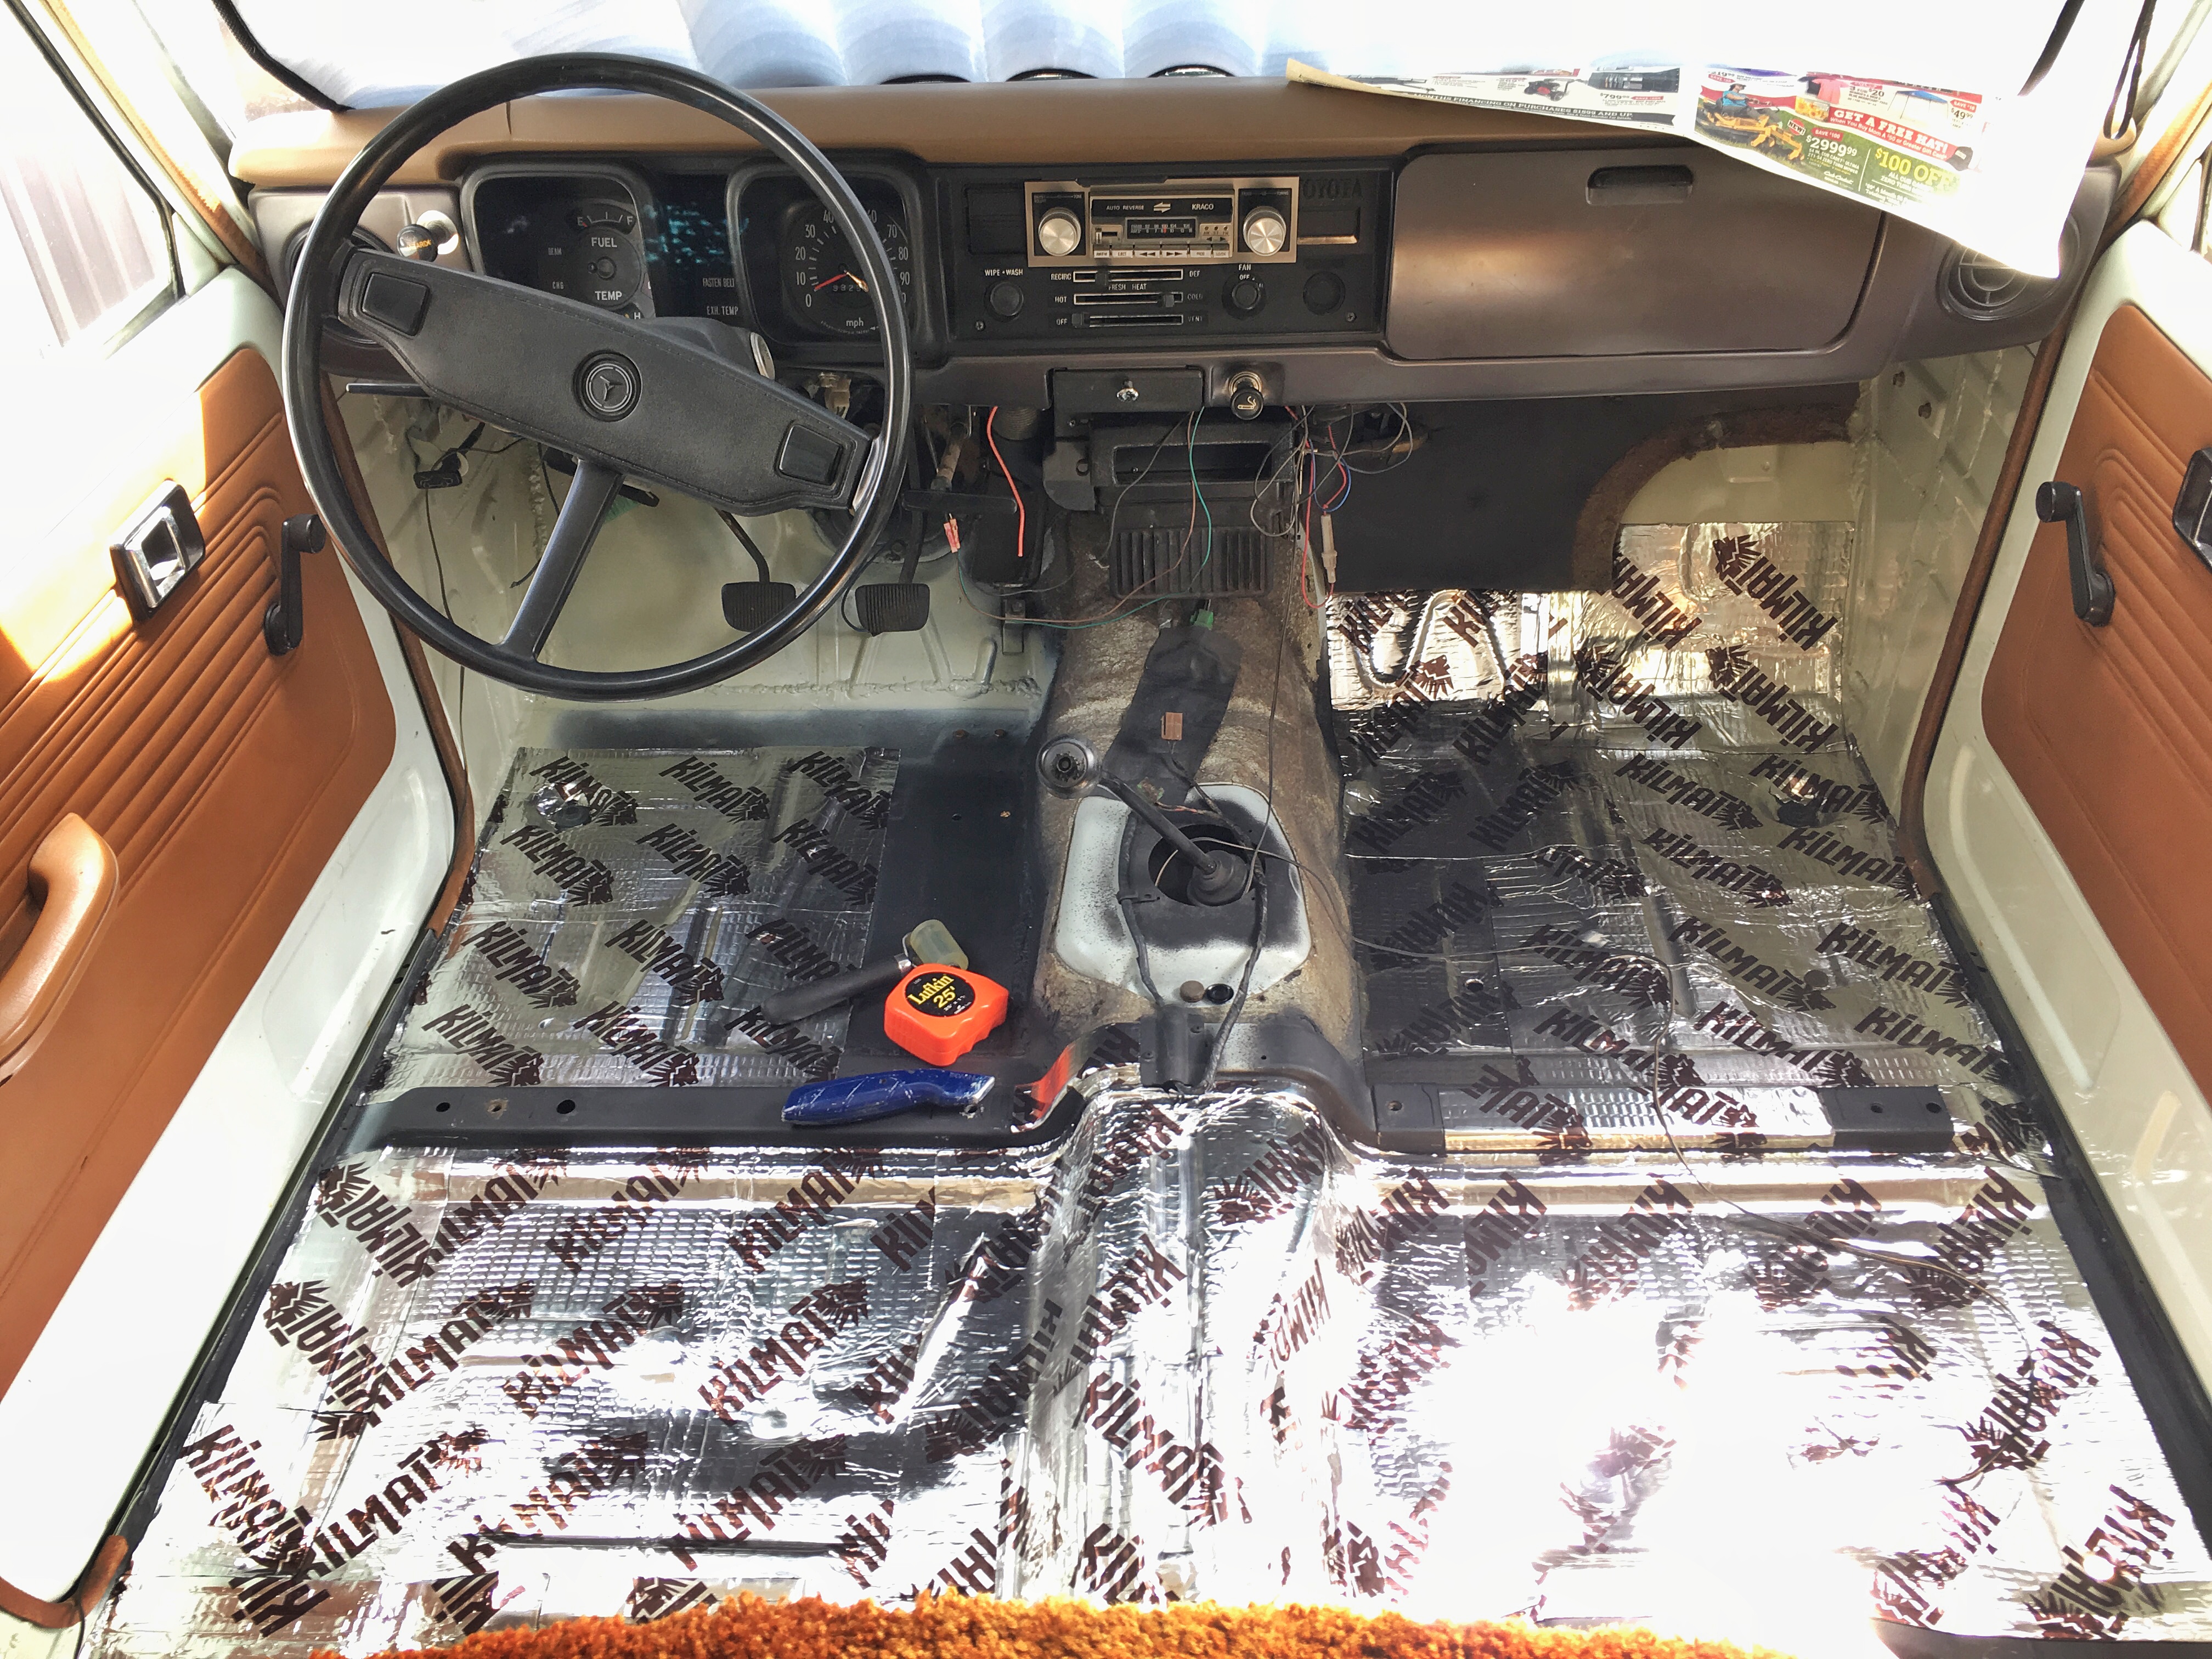
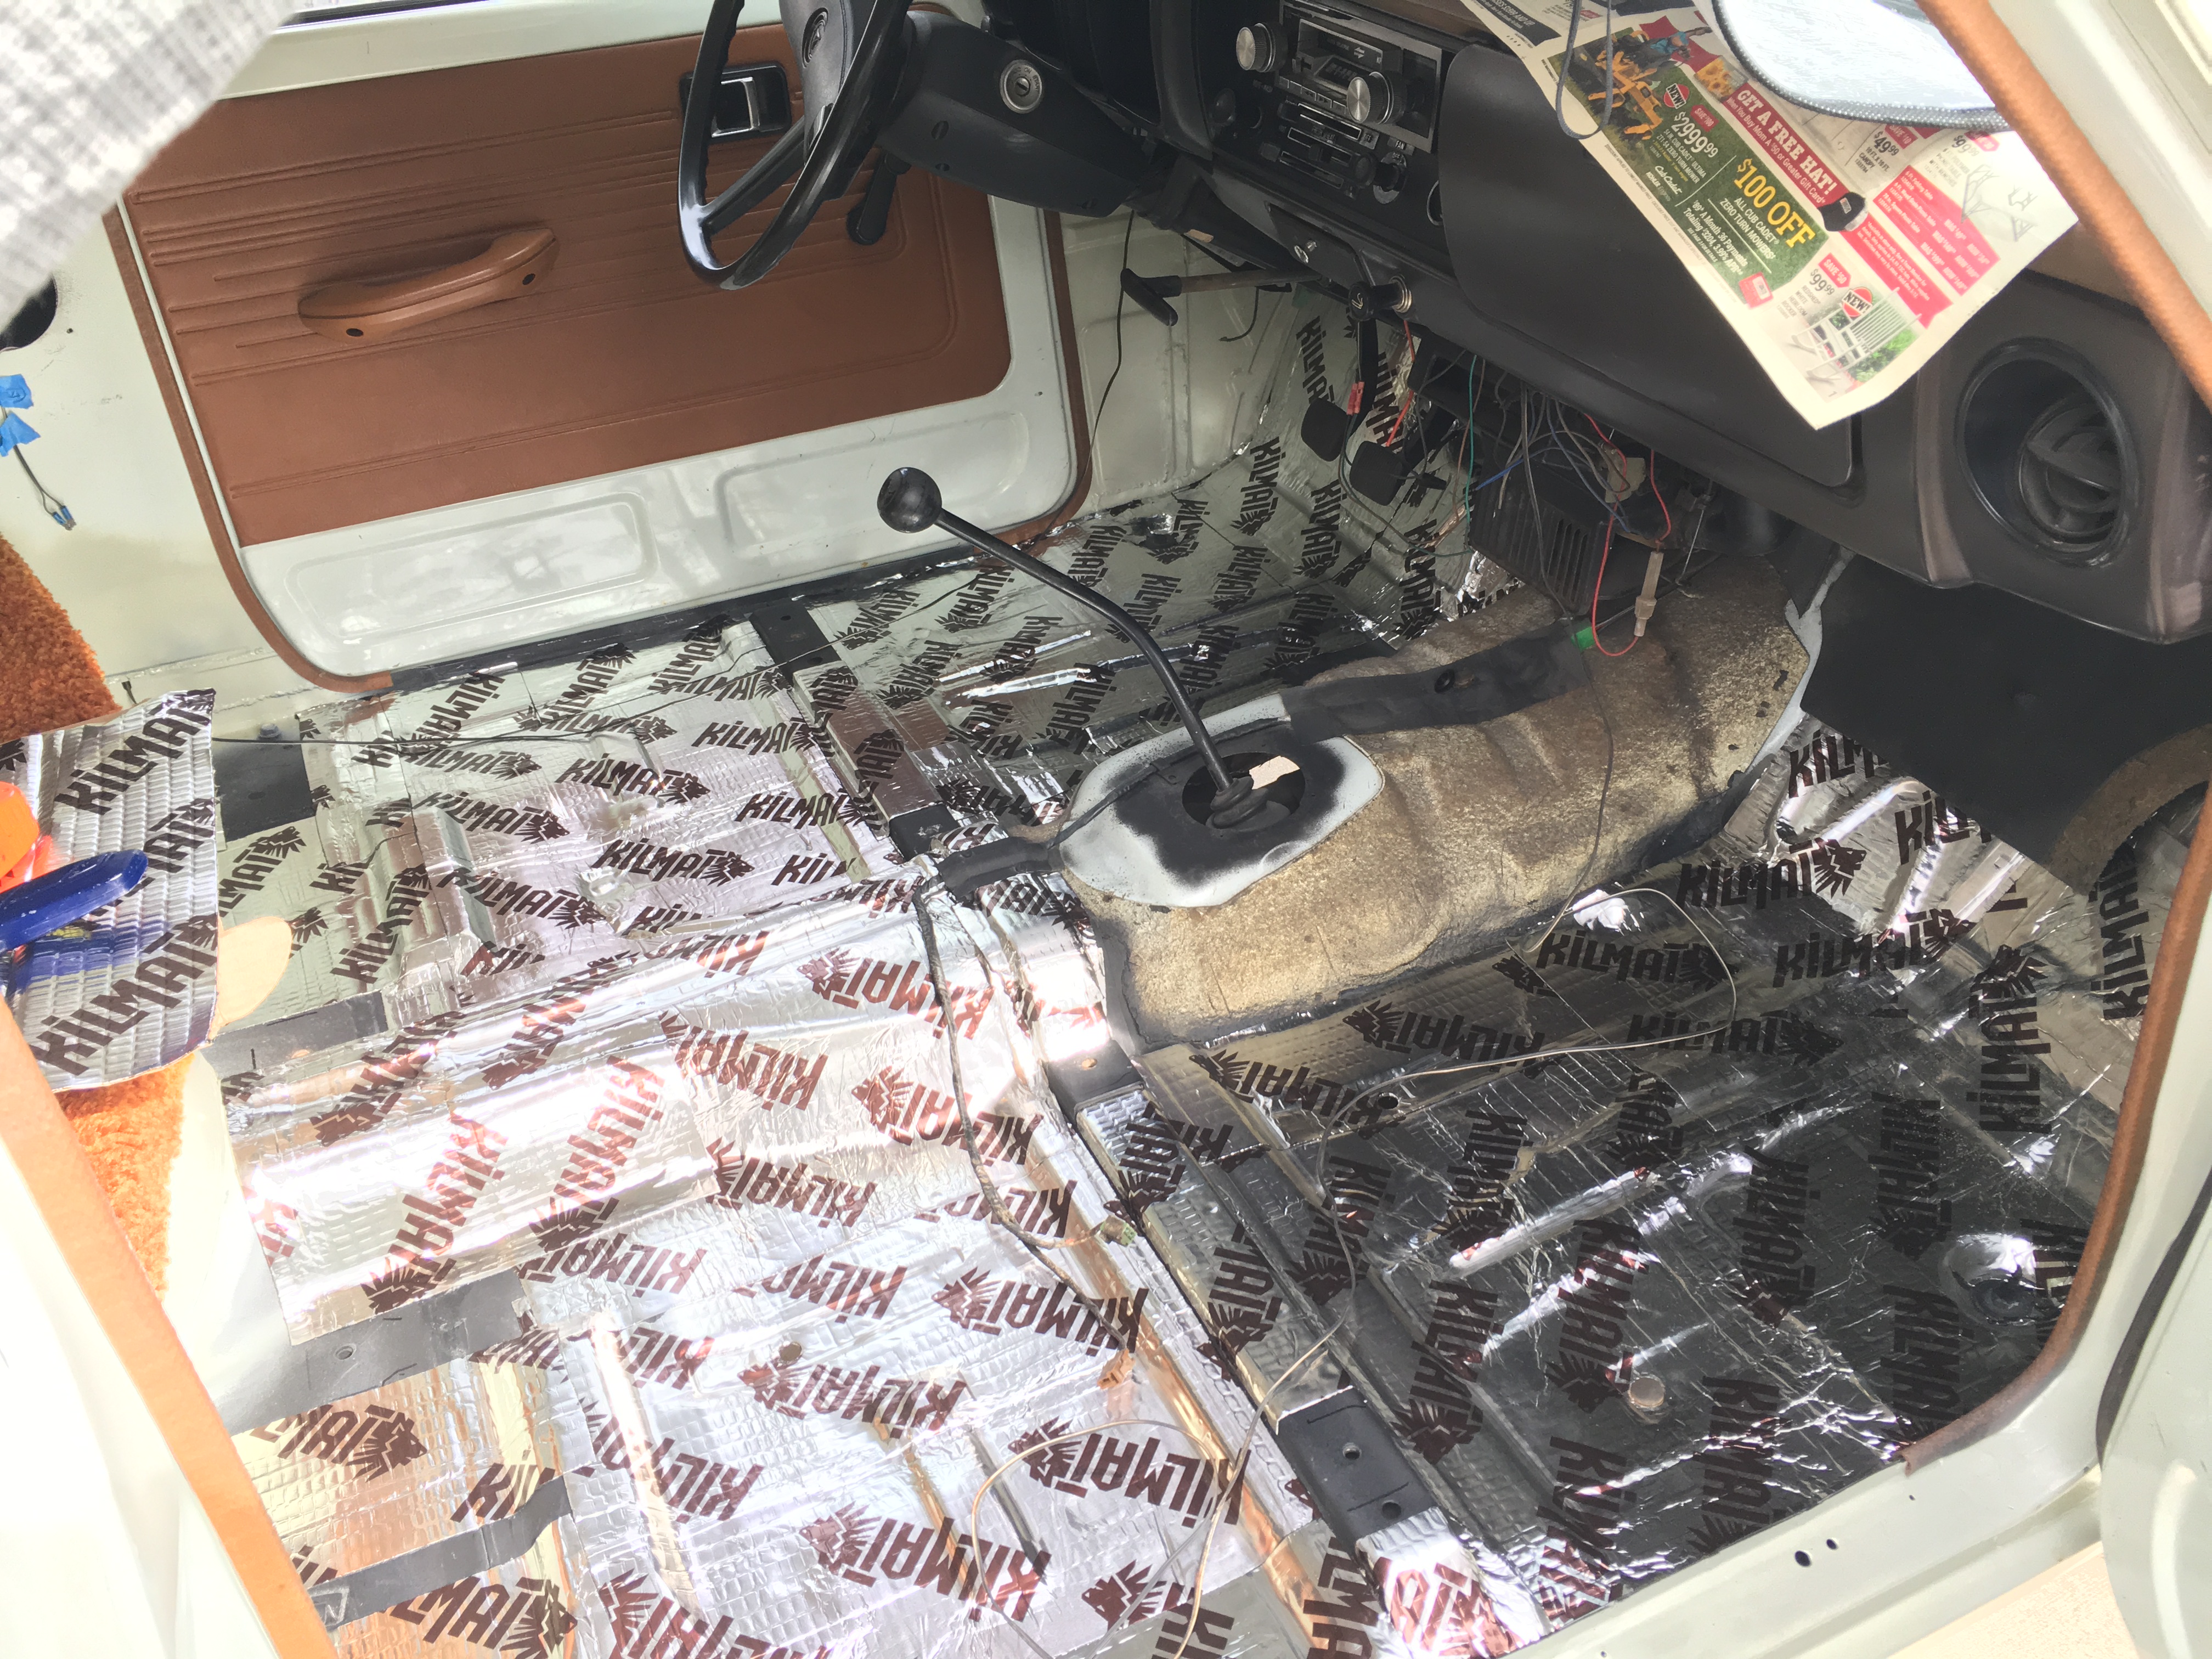
As long as the surface is clean, the sound deadening material is easy to cut and apply. The next step was to install the carpet which is just a huge pain in the ass. Holes needed to be cut in the carpet for the seatbelts, seats, gas pedal, and shifter. There was a little trimming that needed to be done under the dash as well. Overall the fitment isn’t perfect, but it’s pretty good.
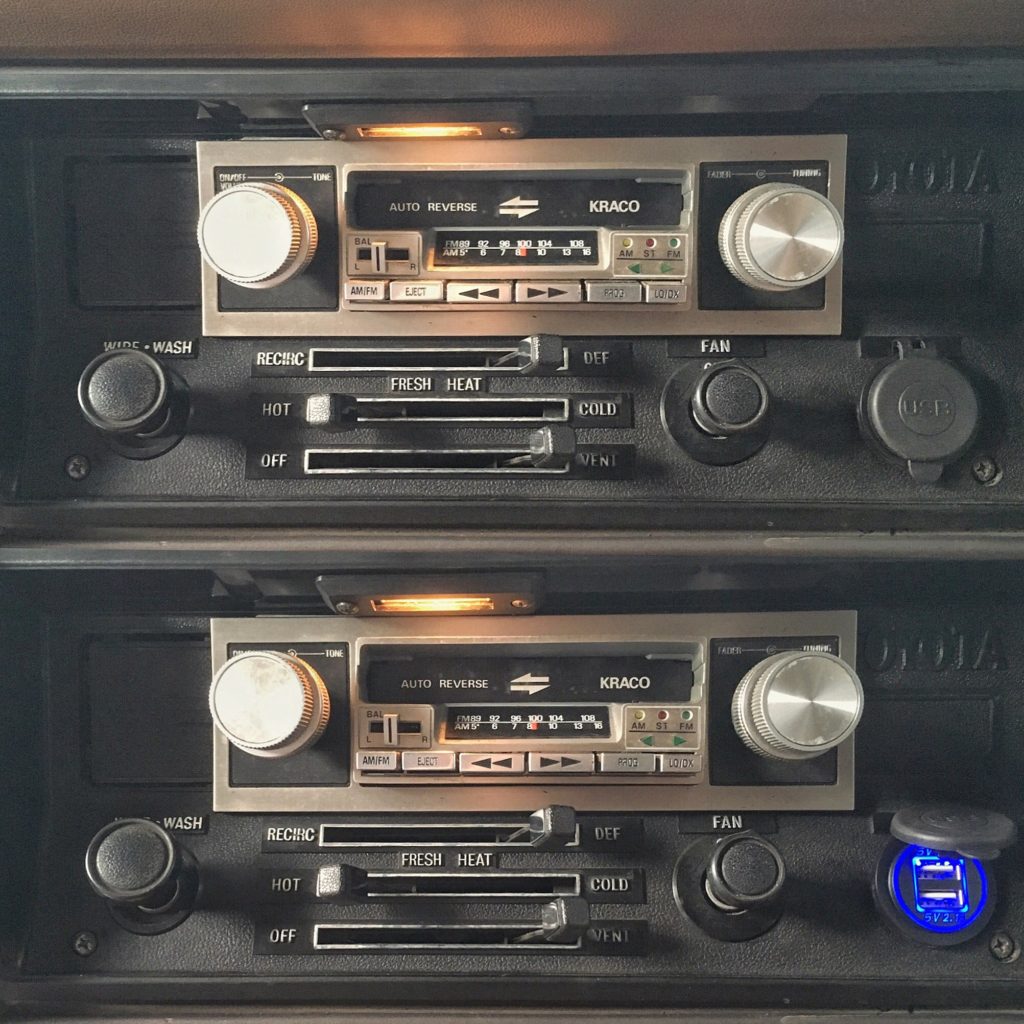
Before I removed the old casette deck, I added a USB charger in one of the unused areas on the dash. When it’s not in use you can cover it and it blends in perfectly.
Link: Dual USB 2.1A Charger
Camper Interior
Heat
The old propane heater, and fridge were removed. One of the reasons was due to the amount of space each of these took up in the camper, but also the age of each appliance was reason enough for me to want to upgrade it.
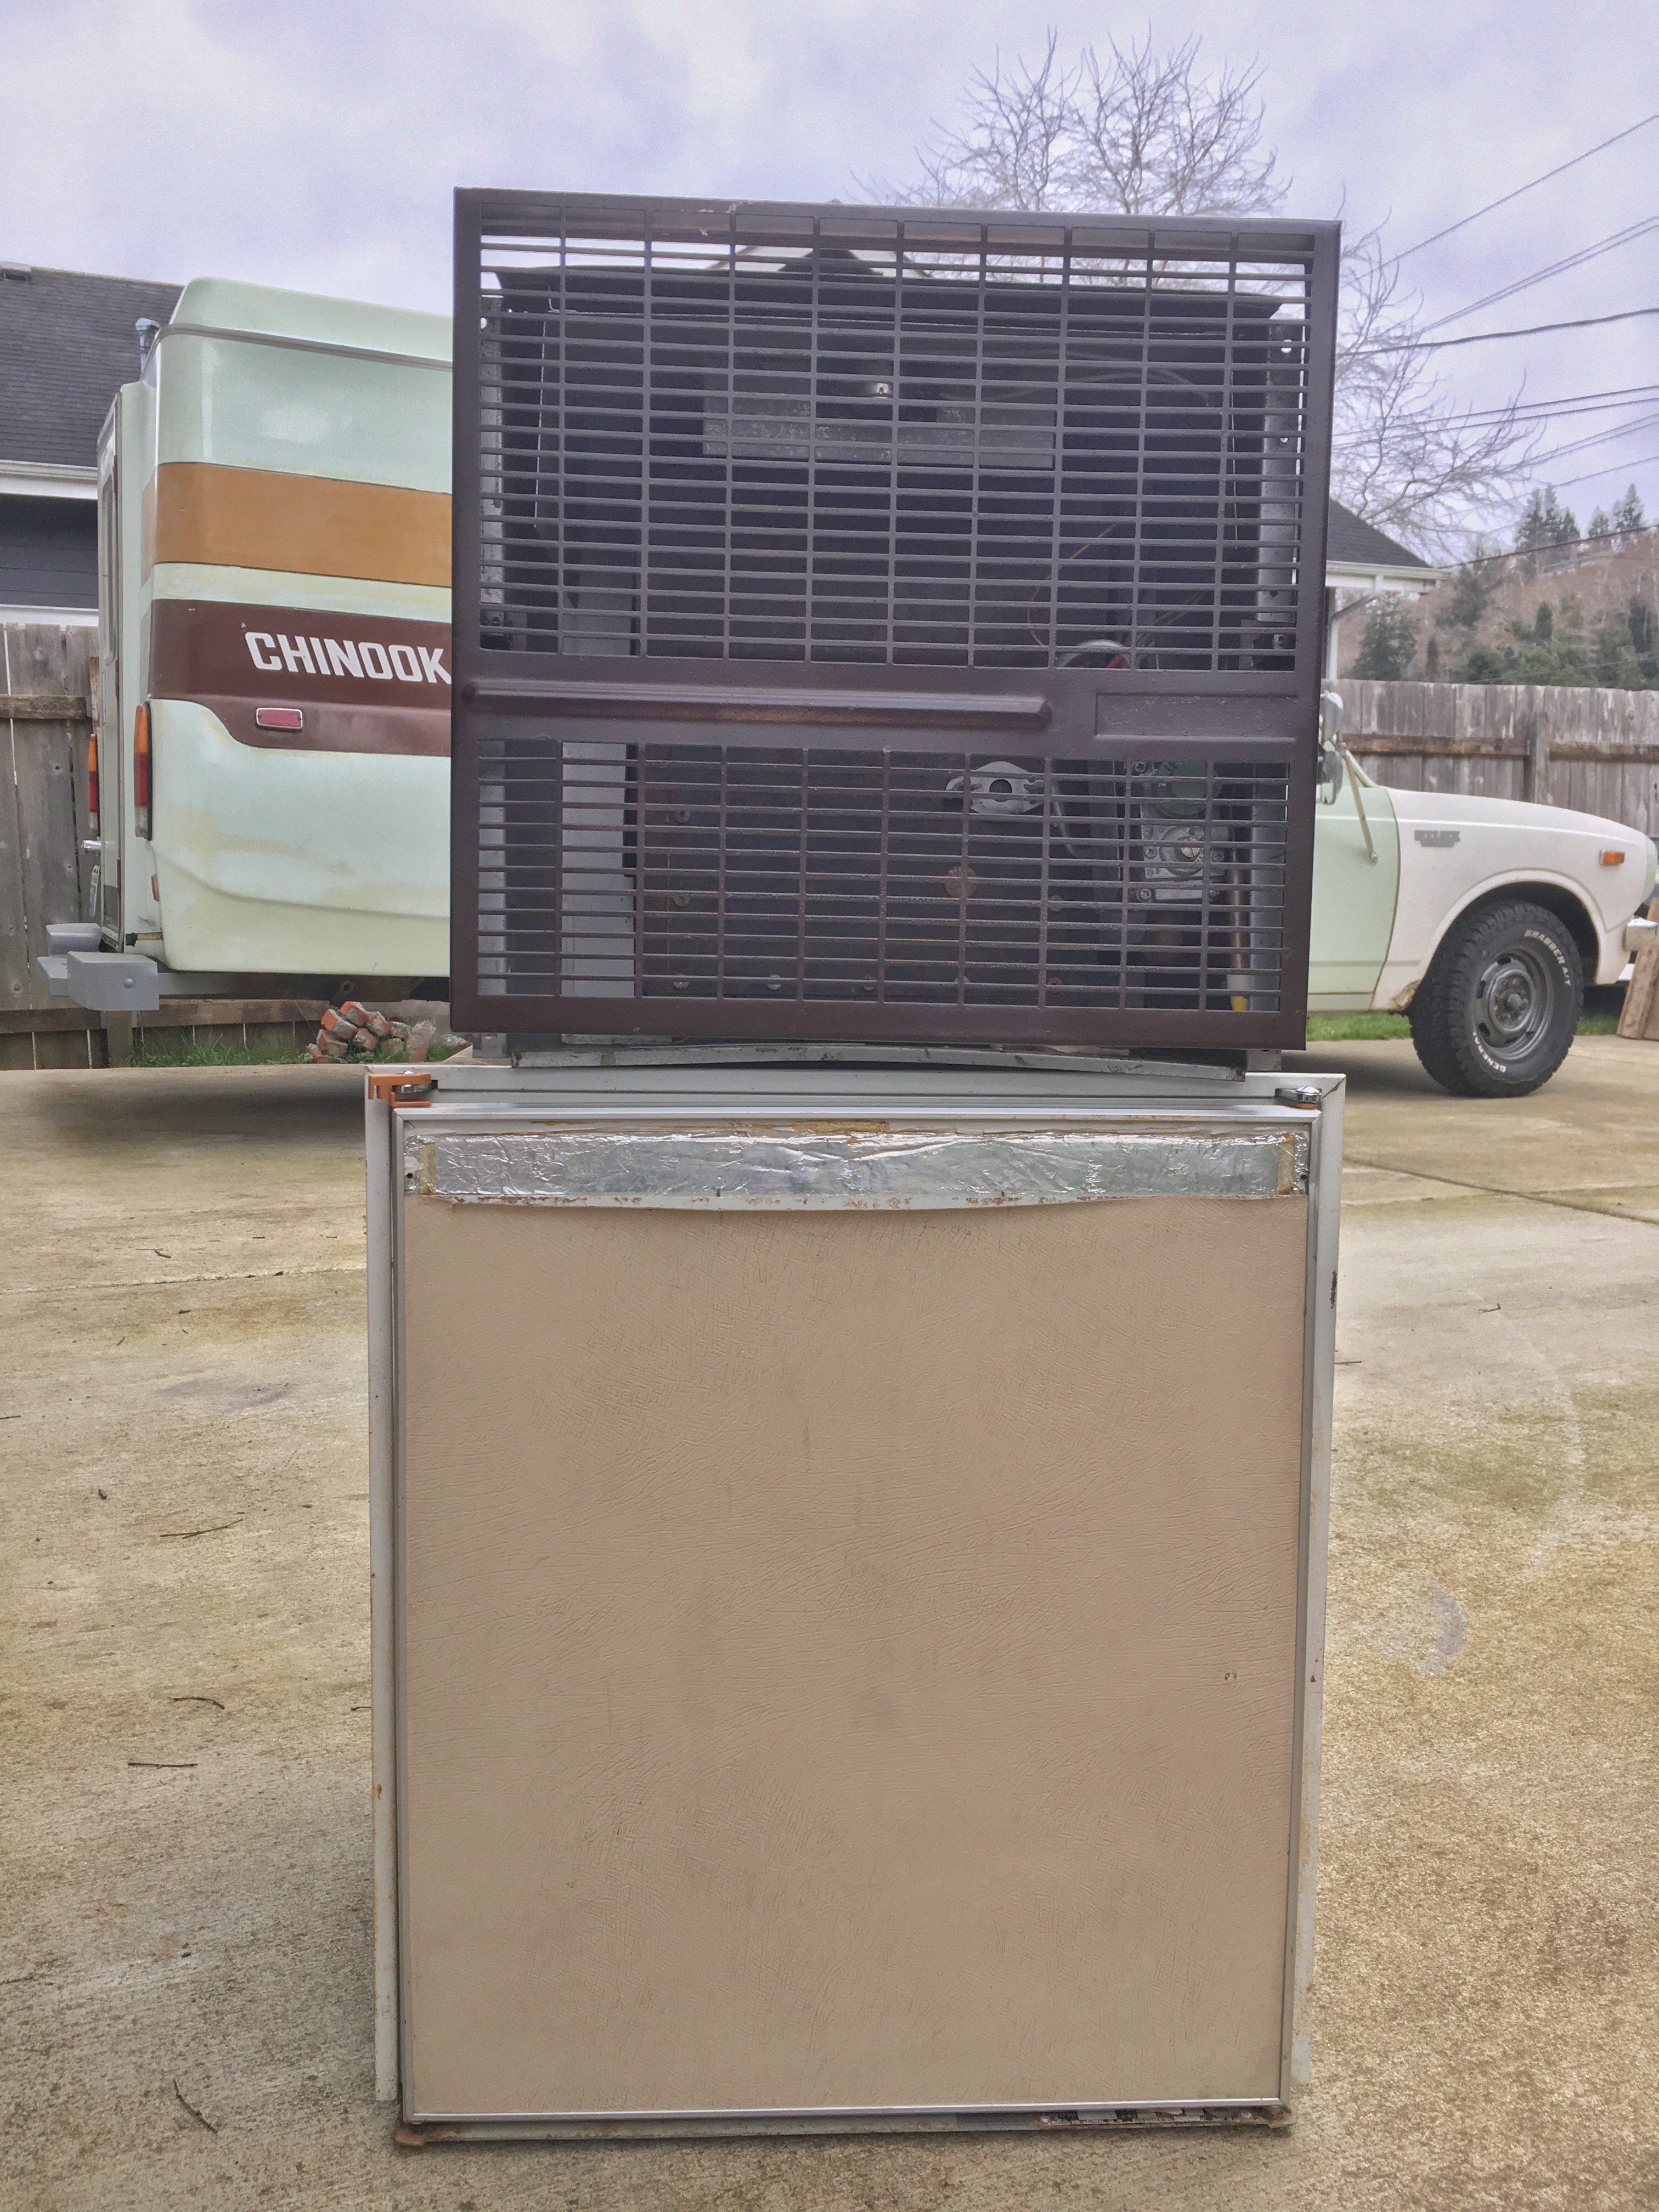
We tried sleeping in sub 30 degree weather with the proper sleeping bags but it was obvious we needed some kind of heat for the cold months. After considering a few different options we decided on the 5kw diesel heater.
Thoughts on the heater? Hands down this is worth every penny. On the low setting this will heat up the camper to the point that we need to have a window cracked open, or the top popped to allow some of the heat to escape. We’ve used the heater many times and it barely uses any fuel. It comes with a 10L (2.6gallon) tank and I’ve read you can run this heater for a long time before you’d need to refill the tank.
Below is everything that came with our 5kw diesel heater kit.
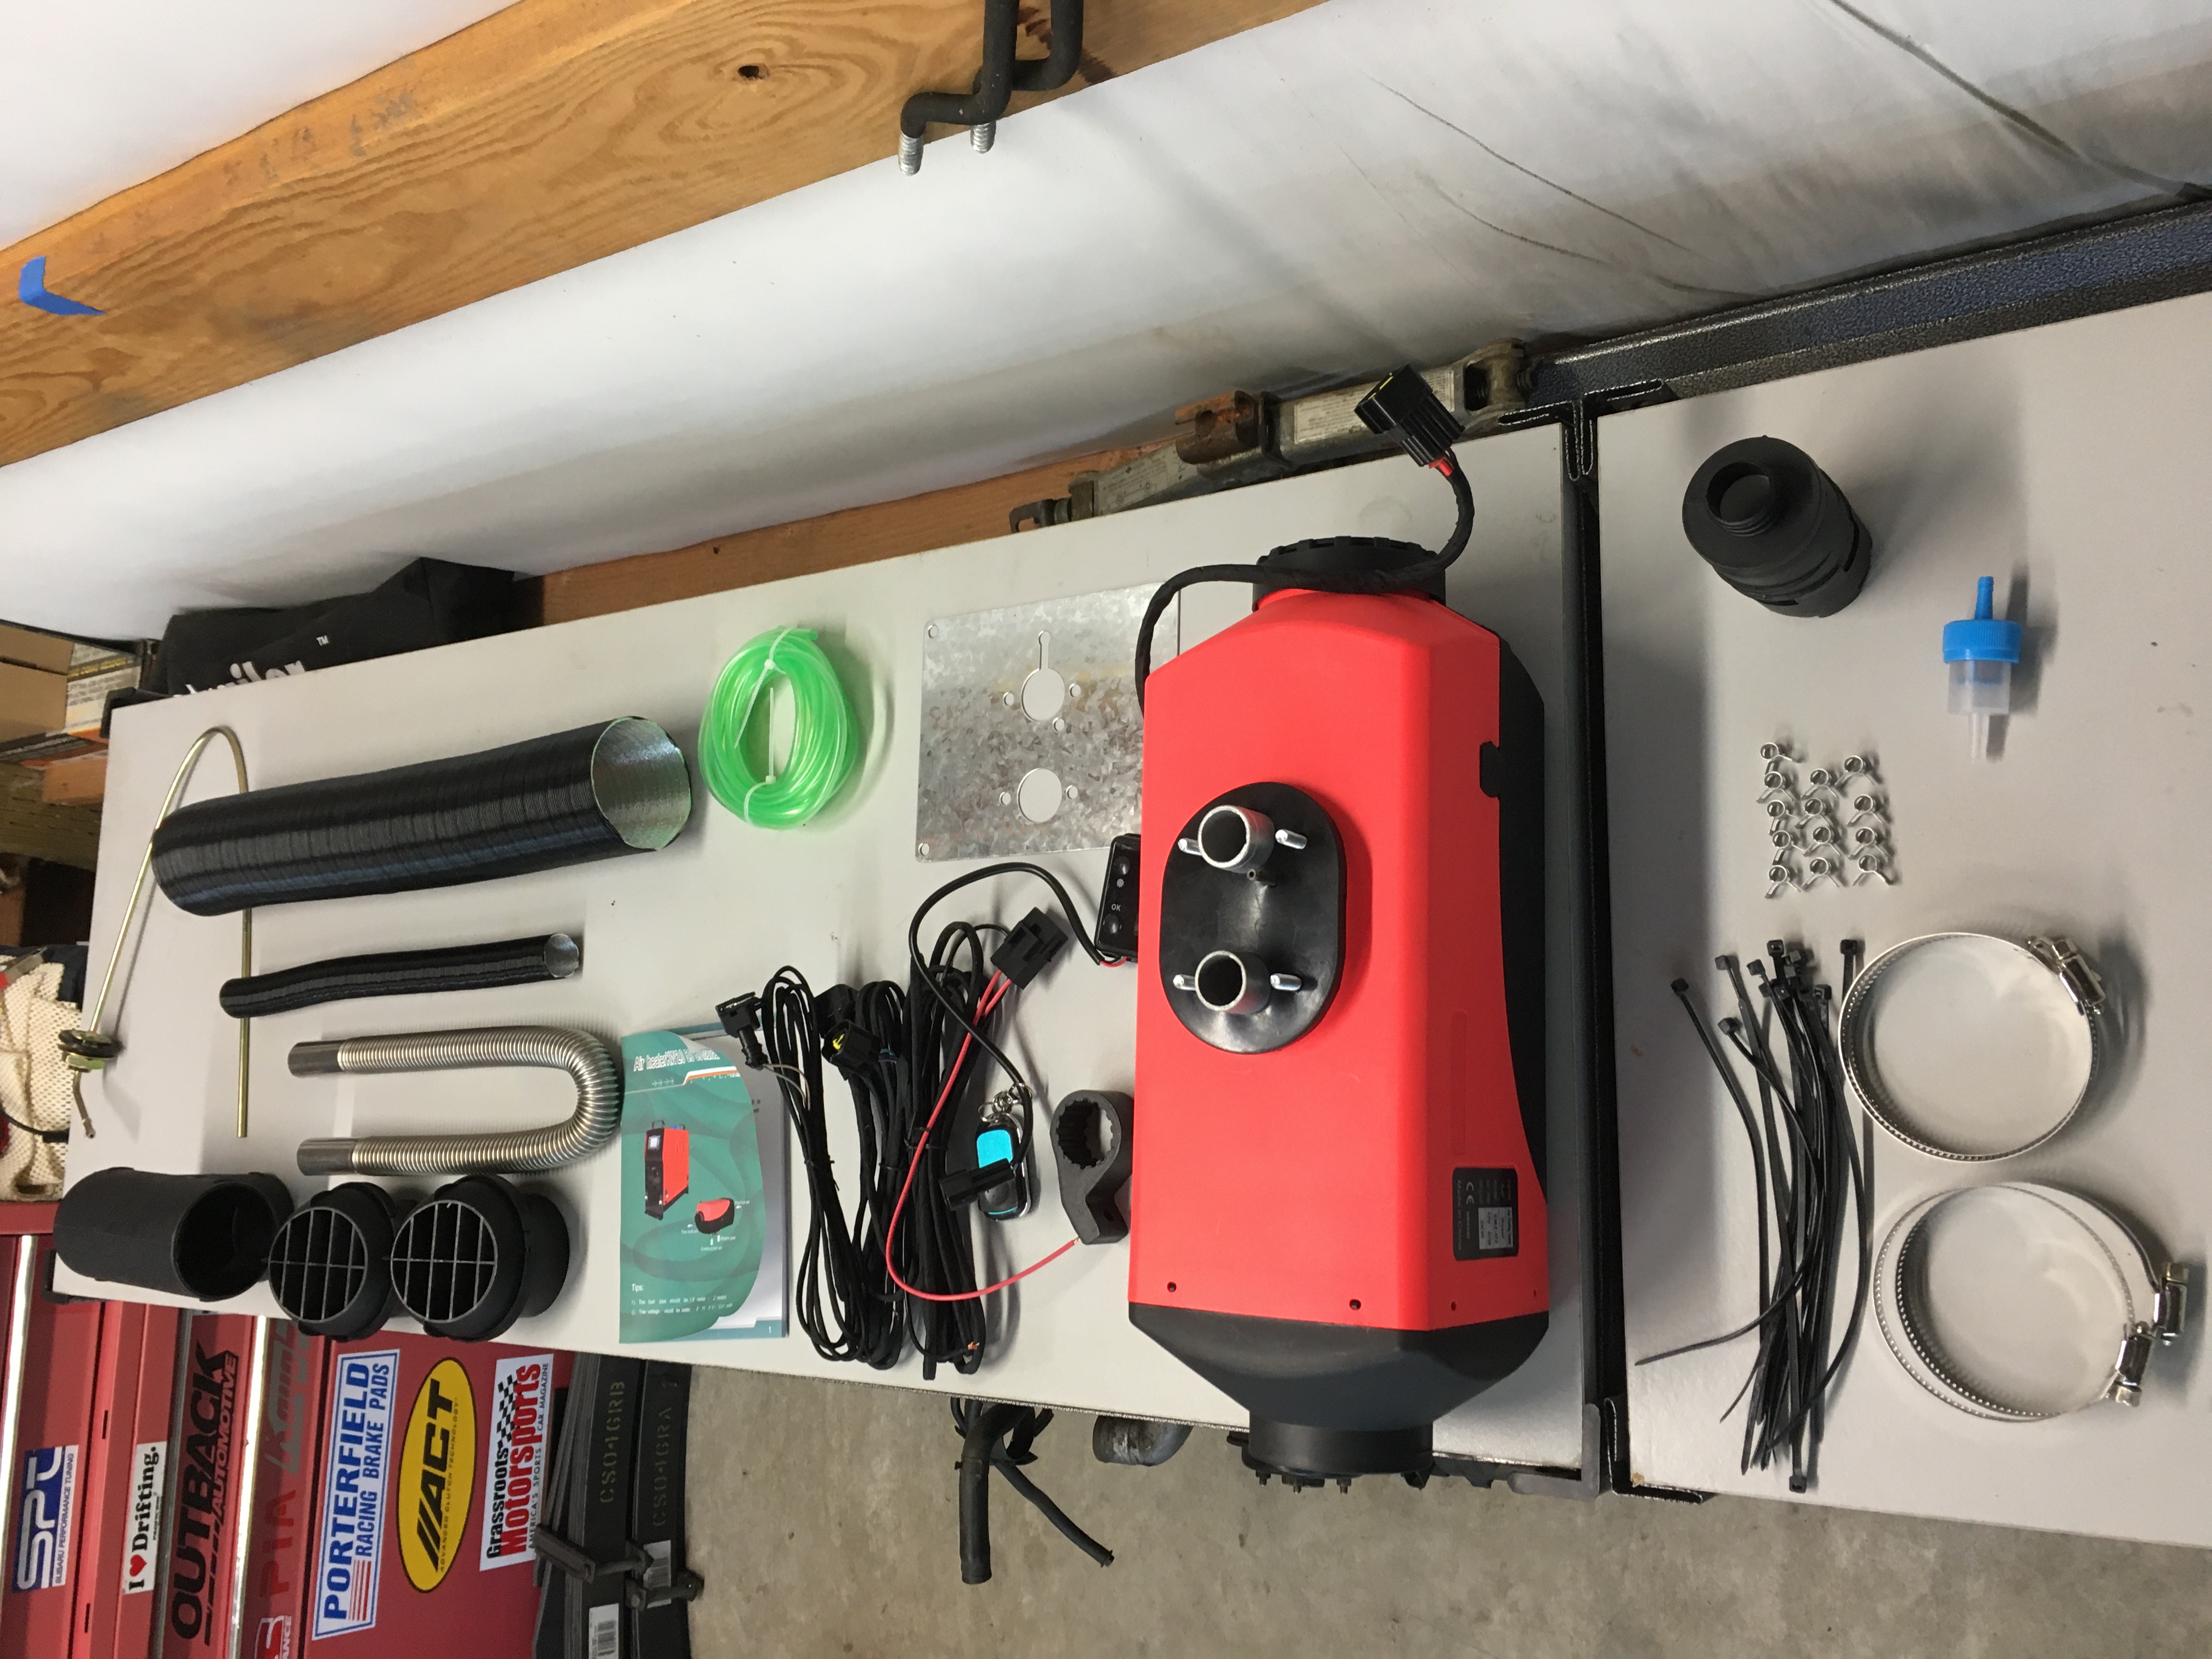
Link to the diesel heater: 5kw Diesel Heater
Propane
The propane was originally used to to heat the camper, run the refrigerator and the cooktop. Now that we’ve removed the heater, and fridge, the propane will only be used for fuel for the cooktop. The stock tank size will last forever until it needs to be refilled.
Currently looking at options for something smaller so it will free up some space. If we decide to keep this size I will need to have the valve replaced, or buy a new tank because the current valve cannot be filled in my state due to the age. I’ve stopped at a few gas stations and everyone has told me the same thing. Not sure what the law is in other states, but I don’t want to chance it.
Calling around to a few shops it sounds like the new valve replacement will cost almost as much as a new tank.
Water
Still looking at options for adding a water system to the camper. The old tank was neglected and the water that was in the tank had been in there for so long that it had all kinds of things growing in it. We decided it would be a better option to toss it, and replace it with a new tank.
Ultimately I’d like to get a 10 gallon fresh water tank, and maybe a 5 gallon grey water tank installed.
Manuals

Misc
*Affiliate Disclaimer* Some of the links may be affiliate links, which may generate me a sales commission at no additional cost to you if you make a purchase.
